Where do we go from here?

Just before our last camping trip, I checked under the bed to see if I had anything stored there.  I was shocked to see what appeared to be water stains on the support platform for the bed.  We’ve found and repaired so many leaks over the years, and I was really, really hoping this wasn’t what it looked like.

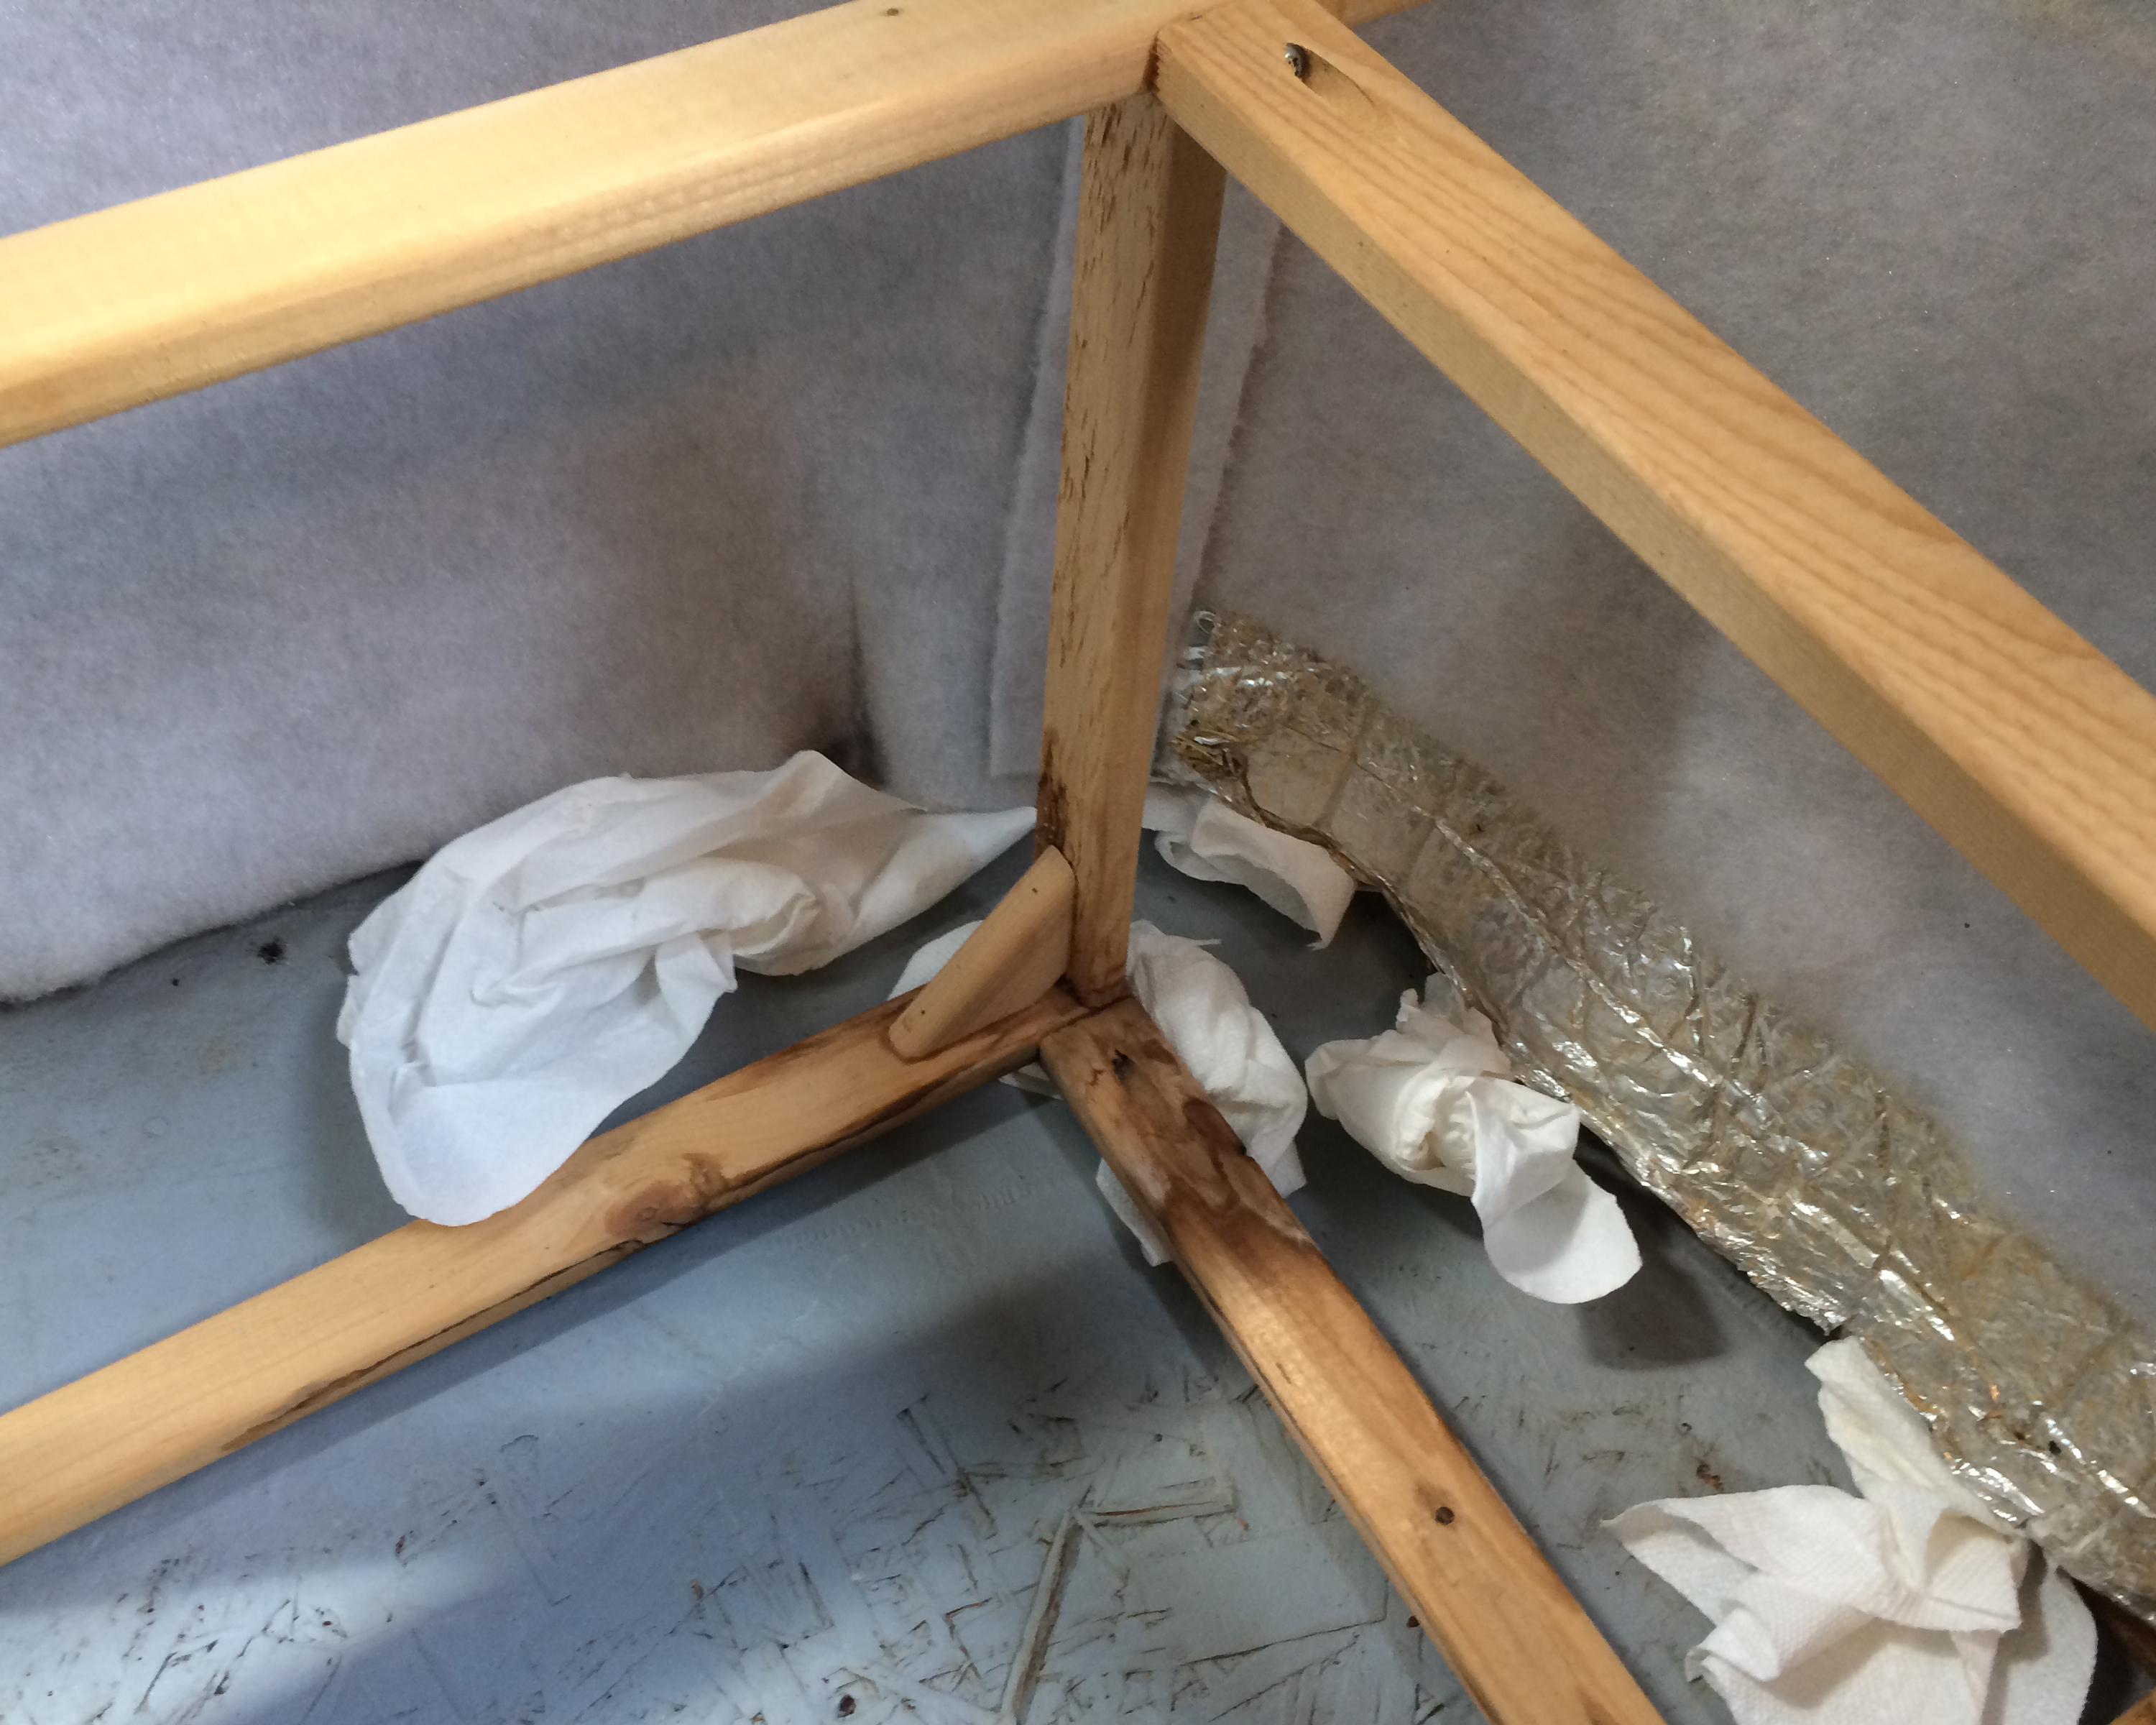
After some heavy rain, I checked under the bed again.  I put some toilet tissue between the pinchers of a long-reach grabber tool and pushed the paper along the floor and carpet in the corner near the bed frame.  When I pulled it back out, the paper was wet; not saturated, but definitely wet.  Not good.

When I looked UNDER the trailer, I could see that this area had been PATCHED at some point by a previous owner.   And when I touched the wood, it felt damp and spongy.  SERIOUSLY not good.  It seemed pretty clear that someone had made an attempt to fix the obvious problem (the floor) without first finding and repairing the cause of the problem (a leak).

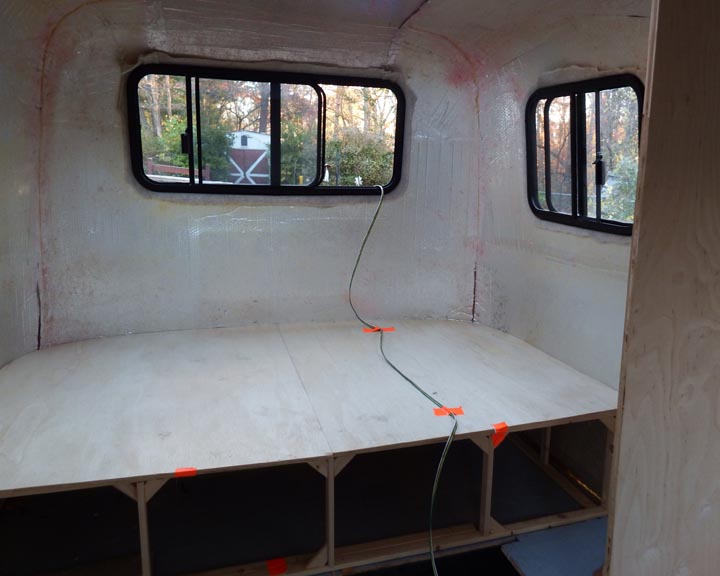
By building a full-sized, permanent bed in the back, we’d been totally unaware that this was happening.  However, now that we were aware of it, we had to decide what to do.  If we’d discovered this when we were just starting to renovate our Scamp, it would have just been one more project on the list.  But now…?

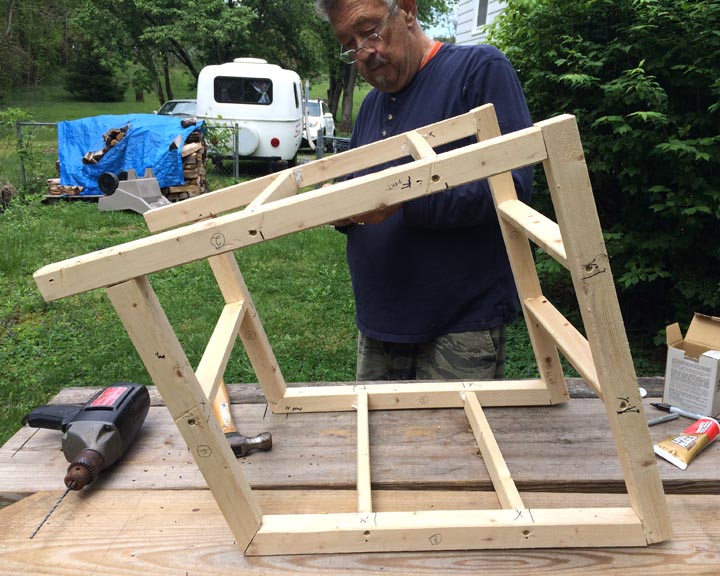
We love this little trailer.  We’ve taken it from “shell to shelter” over the last few years, and we’ve taken pride in all of the work we’ve done.  We dusted off old skills and learned new ones in order to create our cozy and comfortable little house on wheels….


While we were planning a variety of upgrades (such as putting in a fridge, a sink, maybe a stove, etc.), the thought of doing more repairs on the trailer made me feel both sad and frustrated.  I also wondered if we were physically up to the challenge of doing the type of work that would be needed to fix this latest problem….  And with just a few weeks left before the start of the school year, did we really want to spend the precious time remaining ripping out the whole floor in the back of the trailer and possibly tearing out sections of the wall and ceiling covering (again) to look for leaks?

Personally, I was done.  Enough.  🙁

On Wednesday, July 18th, the weather was beautiful and we decided to go for a drive through the Shenandoah Valley and on the Skyline Drive.   I also wanted to stop by a couple of RV centers in the area to look at some of the trailers that were conceivably within our price range.  (We did this a few months ago, too, and we saw several trailers we liked, but none that we loved more than our little Scamp.)

At our first stop, we checked out a Jayco Hummingbird.


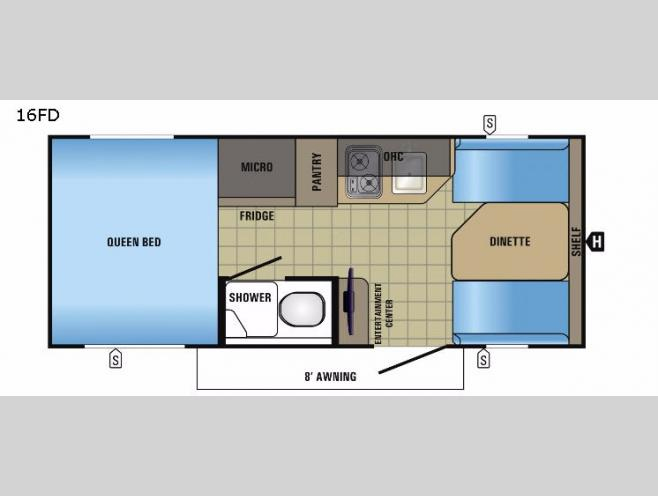
Certainly a nice trailer with an interesting floor plan, but as before, we liked it, but we didn’t love it.  On the positive side, I got an estimate at their shop for repairing the 7-pin plug and wiring on the back of my car, so that was a good thing.

At our next stop, we drove past a few behemoth-sized trailers and parked near a small Coachmen Clipper.  Interesting….  Hmmm, VERY interesting!


While it didn’t have a separate bed and dinette (which would have been ideal), I was absolutely giddy looking at things like the amount of storage, the screen door, and the awning (as well as the stove, sink, fridge, bathroom), and for me it was love at first sight.  It was a 2015 model, looked brand new, and it was offered at an excellent price. With the spare tire on the back, the Clipper was about a foot longer than our Scamp, about 10″ wider, 2 ft. taller (with the A/C on top), and about 800 lbs. heavier–all still well within the towing capacity of my car.  This could work!  It had everything in it we’d ever need for local camping or extended road trips, and if the dealership had taken credit cards, I would have bought it on the spot.

Instead, we verbally committed interest in the trailer, and I said I’d need to figure out how to pay for it since my credit card wasn’t an option.  I offered to make a deposit, but the dealer said there was no need to–I could pay for it when we picked it up in a few days after they’d had time to clean it up and check to make sure that everything was working correctly (since it had just come in).  He also said they’d repair the 7-pin plug on my car and modify my hitch assembly to accommodate the anti-sway bar that would come with the trailer at no additional cost.  Sounded great!

So yes, I was psyched about getting this, and Wayne also seemed excited about it.

But what about our sweet little Scamp?

Obviously we didn’t need two trailers, and I’d need to sell the Scamp in order to make the purchase of the Clipper affordable.  It made a lot of sense to get something that was ready to go anywhere, but after all the time, money and love that we’ve put into the Scamp, we found it was very hard to think of letting it go…. The emotional attachment to our trailer is real.

After much thought and discussion, however, we made the decision to list the Scamp for sale in “as is” condition.  I set the price fairly high, knowing the demand for this particular type of trailer, and almost immediately I started getting inquiries.  People were definitely interested in it, despite the fact that it has no water, propane, fridge or bathroom, and even in spite of the fact that it had an undiscovered leak and needed to have the floor repaired.

Scamp travel trailers are manufactured at a facility in Backus, Minnesota.  Most are built to customer specifications, and usually people have to wait almost a year after ordering before their trailer is ready.  They’re not sold new at RV dealerships, and it’s not easy to find used ones.  (We looked for almost a year before buying our 1995 Scamp as a shell!)  So what is the appeal?  Well, in most cases, molded fiberglass trailers are not as prone to leaking as conventional stick-built trailers are.  They’re very lightweight, very easy to tow, and unique in style.  Factory-built trailers the size of ours sell for $15-20K new, and they hold their value.  (Case in point, a 2009 16 ft. Scamp in GA is listed for almost $14,000.)

Saturday–the day after putting the trailer up for sale–Wayne woke up with what a friend called “Seller’s Remorse.”  As he’d thought more about all of the excitement we’d felt when we finally found our Scamp, how we’d both done so much work to make it functional and comfortable, how much we’d enjoyed our “mini-vacations” with the trailer–well, he just didn’t want to let it go.  He felt that the repair work wouldn’t be TOO difficult (since we’d gotten a better look at the damage by removing the mattress and platform), and that it would be worth the effort to keep going with it.

And so as I deleted all of the sale ads, he called the dealership and told them we’d changed our minds about the Clipper since we would be keeping our Scamp.

I was left with a lot of mixed emotions.  Like Wayne, I also love this little trailer.  But separating the emotions from the reality, COULD we do the repair work?  Do we really WANT to invest more time and money in the Scamp, knowing that even if we take care of these new issues, we’d still have a trailer without some of the most basic features one usually finds in a travel trailer?  While I was kind of disappointed about not getting the Clipper, I knew that used “traditional” campers are always out there.   We could probably find something comparable to the Clipper, at a decent price, within a 100-mile radius if we changed our minds again.

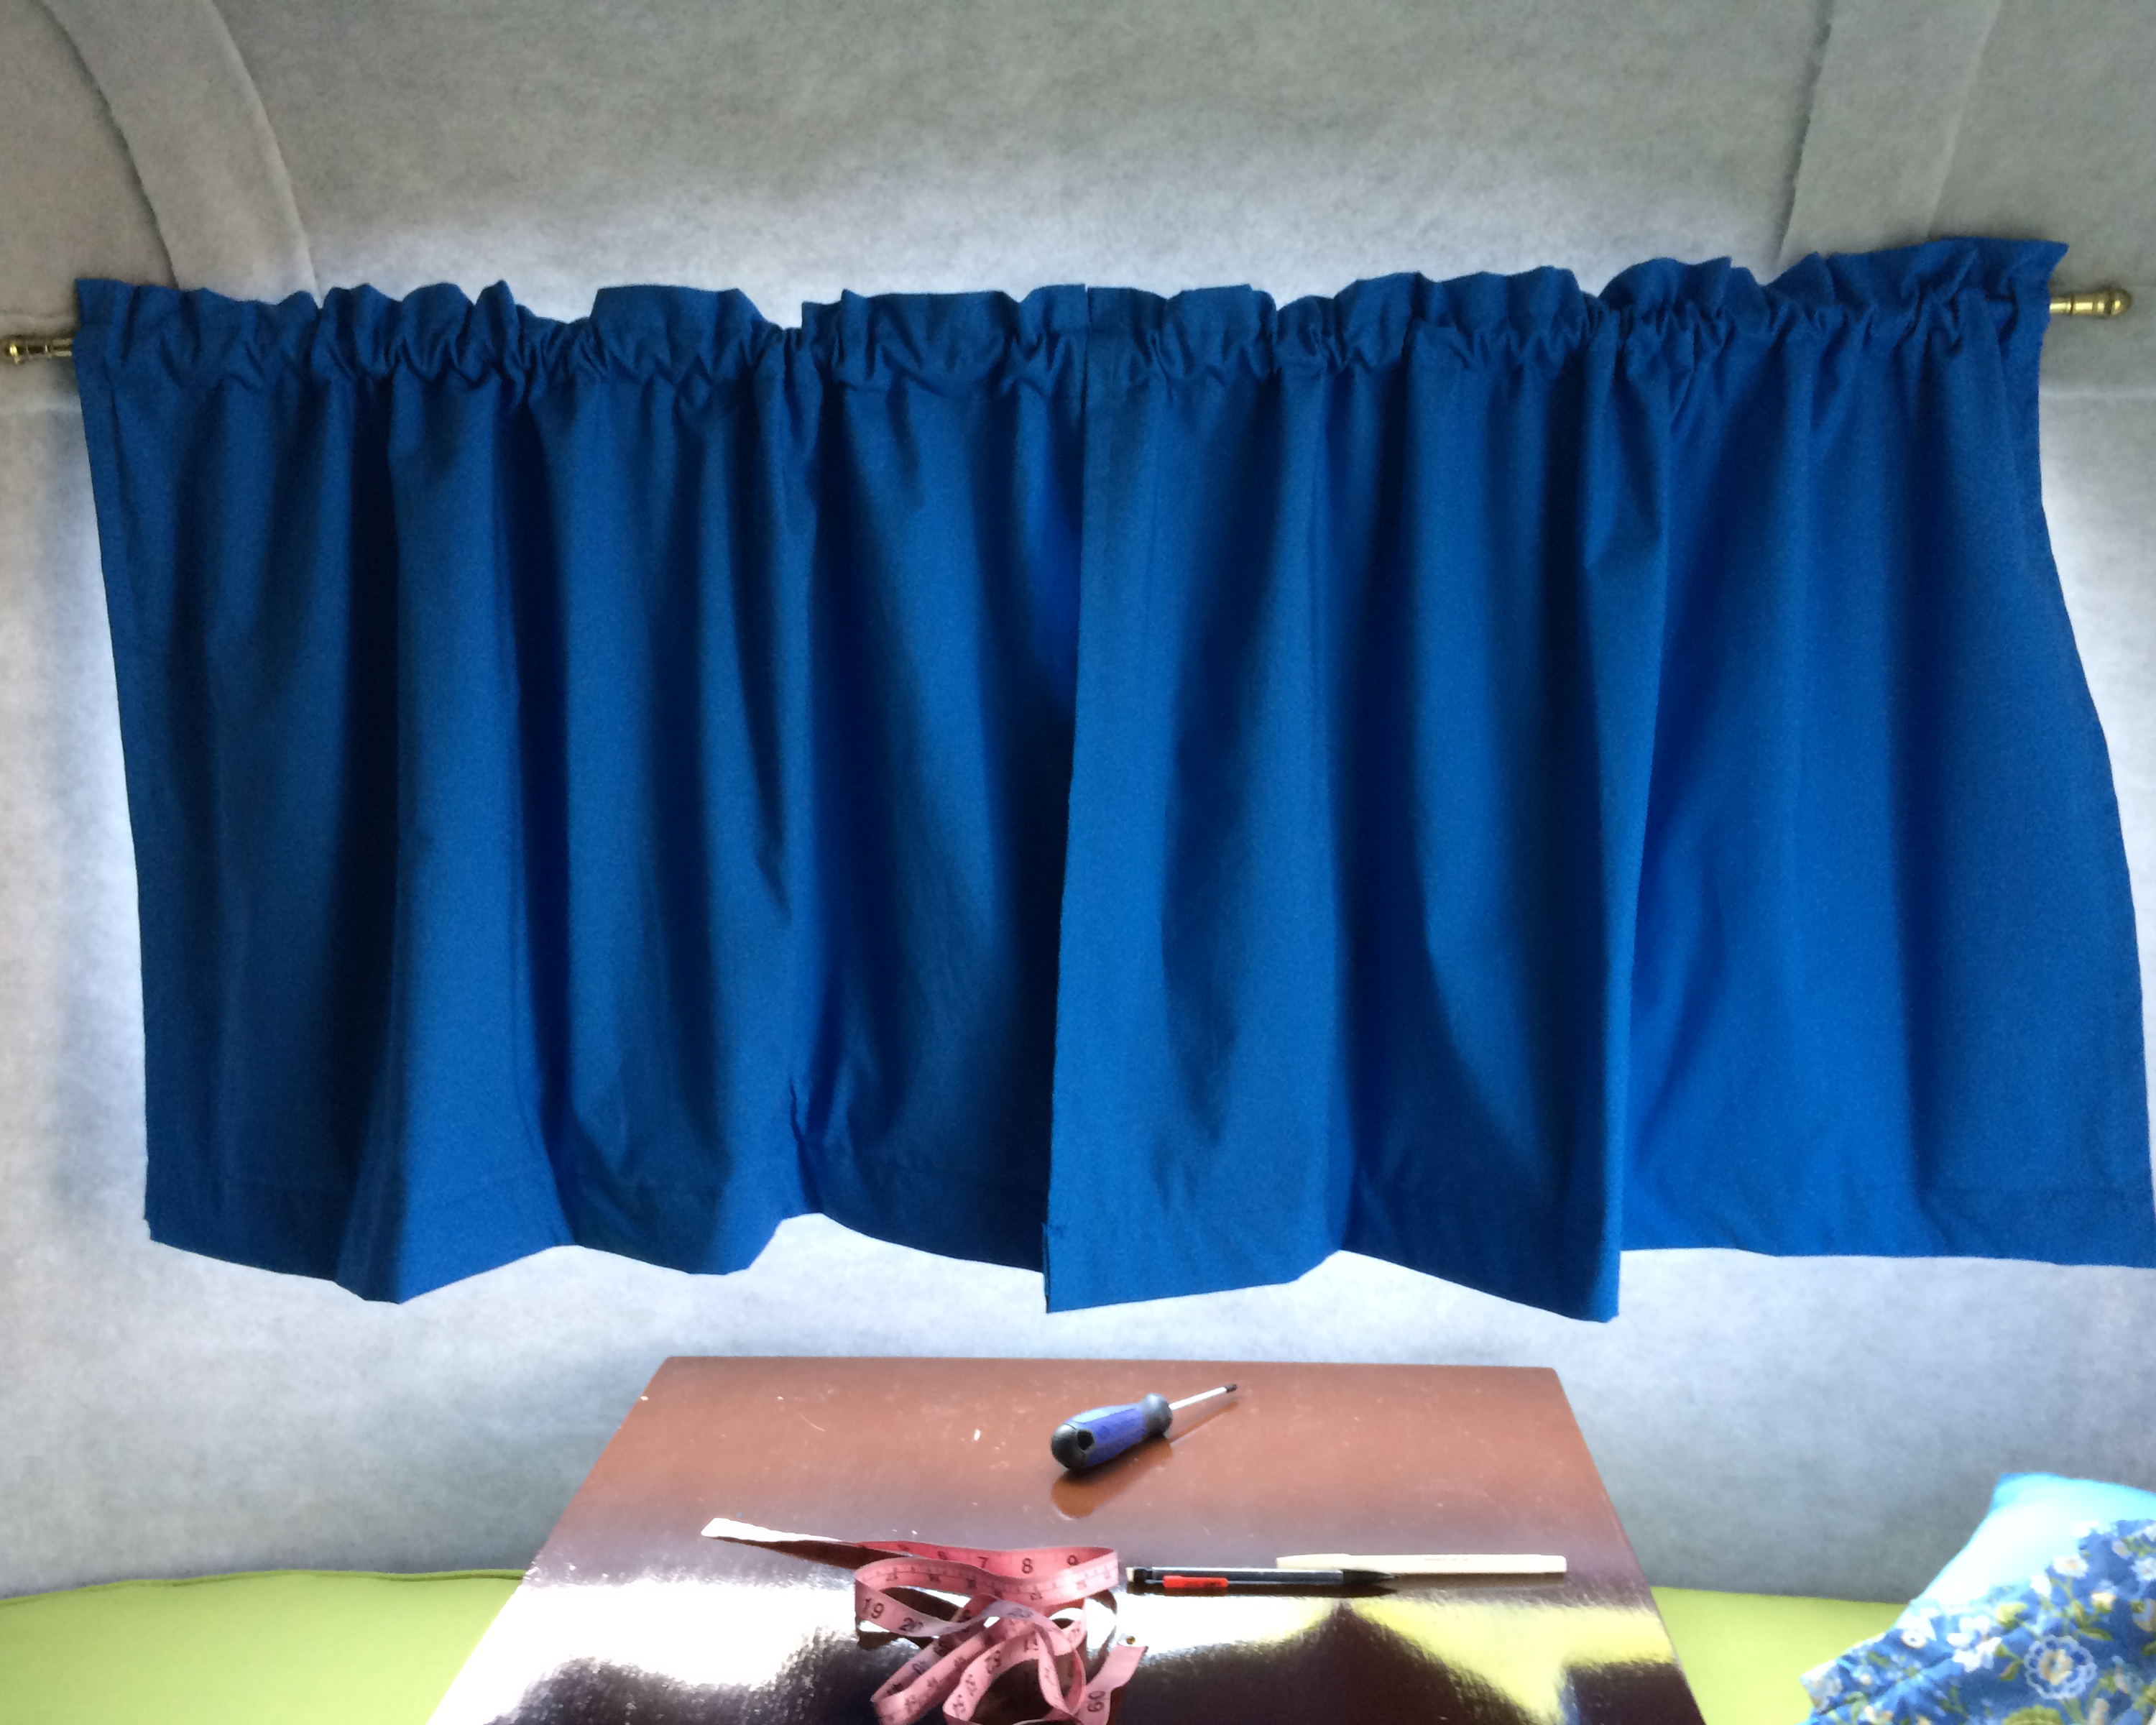
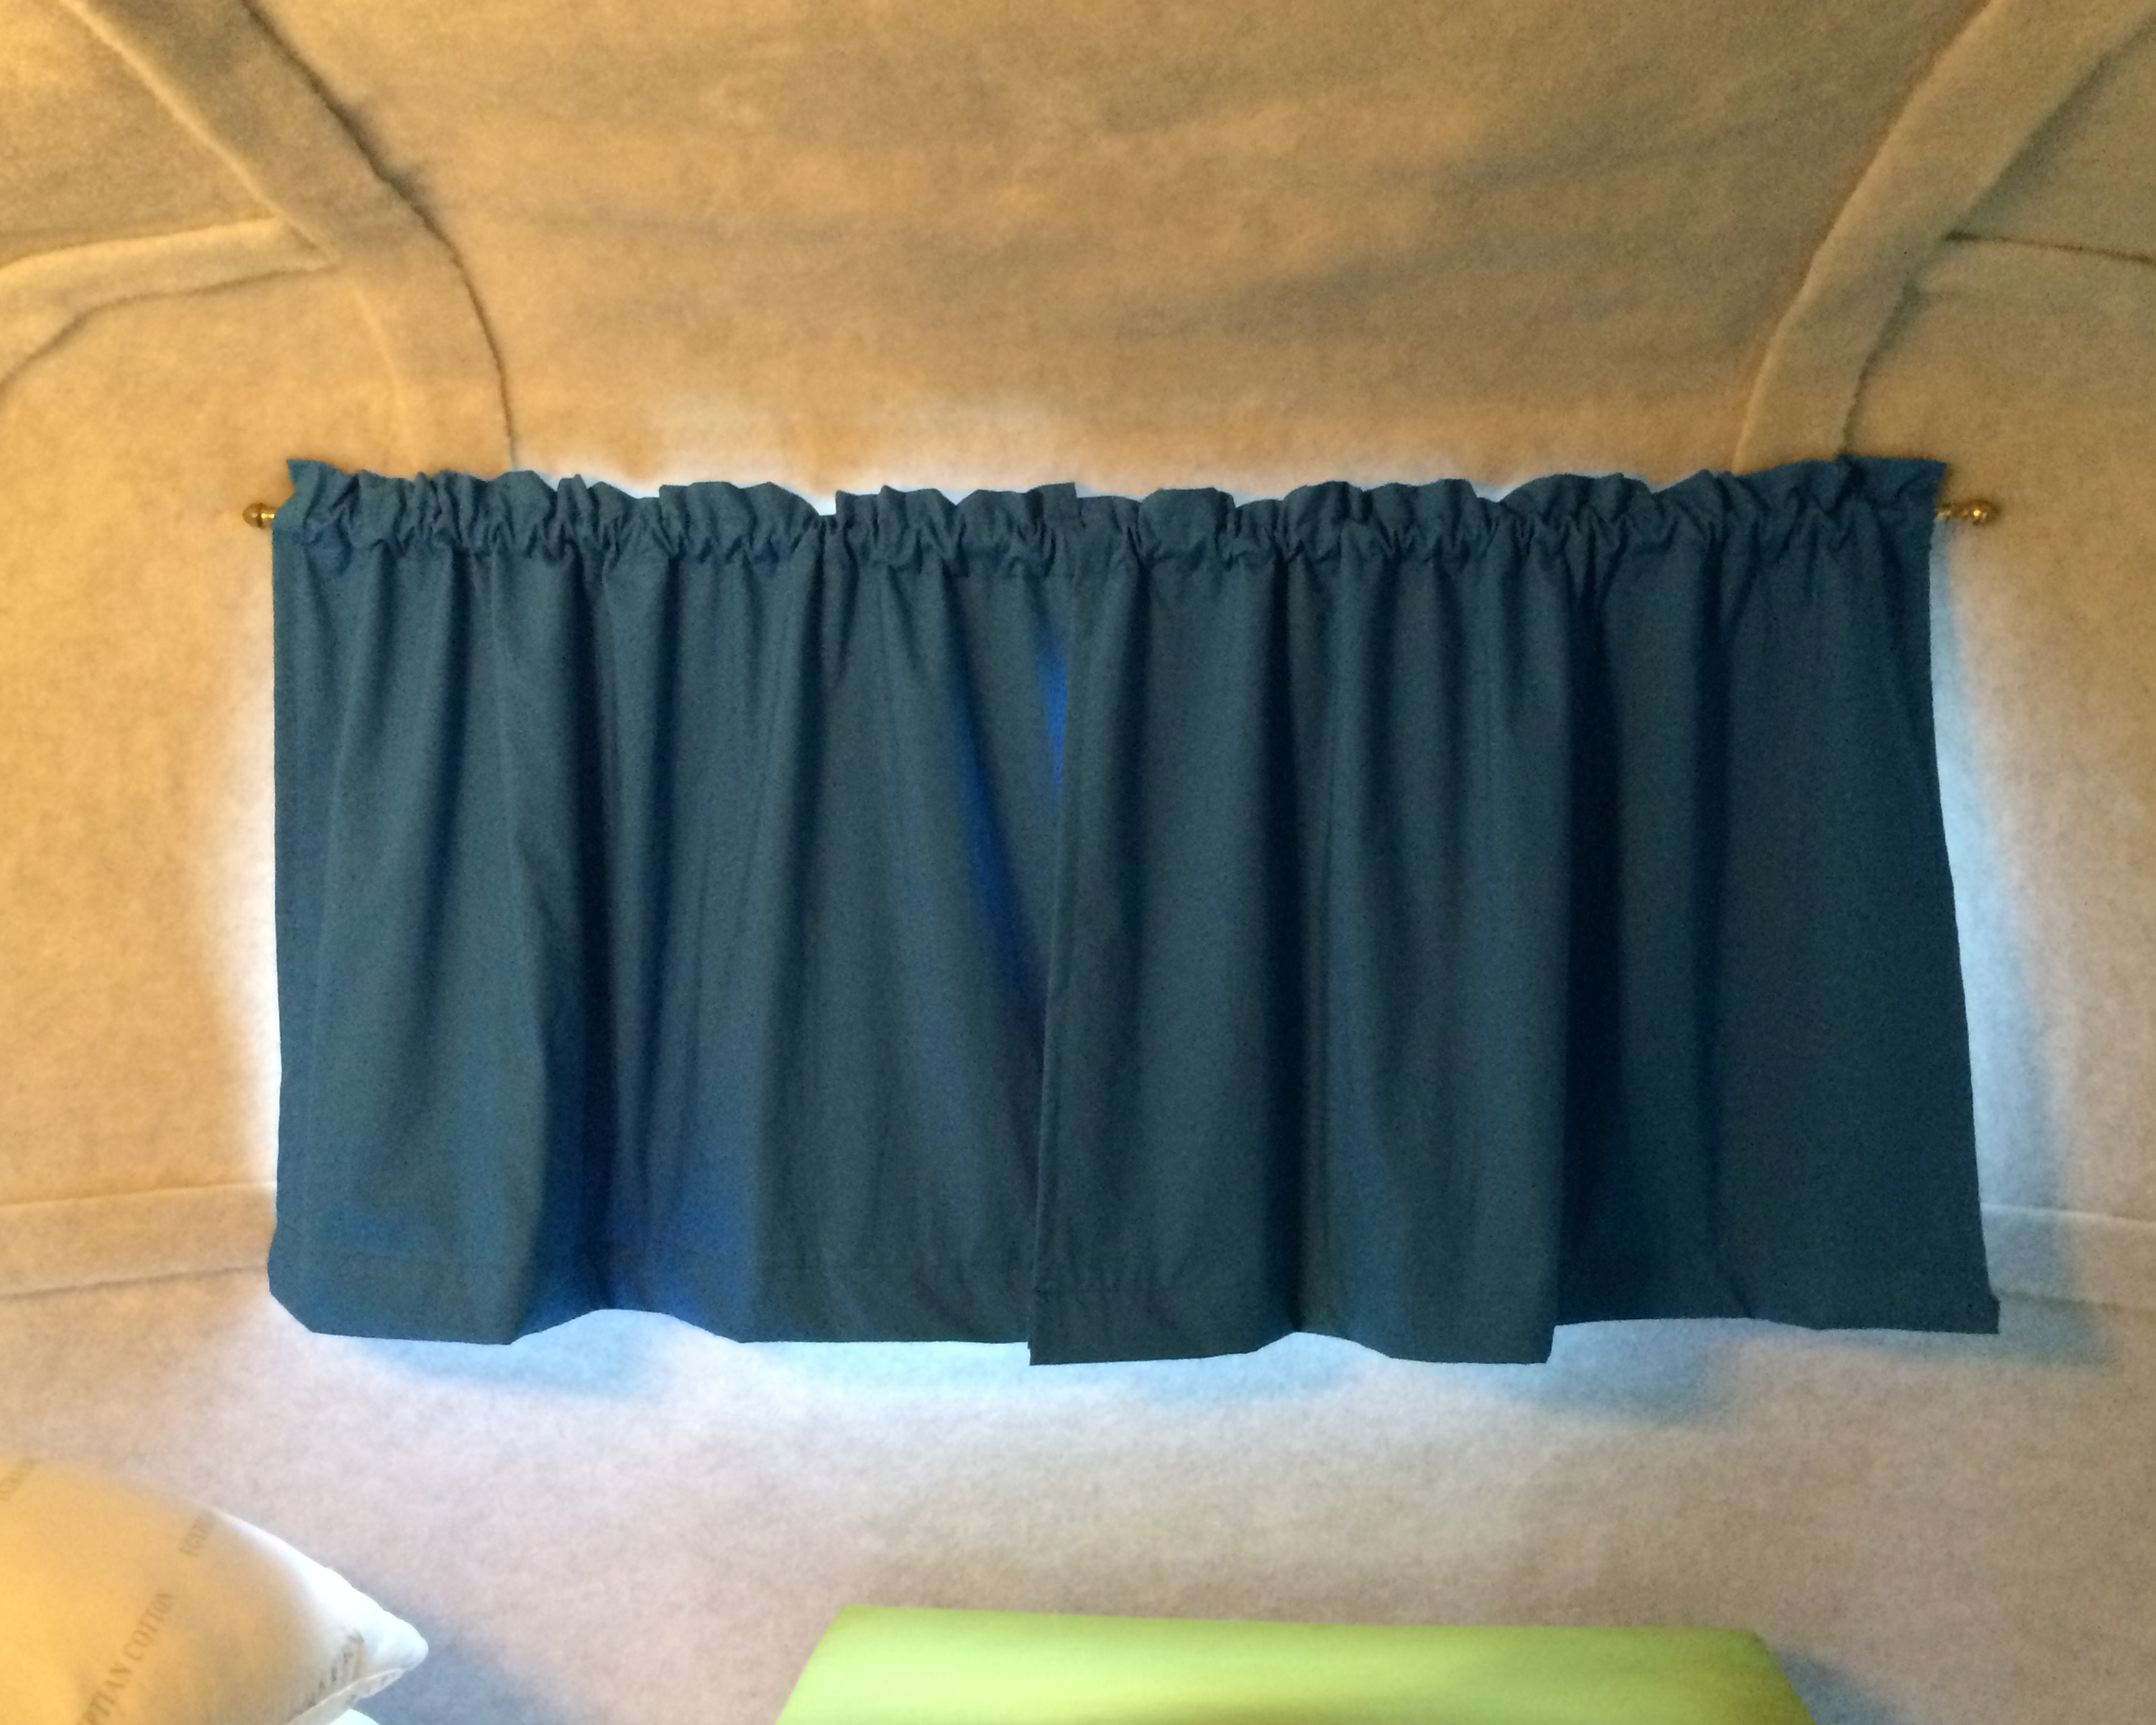
And so–just like old times–we went out to work on the trailer.  As a first step, we planned to remove and re-seal the rear window on the driver’s side.  A few years ago we’d removed and re-sealed the passenger side window when we found that it was leaking, so we knew the process.

After removing the screws from the frame on the inside, however, the window just wouldn’t budge.  It was firmly seated in the wall of the trailer.  Since the water damage on the floor wasn’t directly under this window, we decided it wasn’t worth possibly damaging it or the shell to try to force it out.

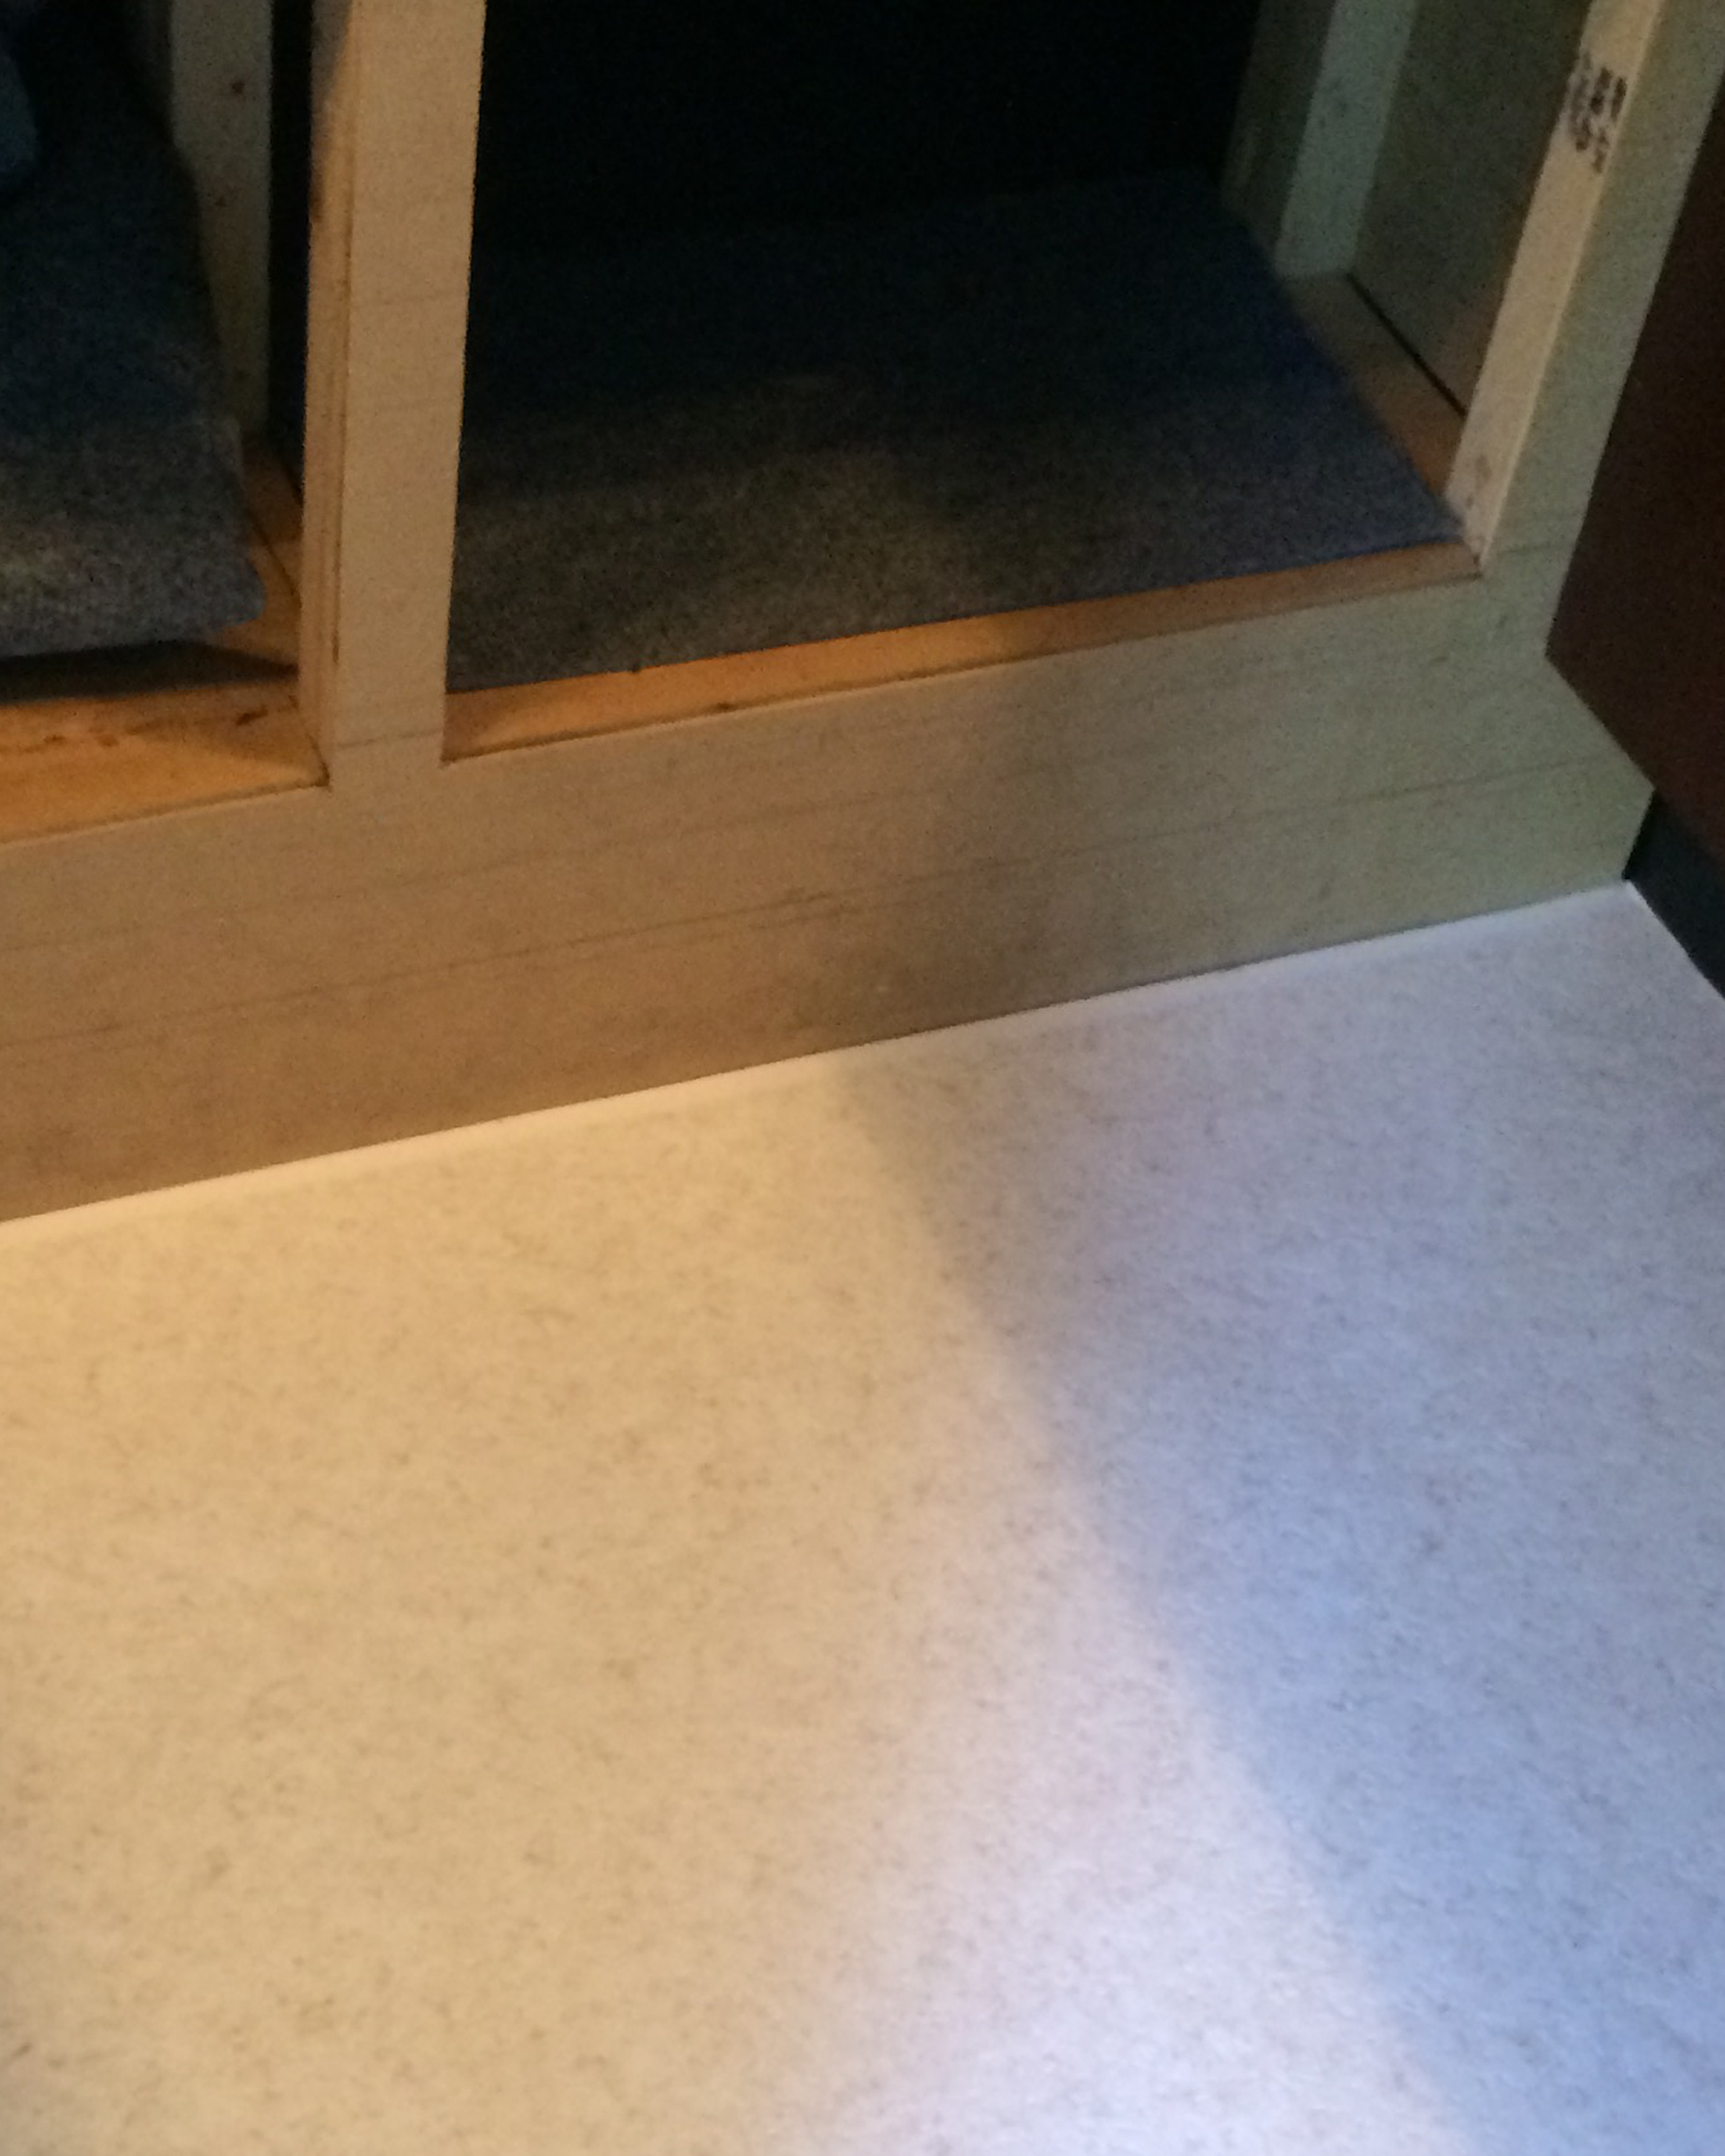
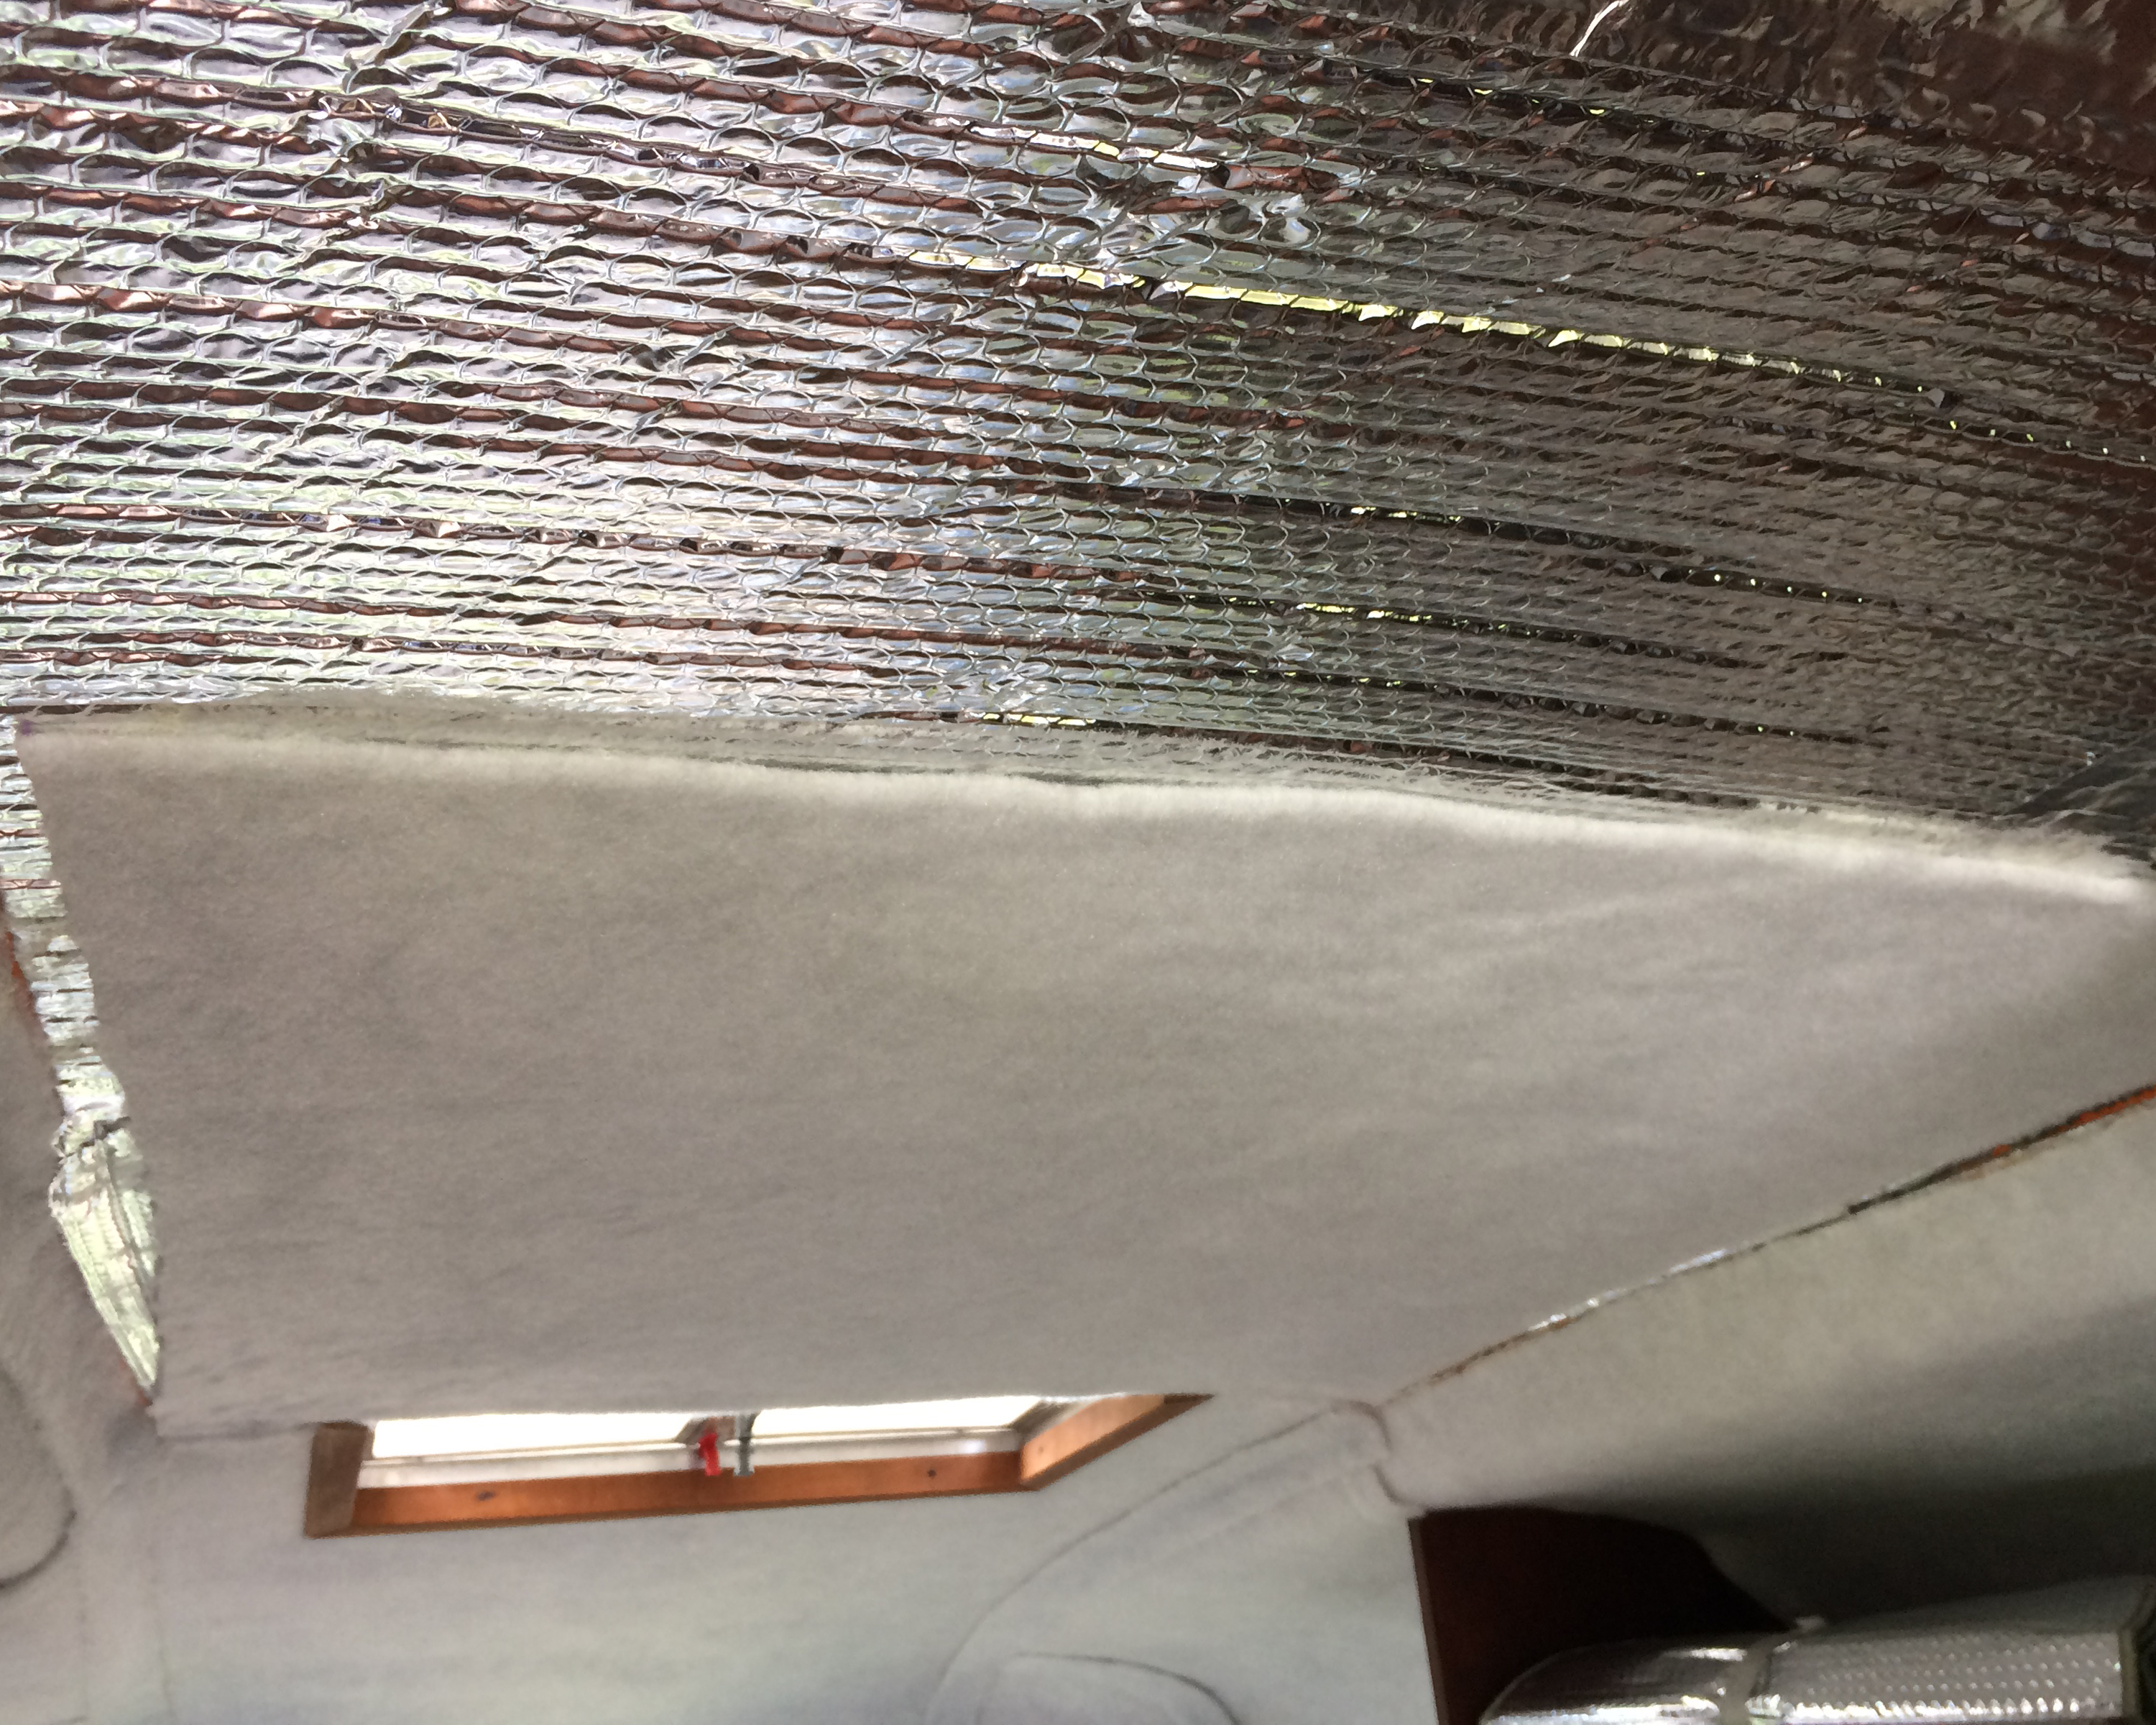
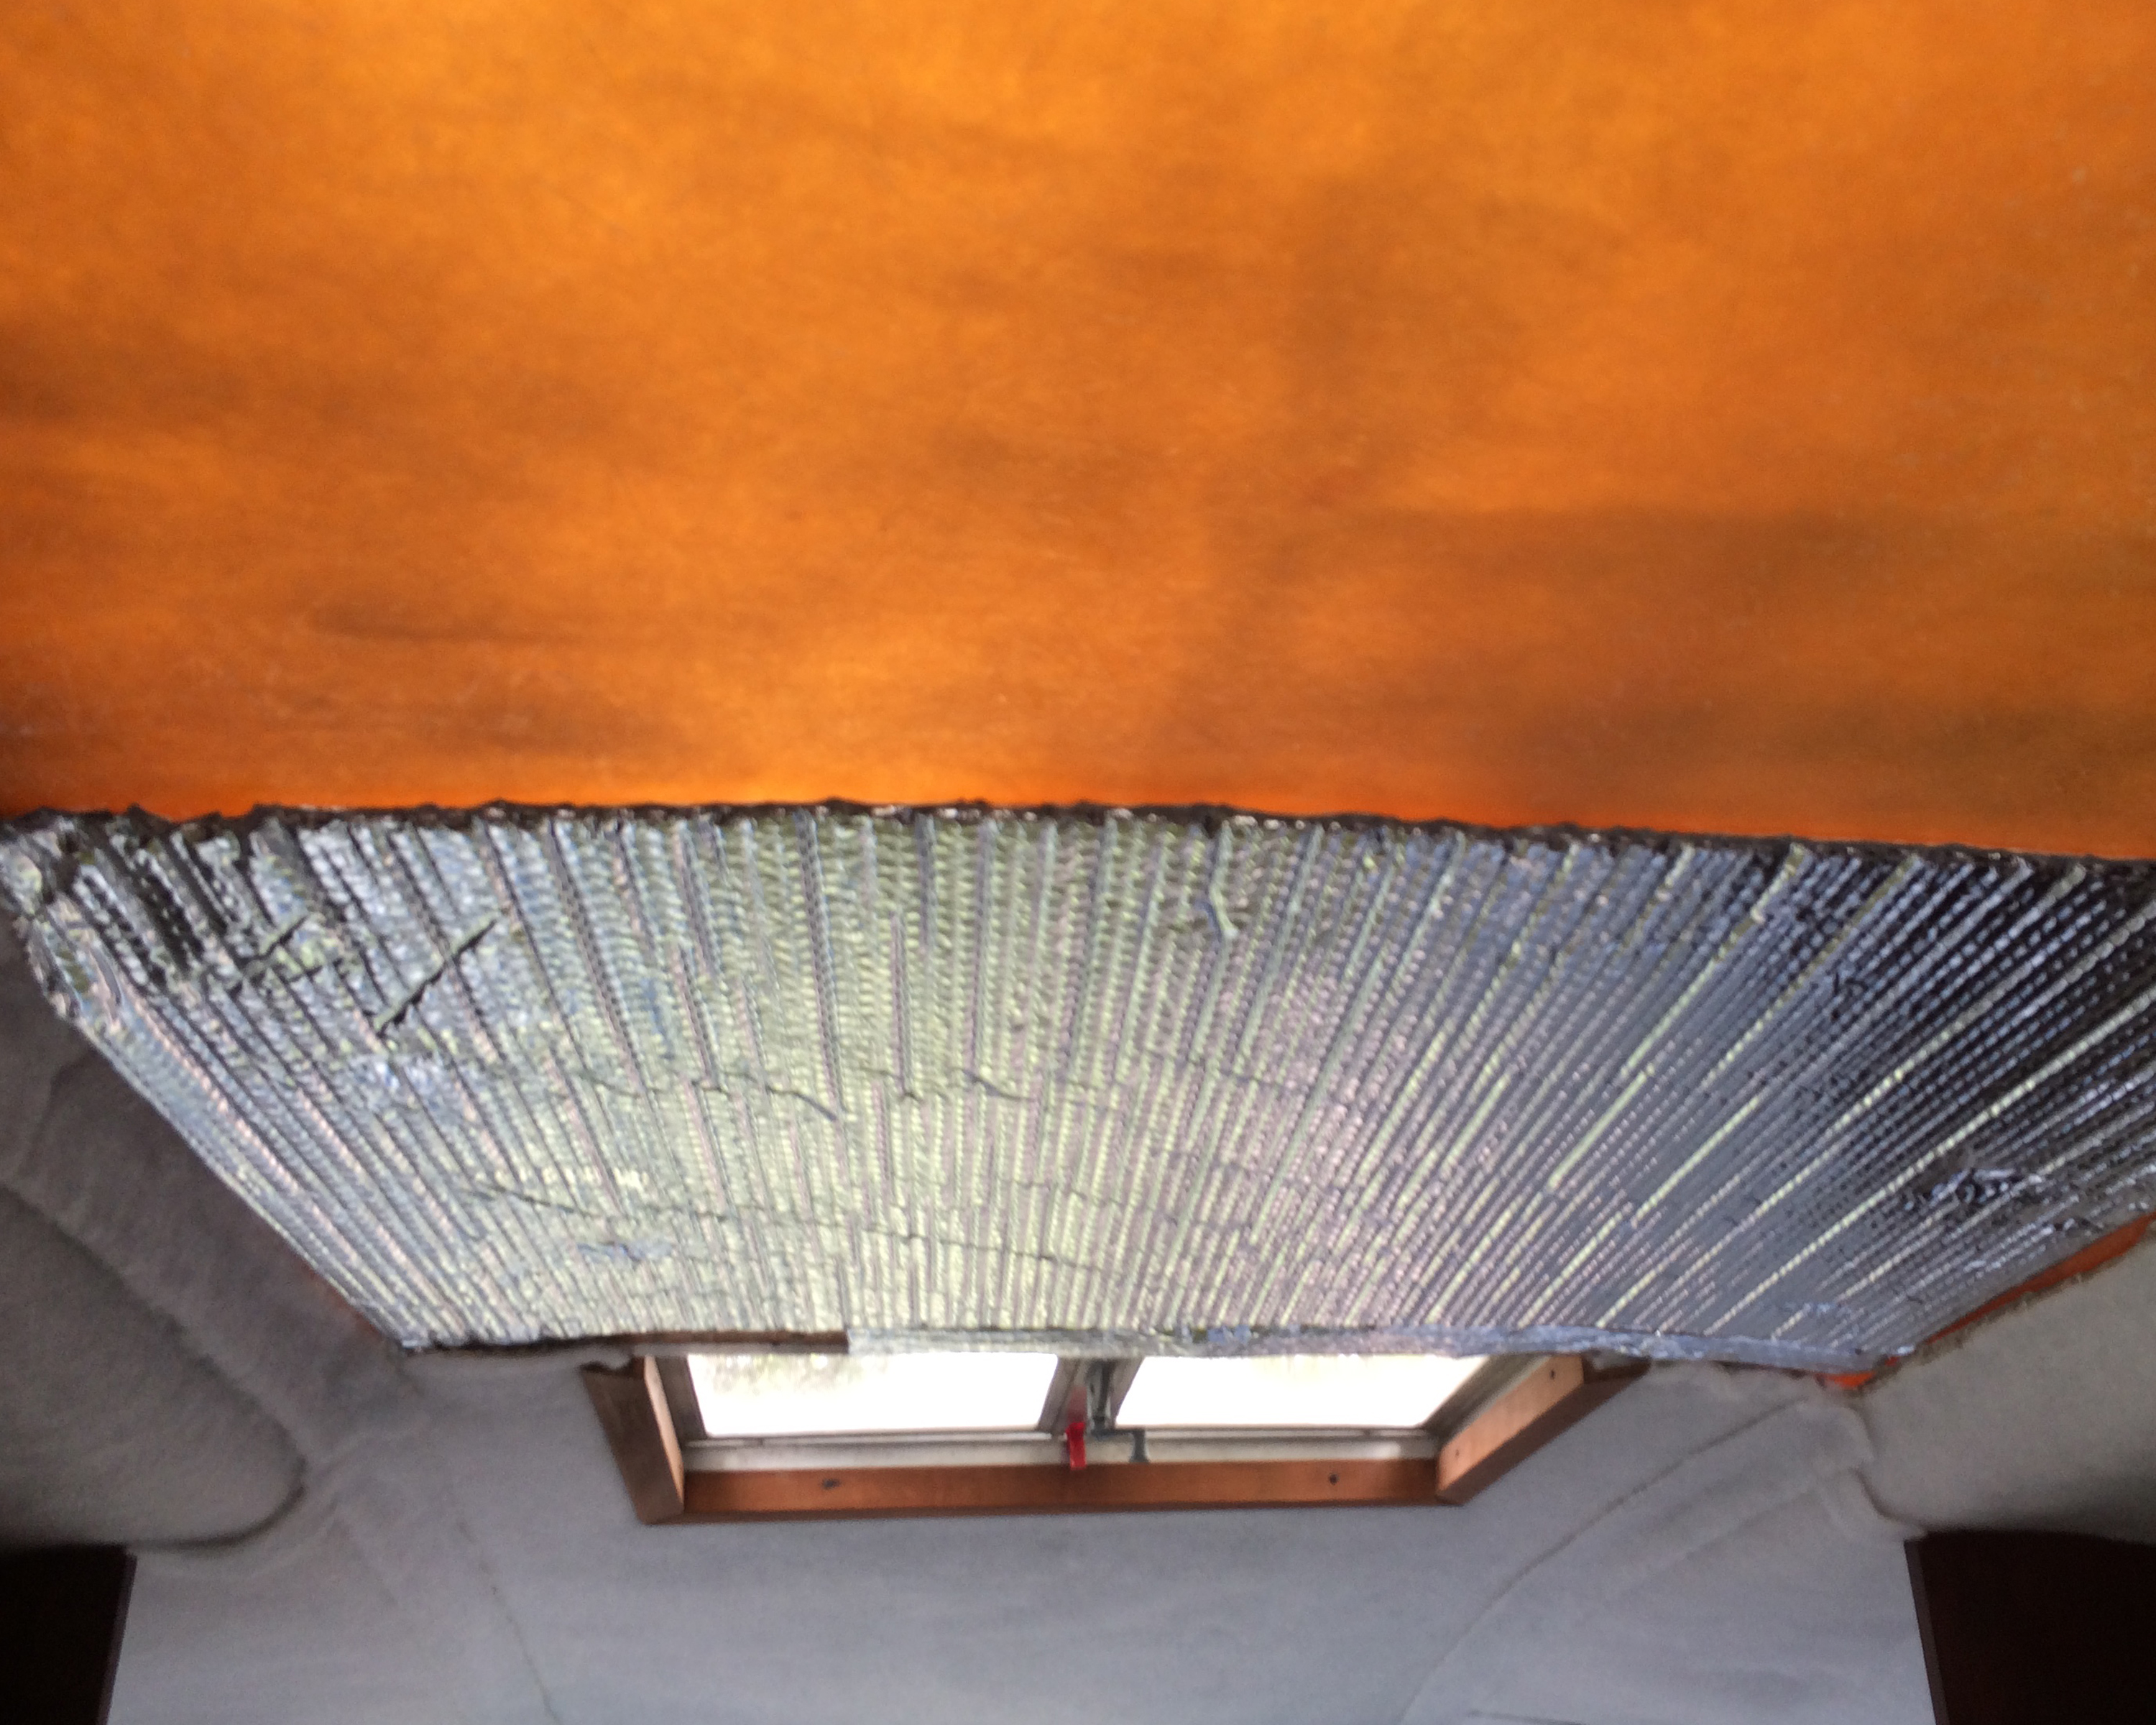
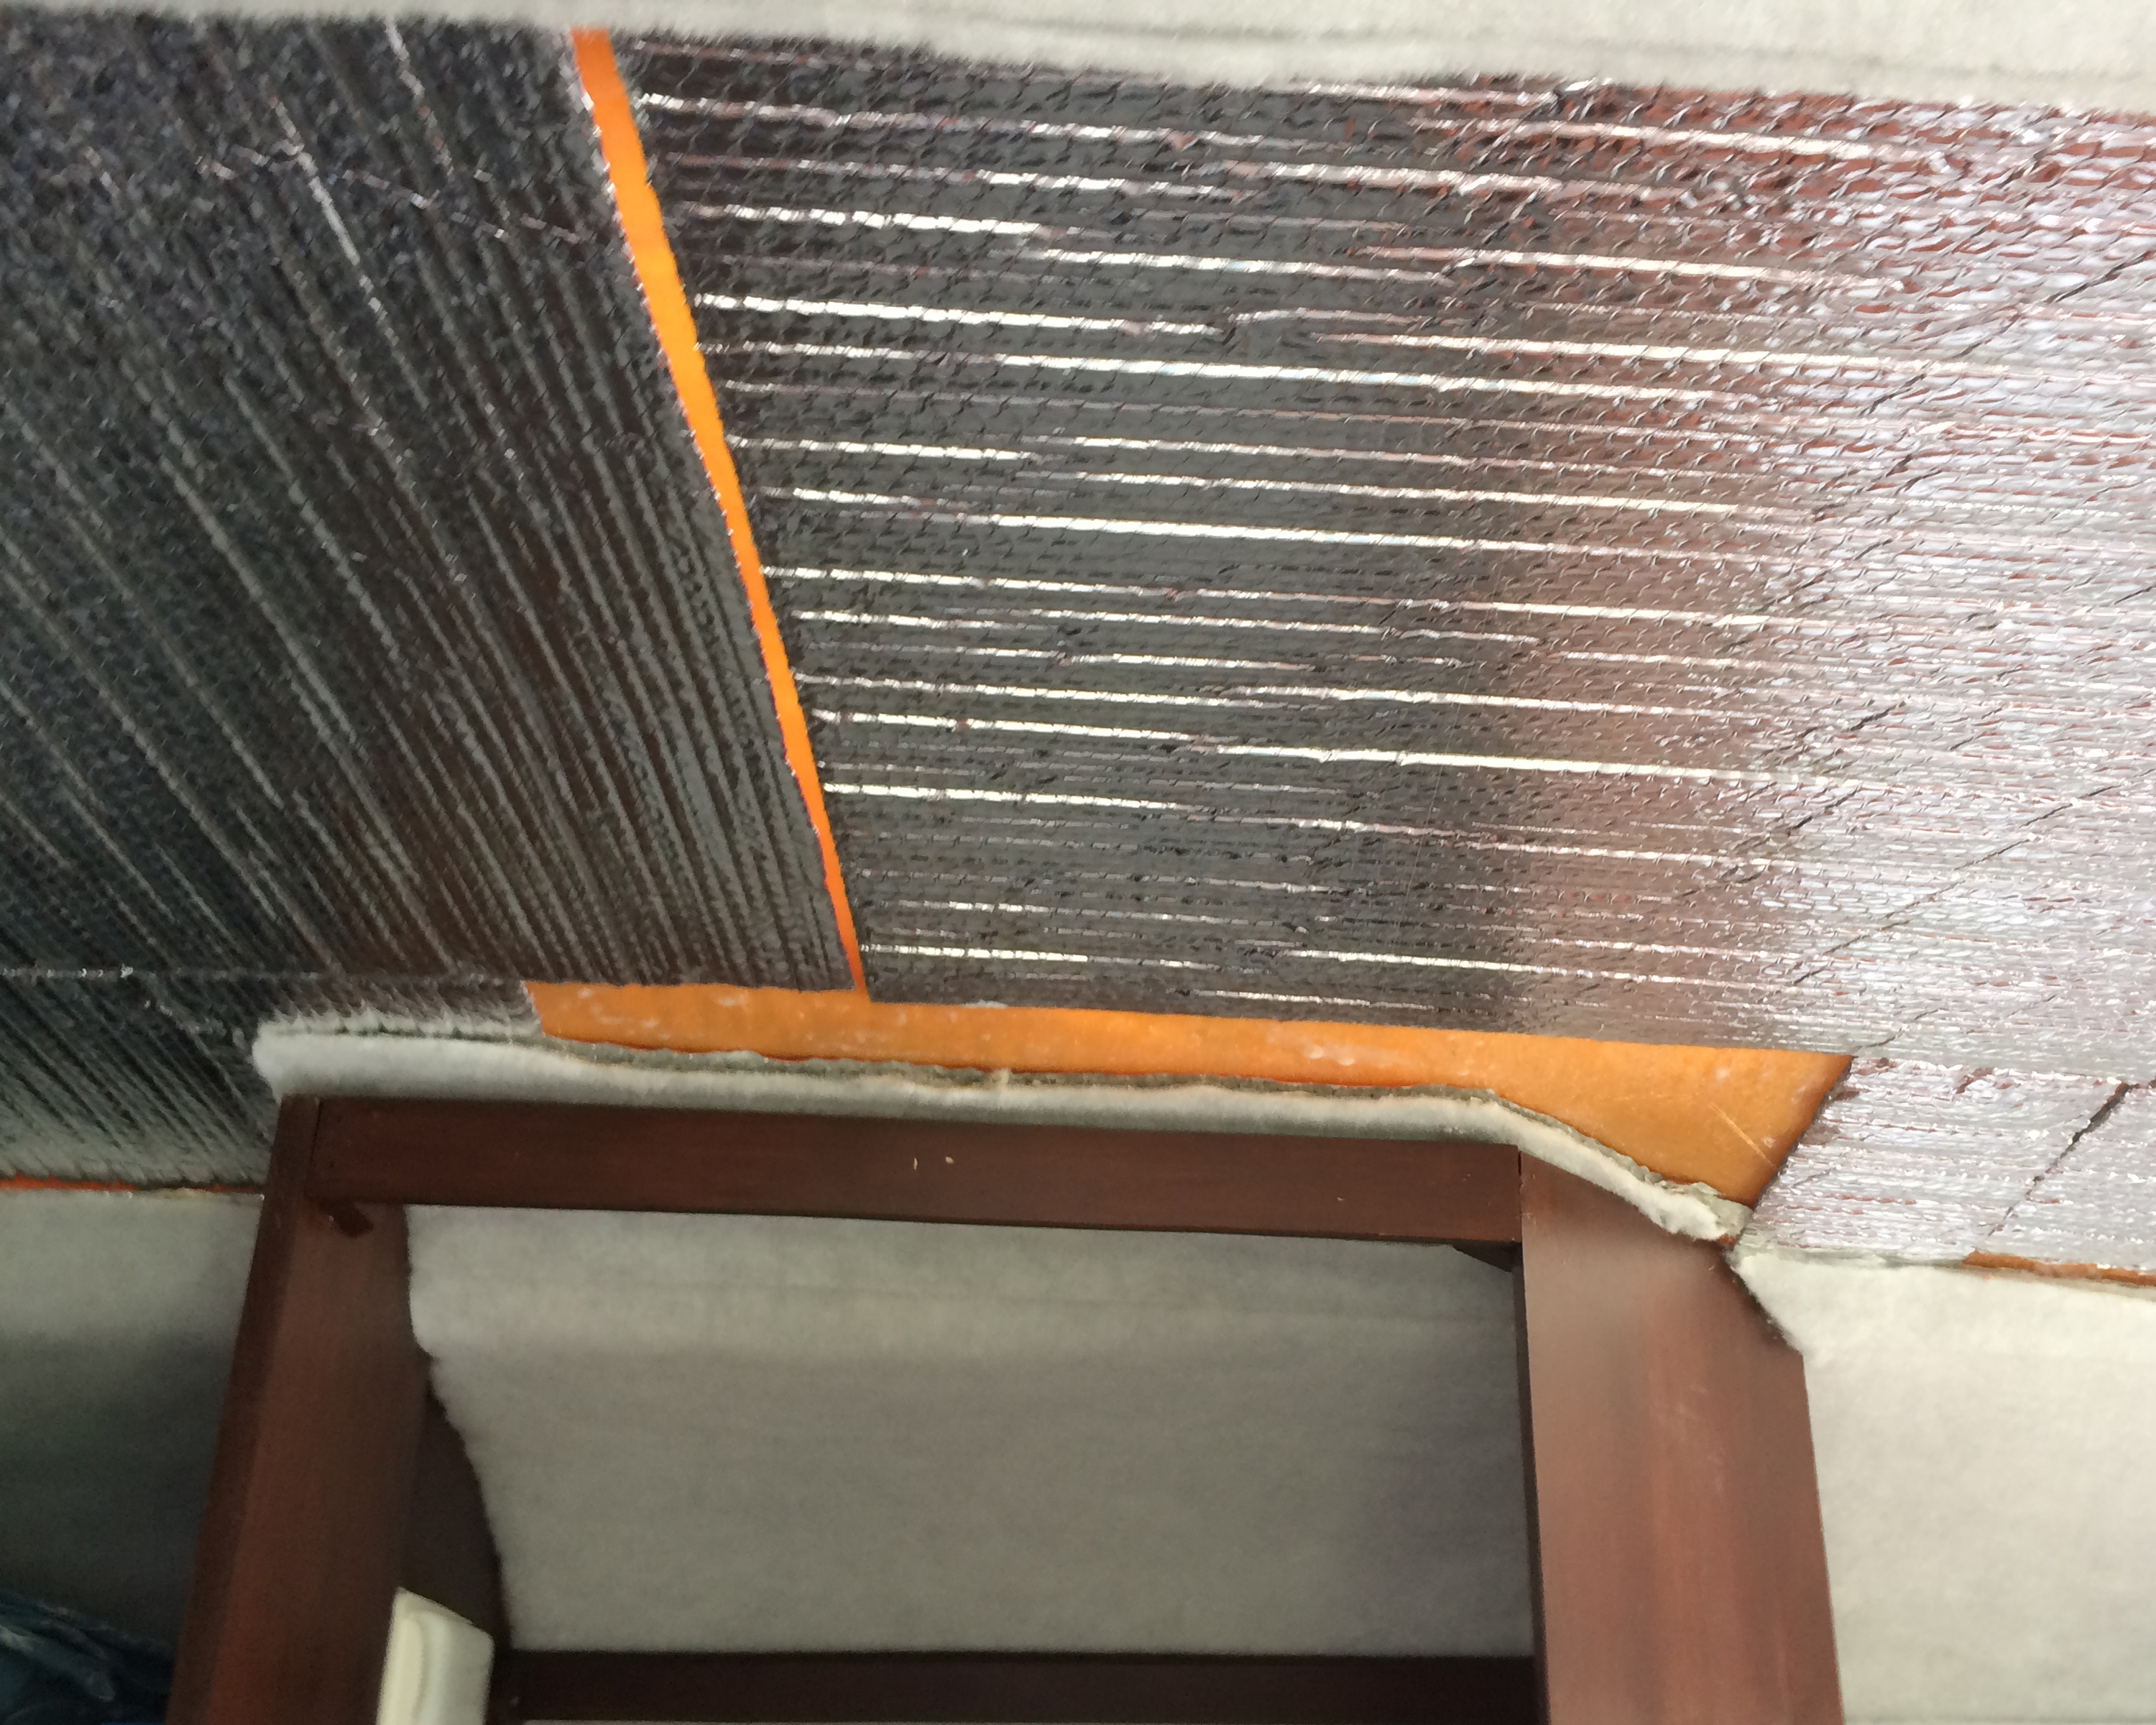
Before starting to rip out the fabric and reflectix on the back ceiling and walls to look for more of the infamous pinholes in the roof, however, we looked for other possible sources of the leak.  Hmmm, there were wires coming up through a hole in the floor in the “ground zero” section of dampness.  When we went outside, we realized this hole was directly below the driver’s side tail light–and that the tail light was in no way sealed to the body of the trailer.  Was it possible that water was coming in behind the light and traveling down to the floor along the wires?

This seemed quite possible, so we removed the tail light cover and used butyl tape to seal the gap behind the bulb plate and the trailer.


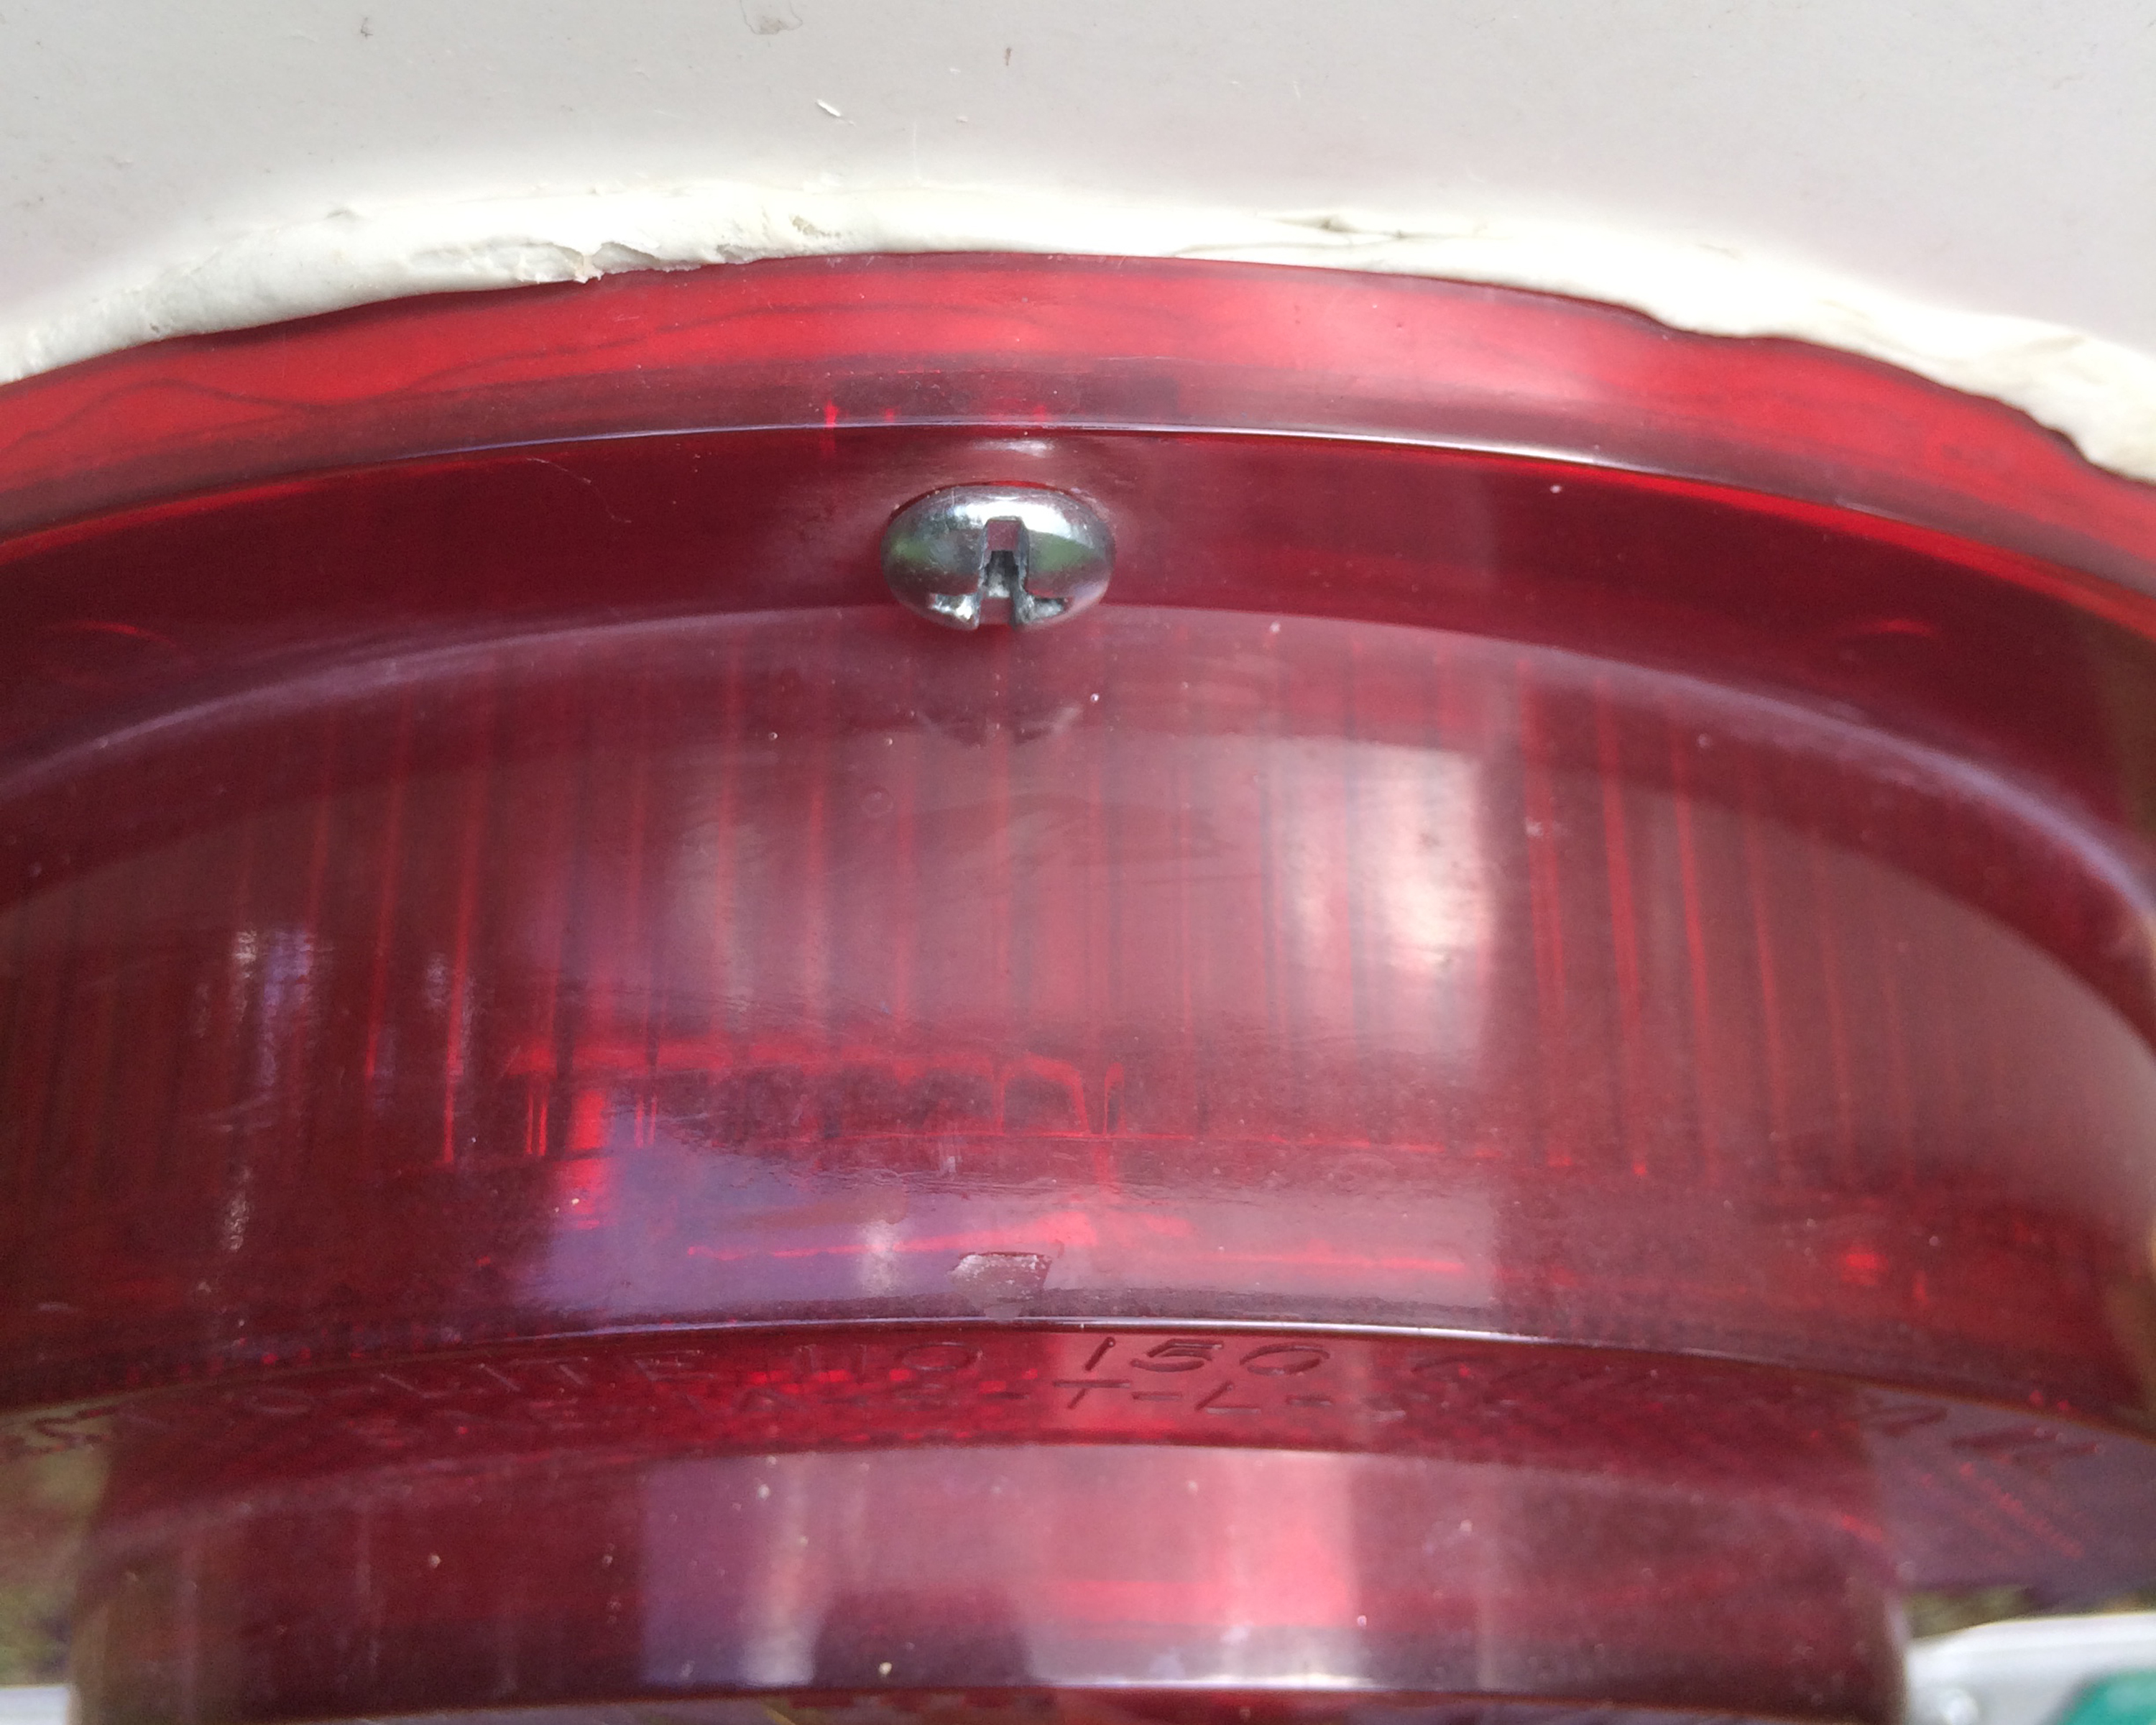
The tail light on the other side wasn’t sealed, either.  BUT, there was no hole in the floor under it, and there was no soft wood under the trailer in that section.  As a precaution, we sealed that up, too.  And while we were at it, we removed the covers on the 4 marker lights, found they WERE sealed to the trailer with butyl tape, but we cleaned it all out and applied new tape.

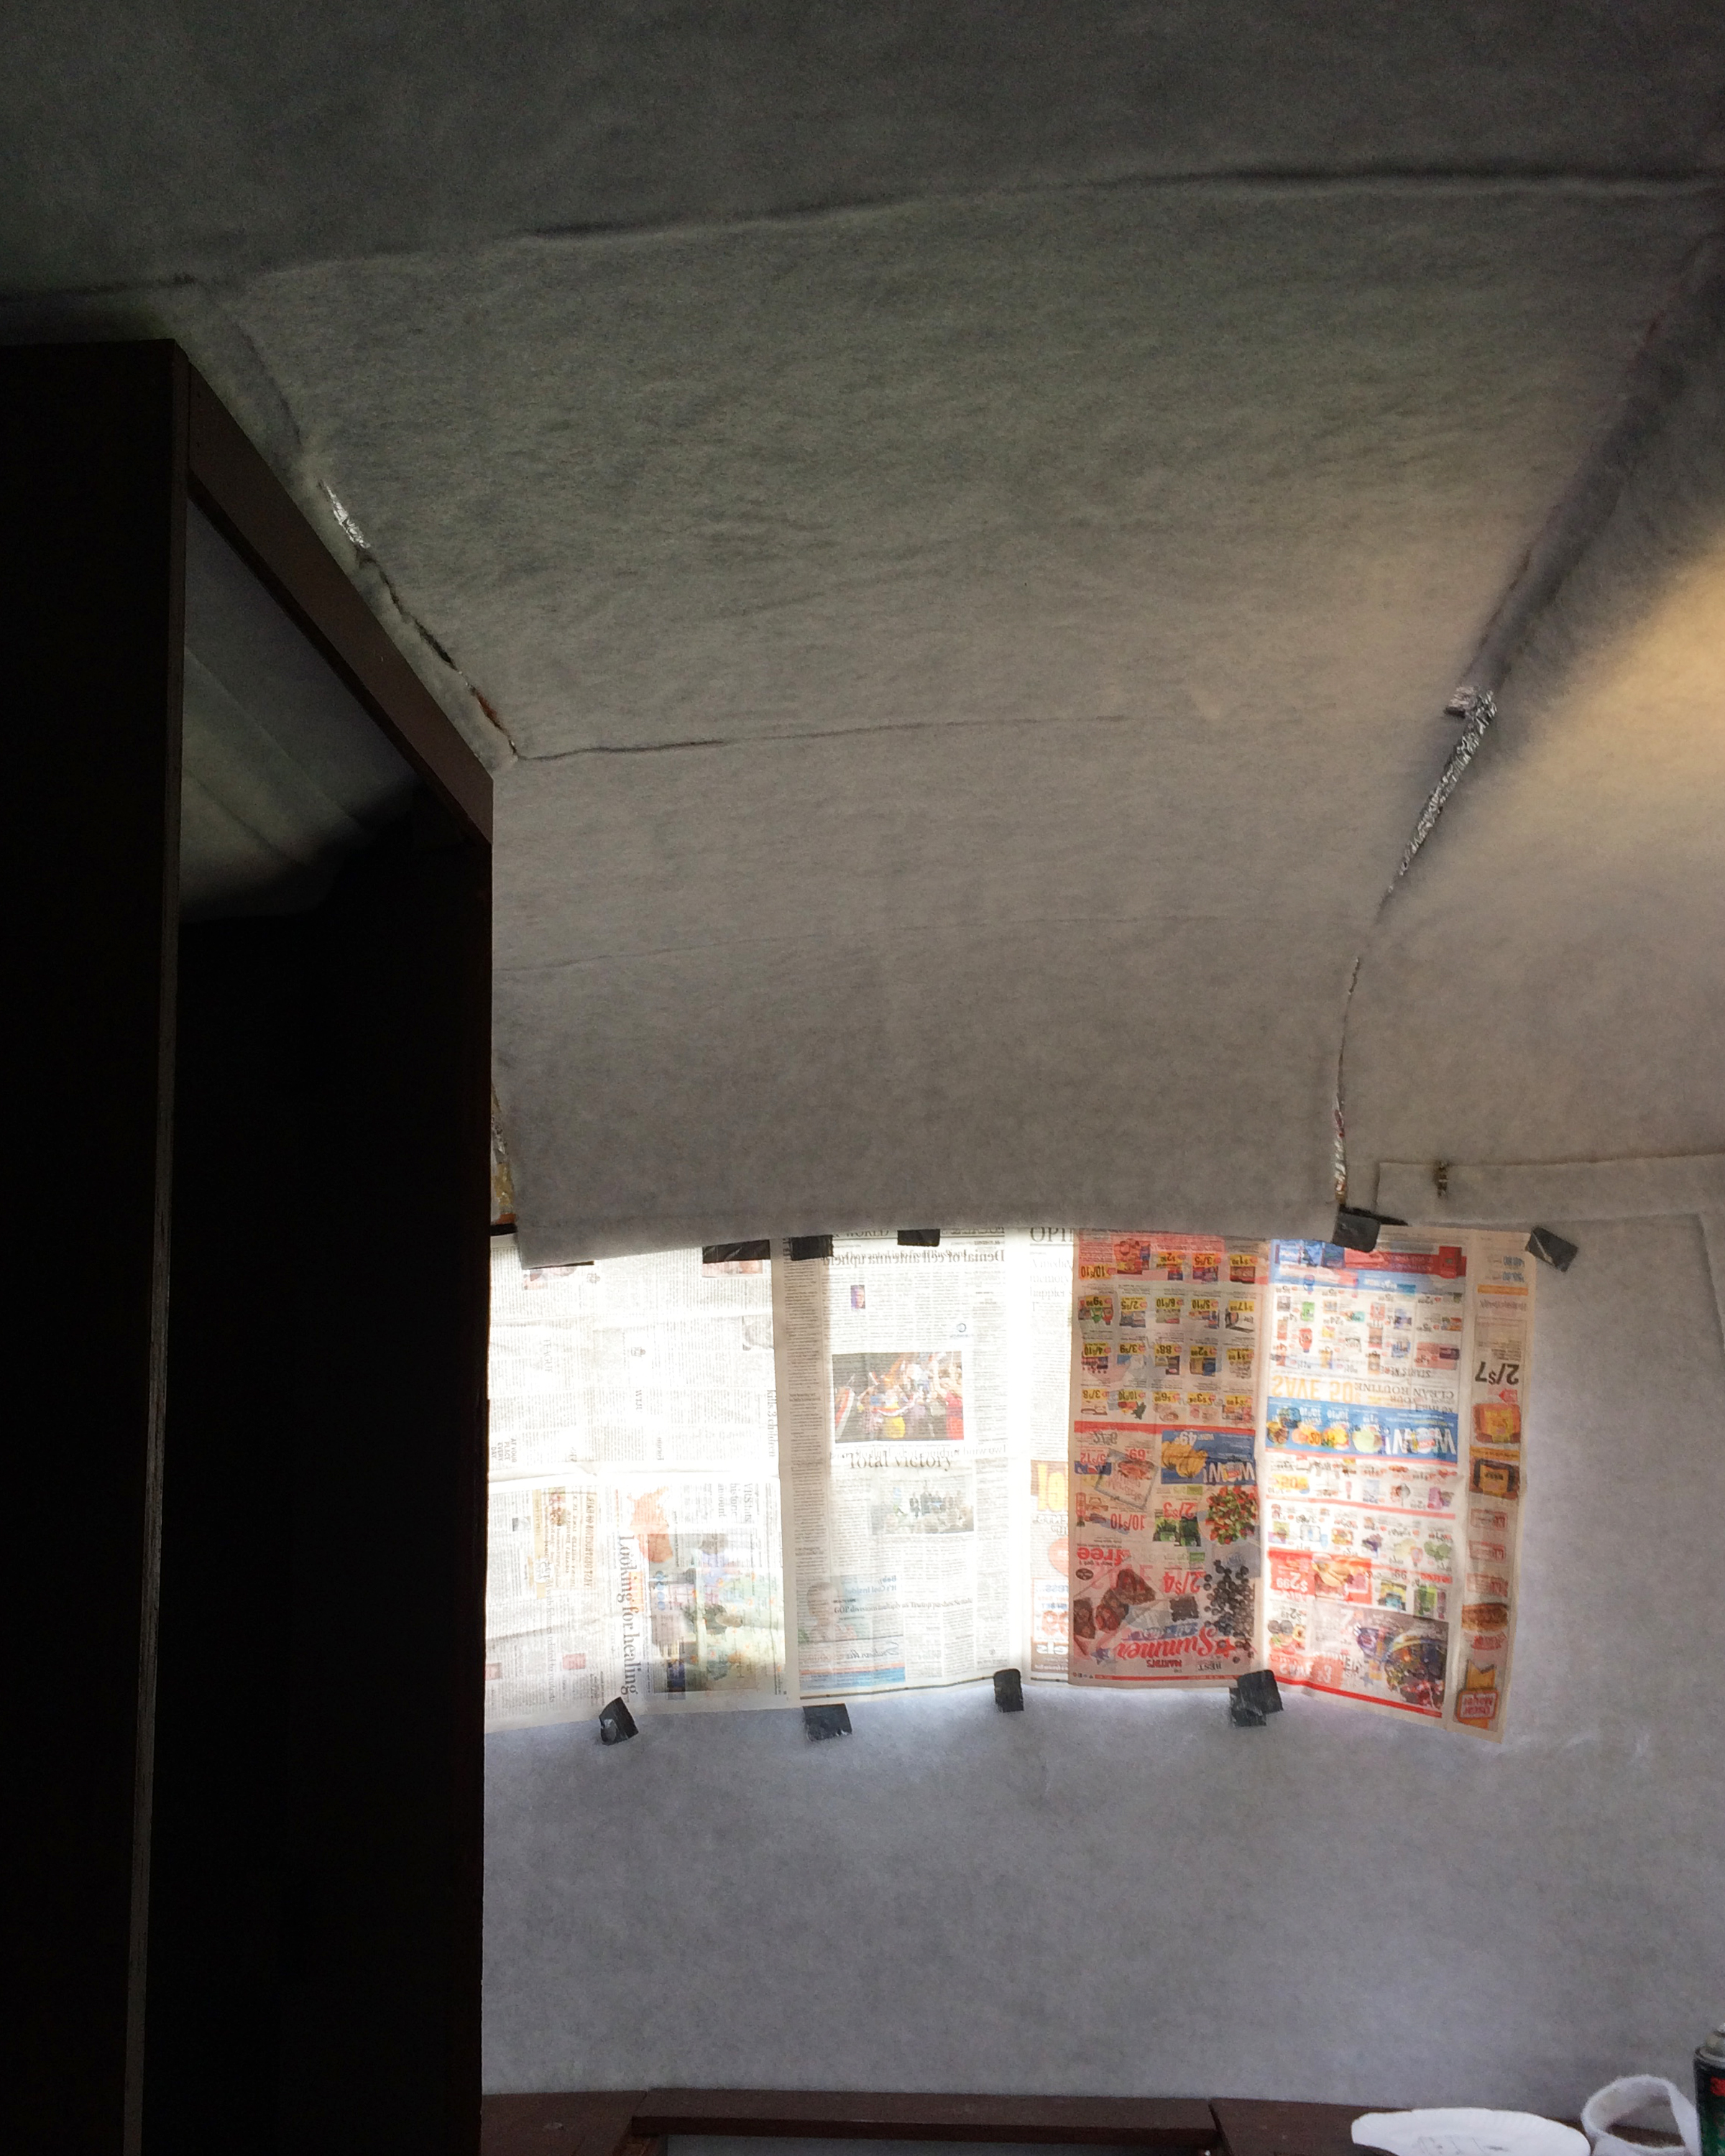
With heavy rain in the forecast for the upcoming week (and for days), we decided to test our repair work on the tail light before doing anything else.  We placed pieces of paper towels up under the reflectix and hull liner all along the back end of the trailer.  If anything leaked the towels should get wet….

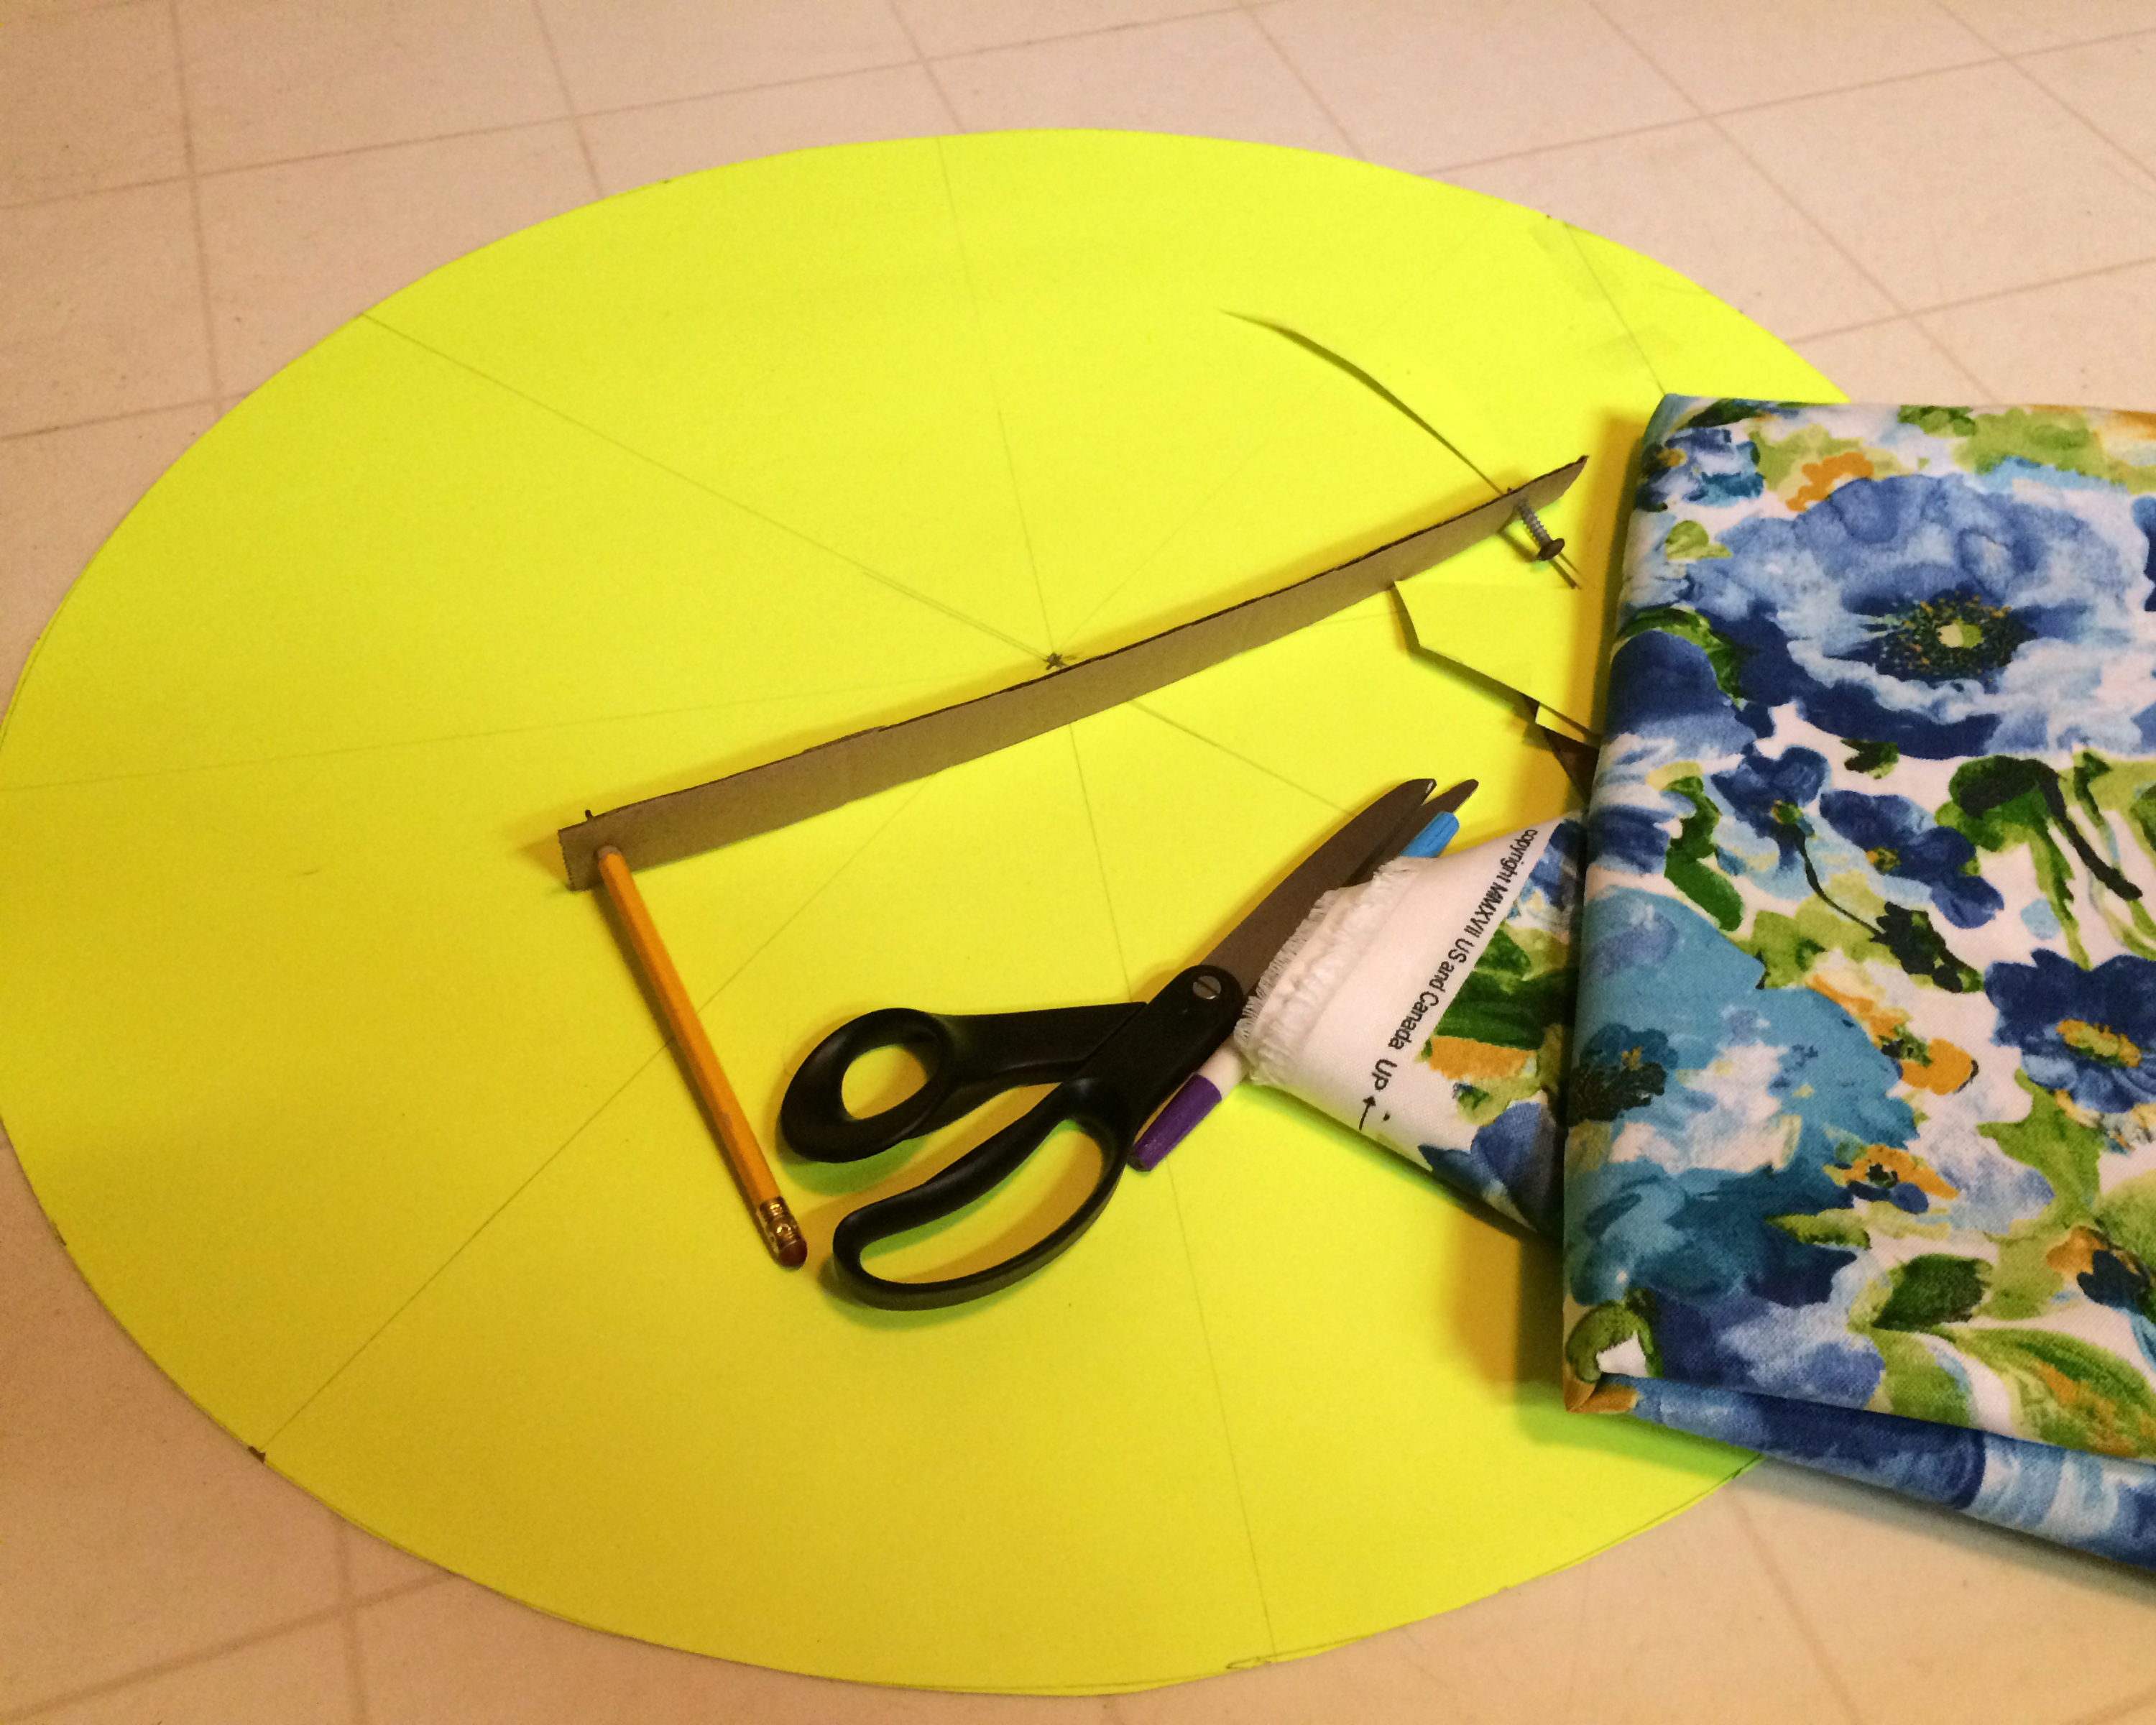
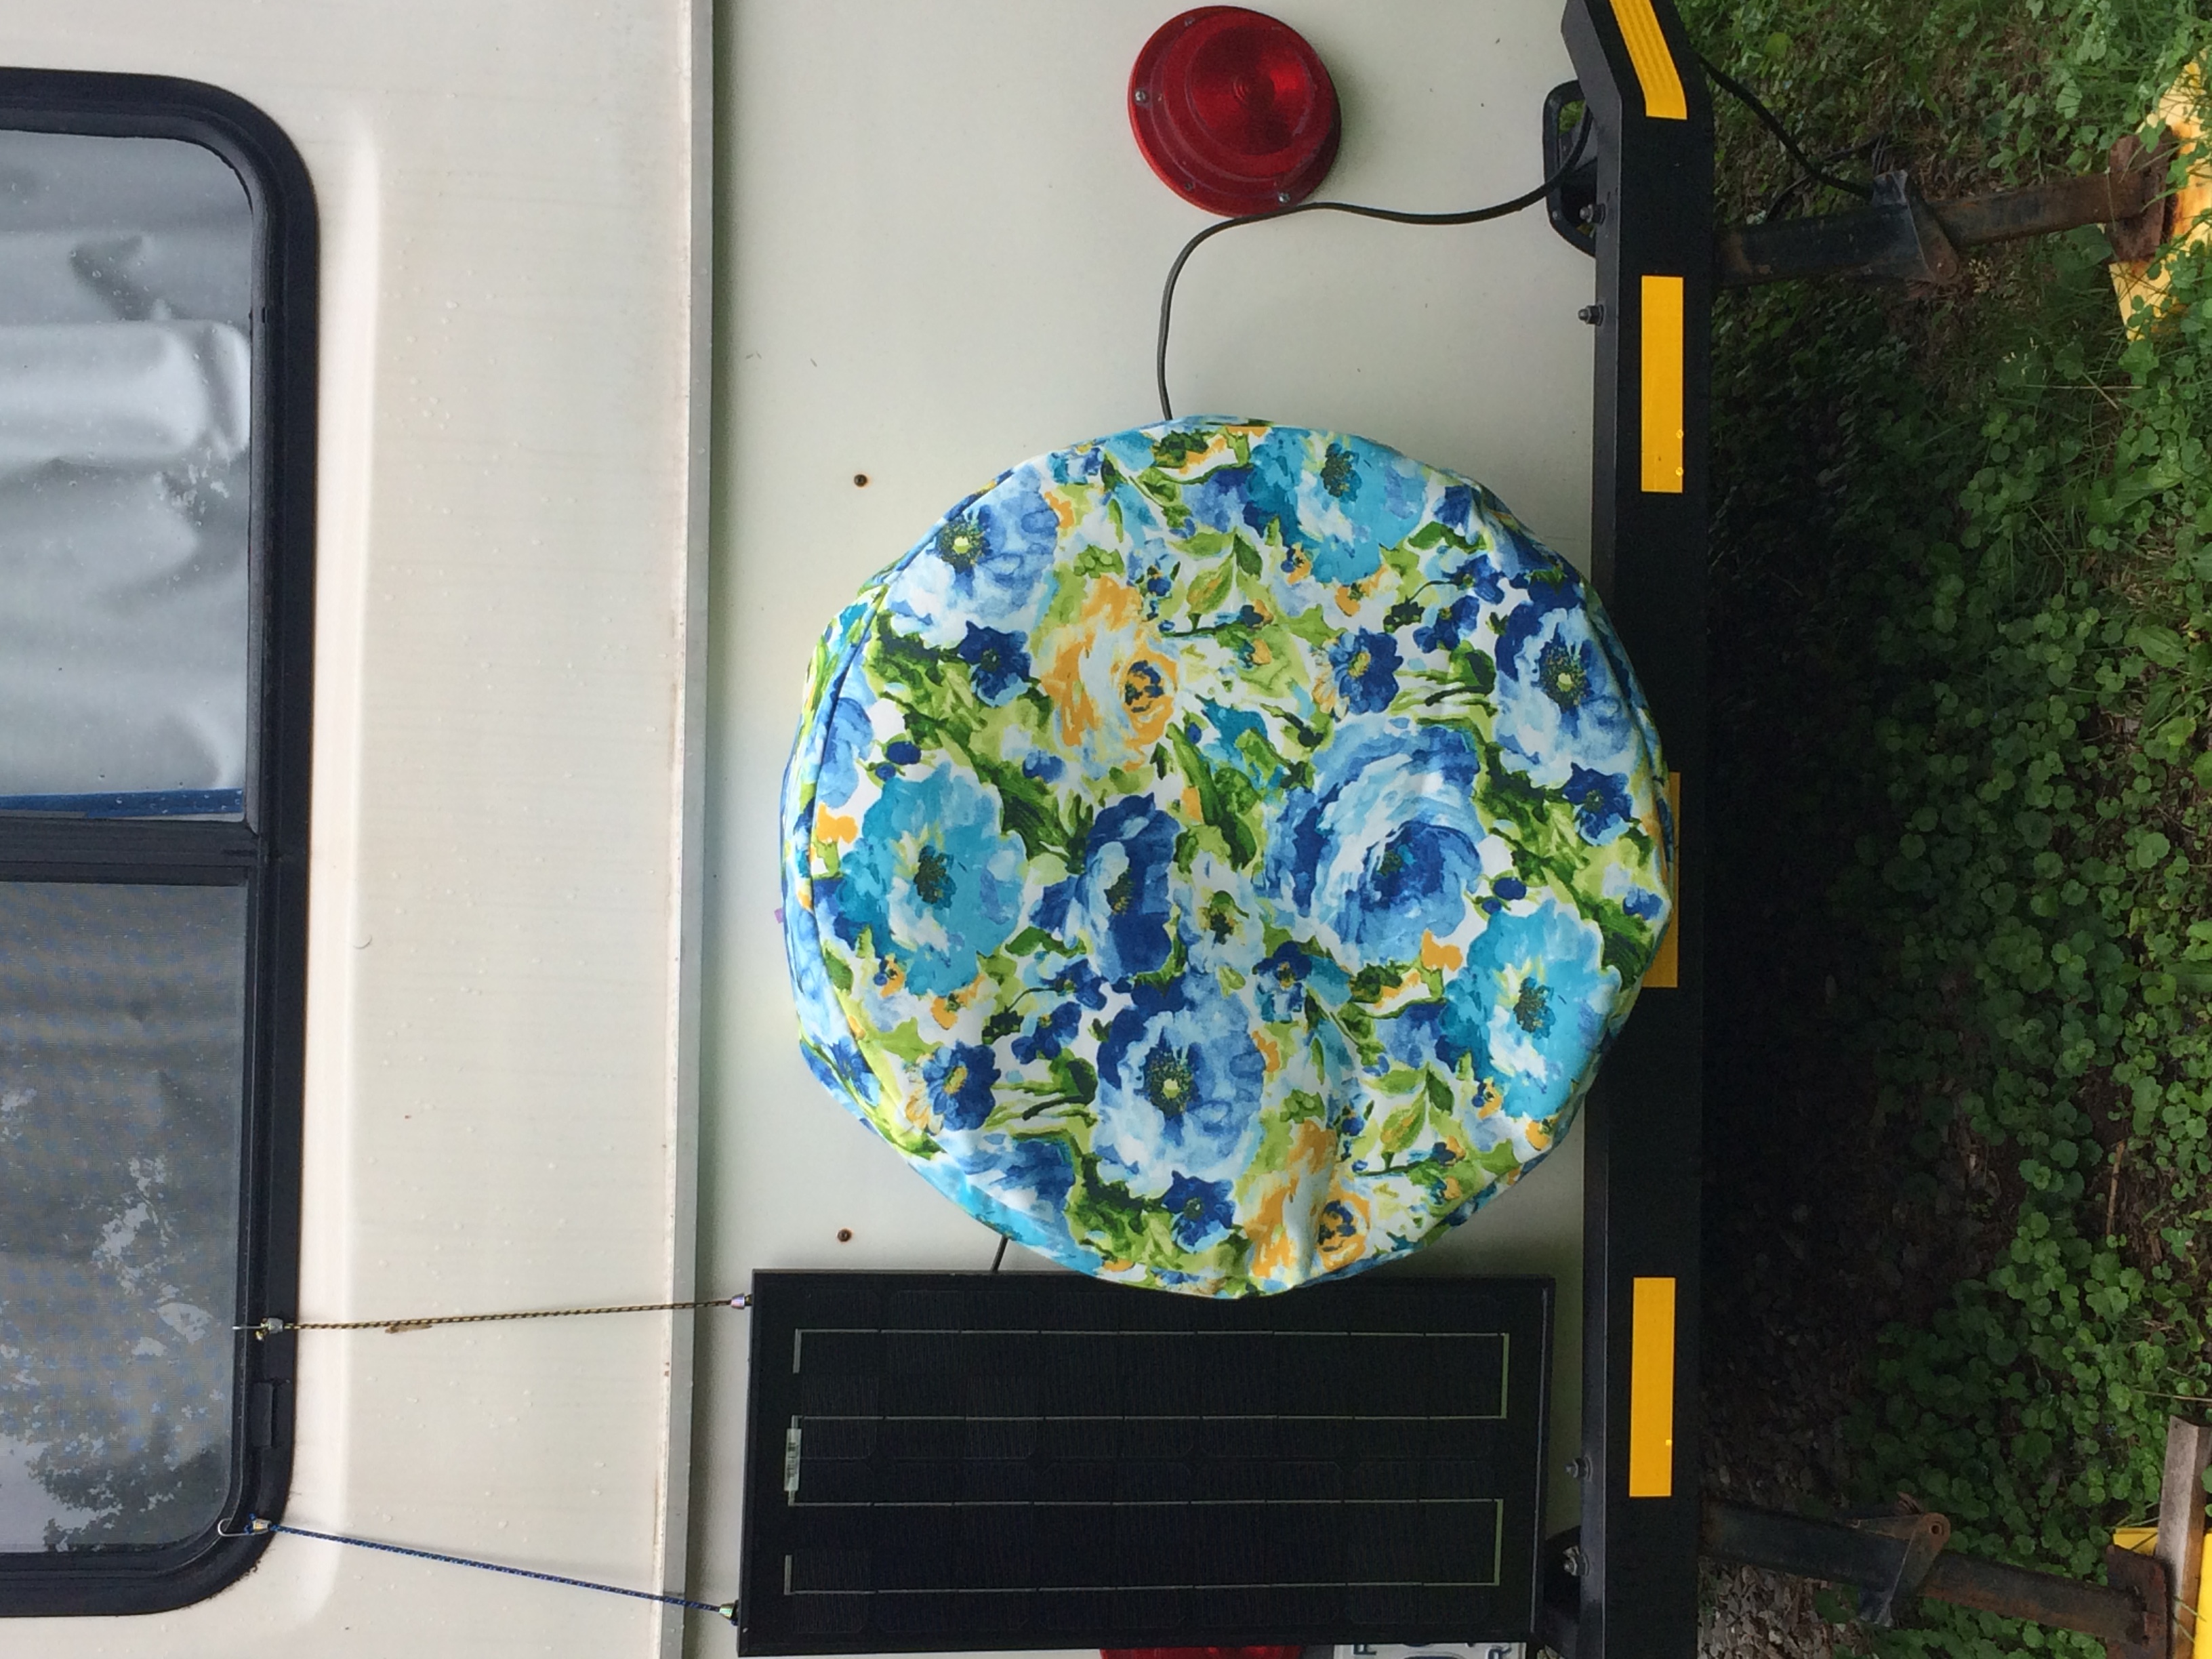
We took a break at that point and went into town to buy more fabric for one of the spare tire covers that I’m making. A woman in Texas wants one in this pattern in a custom size.

When we got home, Wayne said he was going outside.  When I went out to see what he was doing, this is what I found:

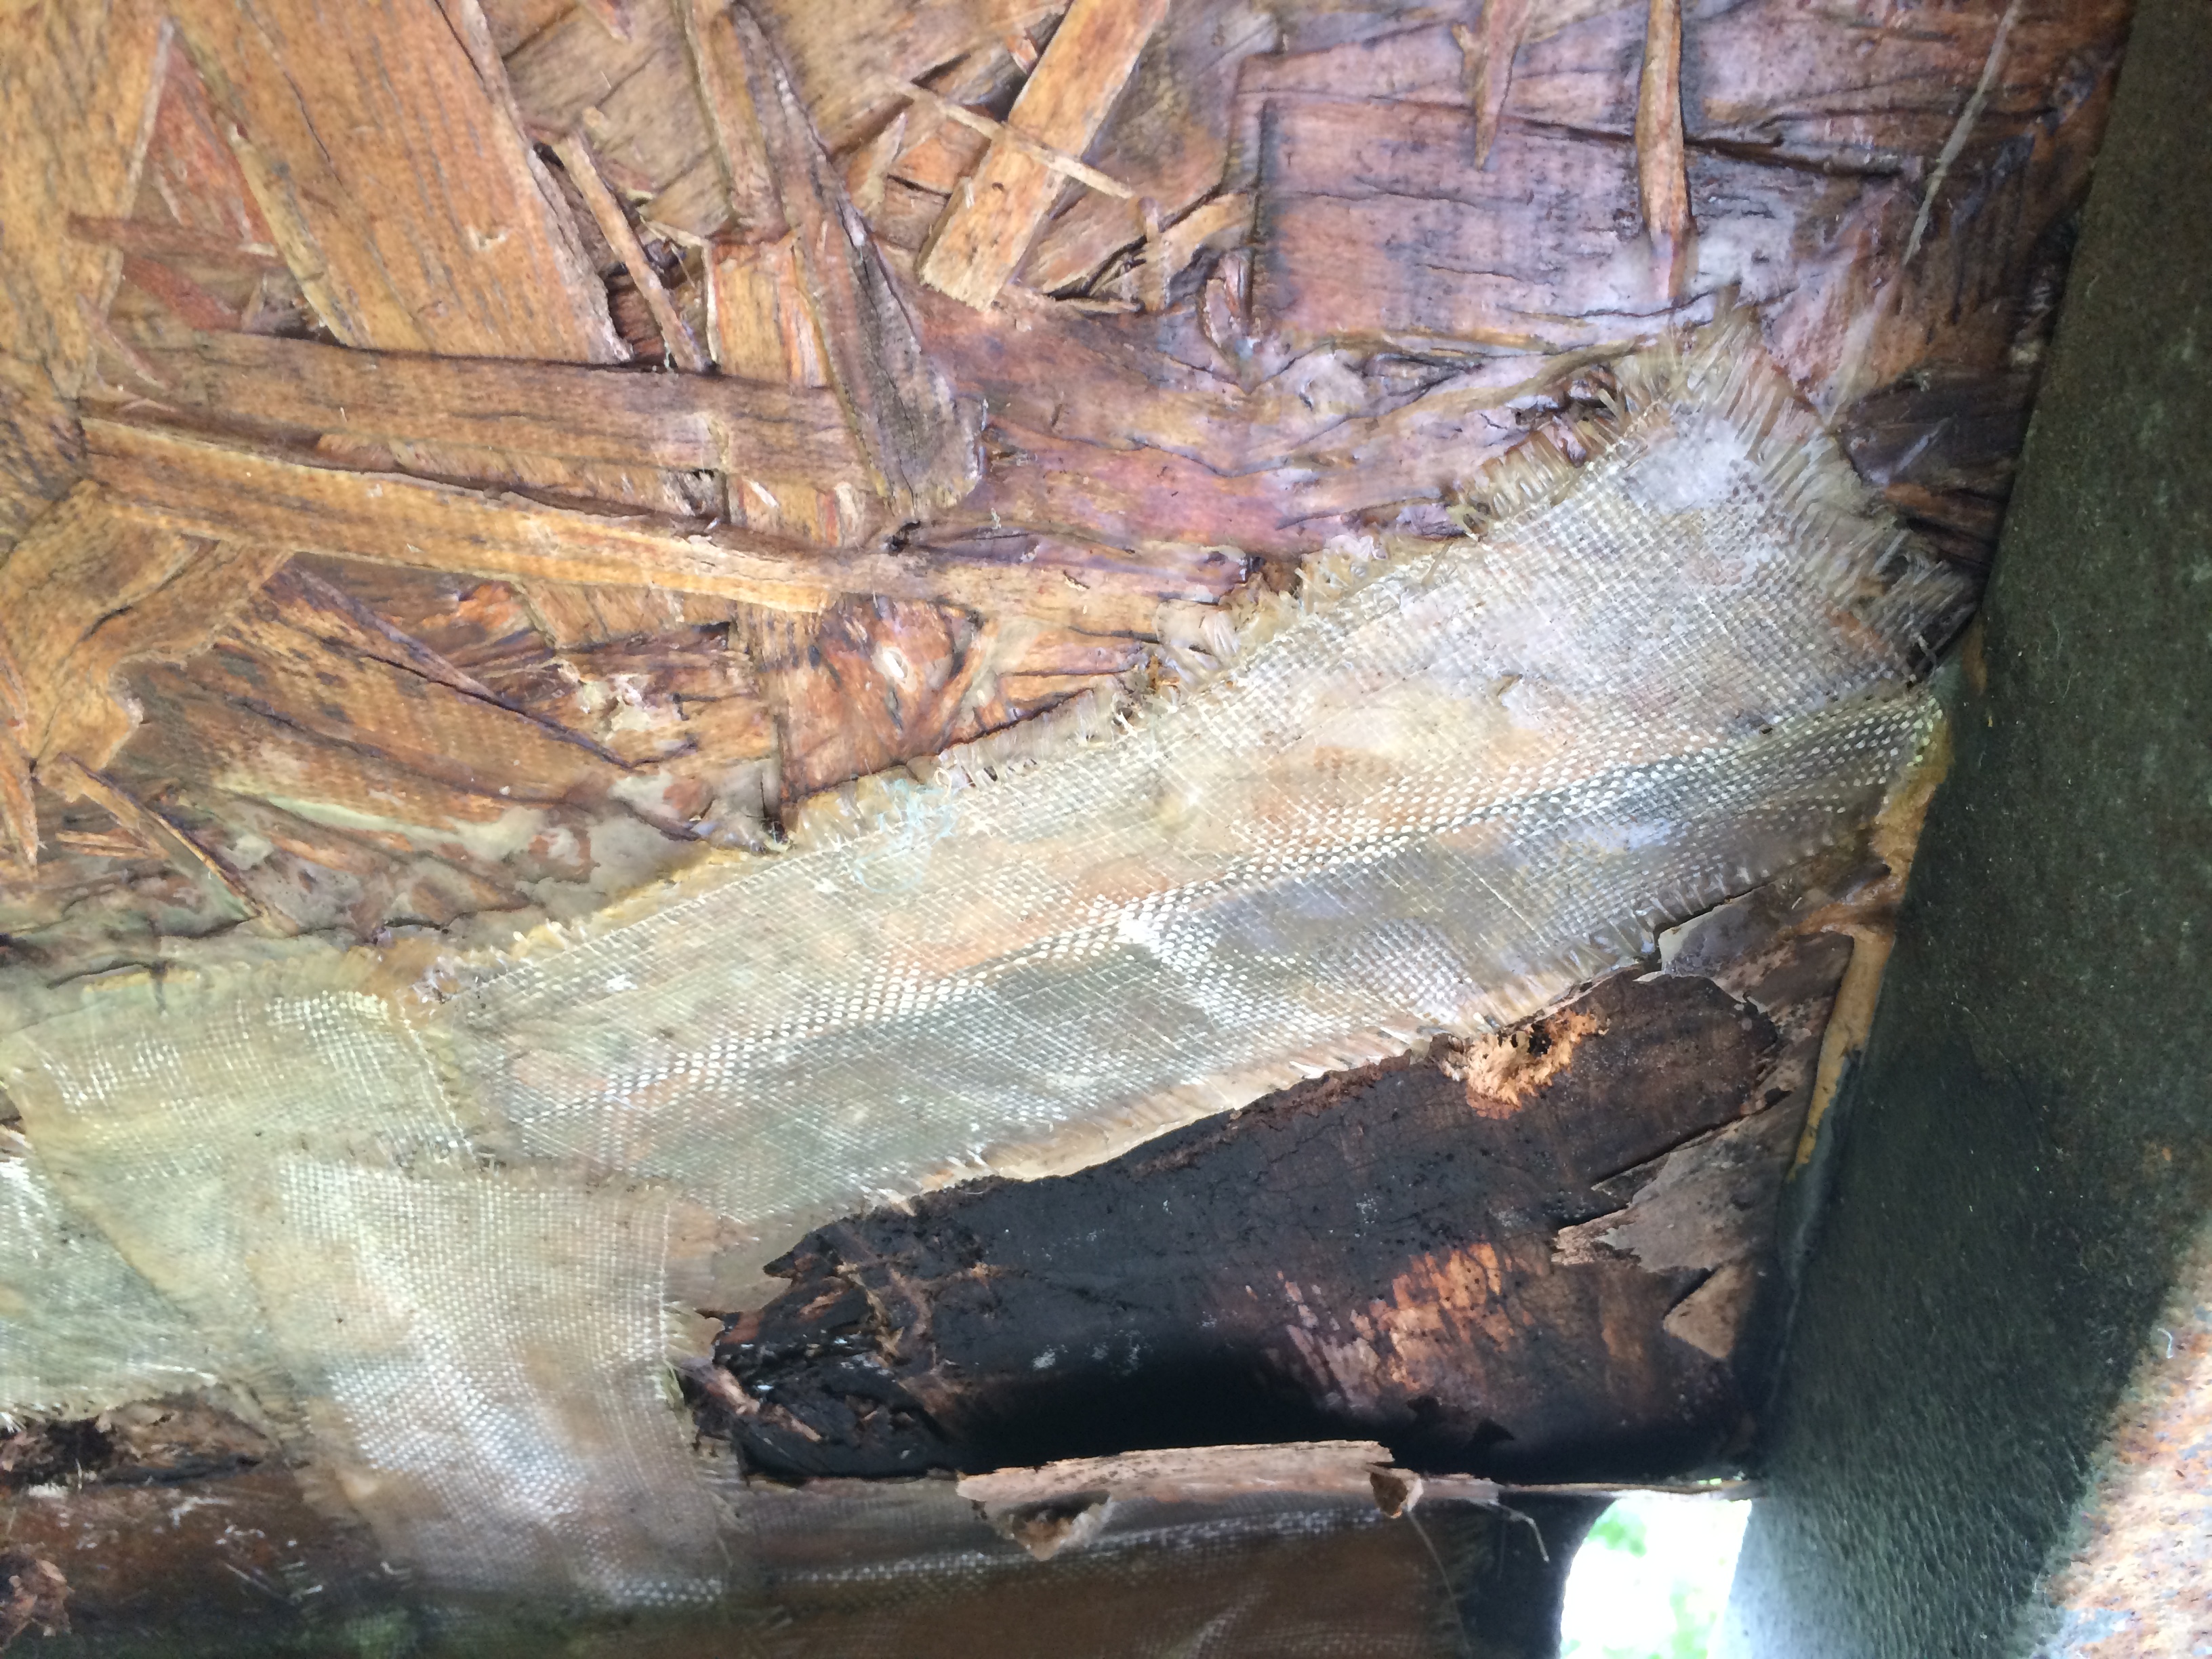
Wearing goggles and a mask, he was using a hammer and chisel to cut out the rotten wood under the trailer.

The bad news is that this wood has apparently been exposed to moisture for YEARS; it’s very soft and wet.  The “good” news (if it can be called that) is that it’s not a huge area.  The damaged section could be cut out and correctly patched and sealed, so it wouldn’t be necessary to replace the whole floor in the back section of the trailer….


The next day, Sunday, July 22, we continued to talk about our options.  As we counted our scratches, bruises, and sore spots from the previous day’s repair efforts, we realized that even though we probably COULD repair this small section of floor, it would take its toll on us, physically.  Sad fact: we were in better shape four years ago when we started renovating the trailer than we are now.

When we checked the trailer that afternoon after some rain had moved through, we were totally disappointed to find that one of the paper towels was wet.  Clearly, sealing around the tail light hadn’t made a bit of difference. 🙁


Could the leak be from the bolts that hold the spare tire on the back?  We’ve never sealed around them (and have since learned that this is often a source for leaks due to the movement of the trailer when traveling), so this could be a very simple fix.  (It was raining, so we couldn’t test this theory….)

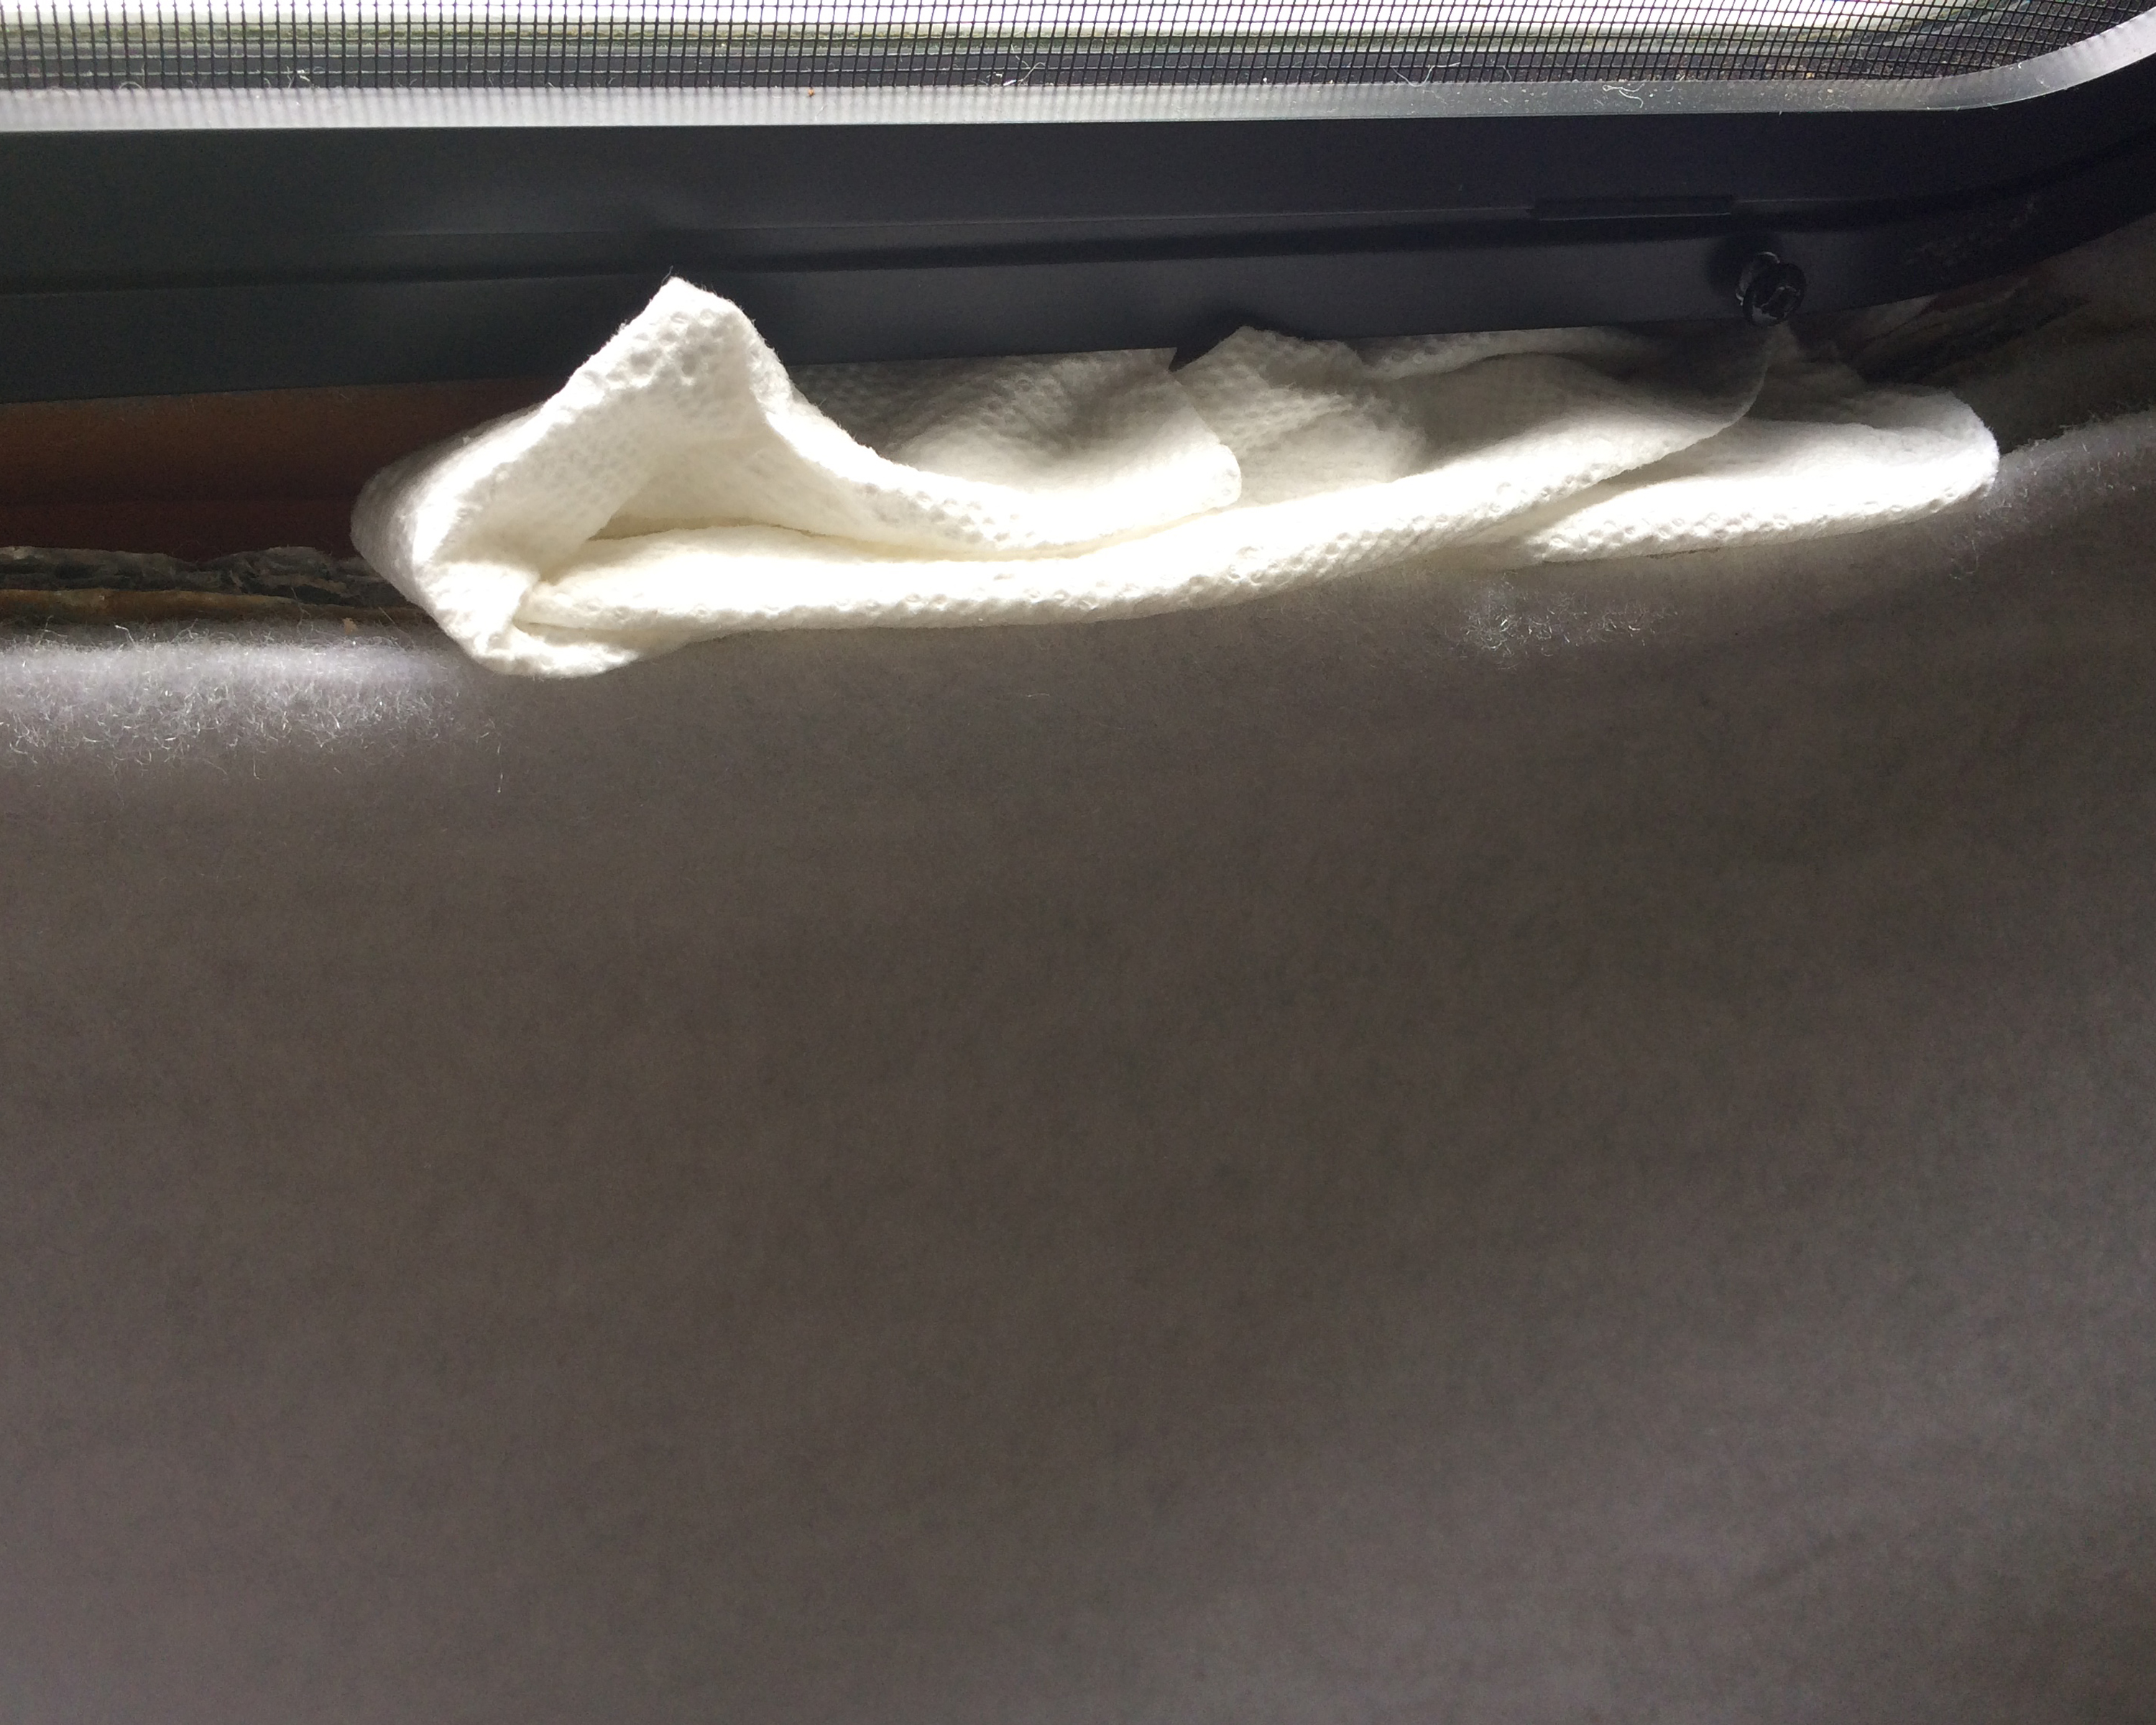
Could the leak be coming from the large rear window?  We pulled back some of the hull liner and reflectix, and yes, it was a little damp (damp, not soaked).  The “weep holes” are clear, but maybe the window needs to be removed and re-sealed with butyl tape.

We dried the area under the window and stuck a paper towel there.  We dried the floor and put a new paper towel there, as well, to wait for the next band of rain.


And we continued to talk about logistics and goals.

Our desire for a trailer initially had to do with our love of Virginia’s state parks.  Some parks we’d hoped to visit are too far away to easily do as a day trip, and we thought it would be fun to be able to drive to one early on a Saturday, spend the night in a trailer, then come home the next afternoon.

When we started looking for a trailer nearly 5 years ago, we were specifically looking for a 13 ft. Scamp because the car I owned at the time would have been able to pull it.  When we couldn’t find one after many months of searching, we got a vehicle with more towing power to give us more options. We were still focused on Scamps, however, due to all of the reasons listed above.

We enjoy camping–as long as we have electricity, bathrooms, and a comfortable, dry place to sleep (i.e. in a trailer).  We agree that we could see ourselves continuing to go camping for maybe another 10 years or so, as long as health and circumstances allowed.

So now we have to decide if our goal is to just to do one- or two-night trips with a trailer.  If that’s the case, then the Scamp, equipped as it is–but repaired–might be all we’d need.   On the other hand, if we’d like to travel with a small trailer, it would be good to have something with at least a few more basic amenities.

I’d like to be able to travel with a trailer. I did a LOT of it with my parents when I was a kid–and LOVED it!–but if we decide to just keep it local, then maybe keeping the Scamp would be the best option–and we could try to find someone who could make the repairs for us.  THEN we could continue with the plan to add a fridge, sink, etc.

So it’s a tough call, in many ways.  We know this trailer.  We know how it tows, we’re getting better (not good, but better) at backing into places, and it’s been our baby.  We’ve already made the initial investment for it, all prior renovation and repair costs have been paid for, the taxes and insurance aren’t bad, and we have greatly enjoyed it each time we’ve taken it out somewhere.

So this is where we are.  And we really don’t know which way to go from here.

Another Project Re-Do

We seem to be in some sort of odd loop: complete a project/re-do the project….  To wit, we removed and then replaced some of the hull liner fabric on the ceiling in order to find and repair the last (fingers crossed…) of the tiny pinhole leaks in the roof.  I recently made new curtains for the trailer due to how badly the original ones (made in 2015) had faded, plus how poorly they fared after going through the washing machine.  So with these projects under our proverbial belts–again–that brings us to the latest déjà vu moment: replacing the flooring in the trailer.

While we liked the vinyl plank flooring we installed in July 2015, we were kind of disappointed to see that a few of the tiles were separating, leaving tiny gaps between them. These were put in as tightly and securely as possible, but perhaps the temperature extremes in the trailer–from summer heat to winter cold–was more than this tile was rated for.  Dunno.  Wayne suggested that we put down sheet vinyl for all over, seamless coverage, so that became the plan for this re-do.

It seemed safe (and obviously much faster) to put the sheet vinyl over the planks instead of trying to remove them.  From front to back in our custom interior, the floor is exactly 6 feet, so we bought a roll of sheet vinyl that was 6′ x 9′.  I was intimidated by the thought of just taking it in and cutting it, so we bought sheets of poster board and Wayne made a pattern of our small, unique floor space.


After all the sheets were connected with spots of tape, we applied more duct tape to make sure that nothing shifted or distorted when we moved the pattern out of the trailer.


We put the poster board pattern on our kitchen floor, wrong side up–and quickly realized that we needed to clean the floor before going any further!   Whoops!  😉

Next, we laid the vinyl on the (cleaner) floor–wrong side up–and placed the pattern on top of it, also wrong side up.


With everything taped down, it was very easy to trace around the pattern with a pencil, and we used a strong pair of scissors to cut it out.

Before putting it in, I had to remove the threshold under the table, and the one at the door.


The one under the table was easy–I just used a cordless screwdriver in reverse and the screws came right up.  The one at the door, however, proved to be more problematic….

I knew we’d taken it off when we put the first floor in, but I couldn’t figure out how on earth to get it off this time!  Maybe there were screws under the weatherstripping, so I ripped it off.  Nope, there weren’t any screws there.  I used a flashlight and mirror–and ultimately my camera–to look for screws under the threshold.  Nope.  No screws there, either, though at some point there were probably rivets.

Finally, I just started pulling it, gently tapping it with a hammer, etc., and–at last!–I was able to “simply” pull it off.  Well, THAT was easy. (Not).

Okay, on to the vinyl…. Even though I knew we’d been careful with the template, I was still astounded when I rolled it out.  It fit the space almost perfectly!


This was literally all that I trimmed:

After a couple of hours, I went back in the trailer and carefully applied some adhesive for sheet vinyl just along the edges (not all over the floor).  And a while after that, I reinstalled the threshold under the dinette table and at the doorway.

We might be able to re-use the weatherstripping that I ripped off, but Wayne said he thought we had some that would work better.  I’ll leave that part up to him.

Yes, the light floor will show every bit of grass or dirt that’s tracked in, but the added brightness is kind of nice.

That said, at this point I don’t think we’ll go with a lighter color for all of the wood in the trailer, but with all of these other project re-do’s, you just never know! 😉

I Get These Ideas……!

When we started renovating our Scamp, I admired some of the fancy spare tire covers.  With money being tight, though (and geared for renovation necessities), I opted for a plain white vinyl one. (Functional, but boring….)

I thought about crocheting a cover for it.  Several people offer free crochet patterns, and there are also crocheted covers available for purchase on Etsy.  Really love these bright pops of color and all the designs! 🙂

Yesterday while searching for something else, I found a post in a Scamp forum about a woman who had sewn a tire cover for her trailer using a cute vinyl tablecloth as the fabric.  Hmmmm…….  Sewing…..

And that’s all it took for me to start figuring out how to make a cover for the spare tire on our trailer.  Since I really like the fabric I used for the new curtains in the Scamp–and since it’s an indoor/outdoor fabric–I decided to give it a try!

Sunday morning I bought 1-1/2 yards of fabric and a 2.5-yard package of 1″ elastic.  When we got home, I measured the diameter of the tire (24″), and added an inch for the seam allowance.  Instead of just jumping in and cutting the fabric, I made a pattern out of poster board, first.

The poster board I had was 22″ x 28″ so I cut 3″ off the long end and taped it to the short end to make a 25″ x 25″ square.  I made an X from corner to corner to find the center, and poked a hole in the center with a screw.  I used a piece of cardboard to make a “compass,” measuring 12.5″ from the screw in once end of the cardboard, to a pencil at the other end.  I placed a piece of cardboard under the center (to protect the floor from the screw) and simply turned the pencil and cardboard around to make the circle.  (This can be done by using a string tied to a pencil, but I wanted to be as accurate as possible for the pattern, and the cardboard offered a better option.)

Once I was pleased with my pattern, I spread out the fabric on the floor, wrong side up.  My self-appointed supervisor was very vocal and kept offering suggestions. 🙂


I traced around the circle on the fabric, cut it out and set it aside.  Next I needed to do the “gusset” to go over the top of the tire, with enough to go over the edge to the back.  The woman who’d made the cover out of the tablecloth said she’d made this strip 9″ wide, so I figured that would be a good place to start.  But how LONG to make the strip?  That info hadn’t been provided….

I sat on the floor with the fabric on my lap and pondered this for a moment.   (My “supervisor” was happy to take a break.)

I knew I’d want to overcompensate and make the strip longer than necessary, so after finding the circumference of the circle mathematically AND measuring around the tire, I opted to make the strips 90″ long (54″ fabric width + another 36″).  I knew it would be way too long, but it seemed like a good idea–at the time.

I sewed the two strips of fabric together to make a piece 90″ long, then–with right sides together–I pinned the strip to the edge of the circle.  I sewed it all the way around the circle using a 1/4″ seam allowance, but I had to cut a lot off.  All this length also made joining the two ends of the strip a little tricky since it was already attached to the circle.  So here’s what I should have done:

For my tire, I should have made a strip 9″ wide x (approximately) 79.5″ long.  At this stage, I should have folded one long edge under by 1/4″ and stitched it down.

Next, I should have sewn the two short ends of the strips together using a 1/2″ seam allowance to make a loop of approximately 78.5″ around.  THEN I should have sewn the loop to the circle (right sides together, matching raw edges) using a 1/4″ seam allowance.

But with the strip (ultimately) attached to the circle, I took it outside to see how it fit on the tire. It seemed to be okay, so I think it’s safe to say that a 1/4″ seam allowance here works.

When I brought the cover back inside, the next step was making a casing for the elastic.  I folded the edge of the strip over 1-1/2″ and used a combination of pins and clips to hold it in place.  I stitched along the previous line of stitching (from the turned under part) to make a casing about 1-1/4″ wide.

I left an opening in the casing of about 2″, cut a piece of elastic 63″ long, and threaded the elastic through the casing by “inch-worming” it along with a large safety pin.  (I pinned the other end of the elastic to the fabric to avoid having it slip into the casing–which would have meant doing this step all over again.  Been there, done that; experience is my best teacher. 😉 )

When I finally got the safety pin and elastic all the way around and back to the opening, I overlapped the two ends of the elastic by 1″ and sewed them together.  I took it out to try it on the tire again.  I was pleased (very pleased!) with the way it fit, so I sewed the casing shut.

Done!!


Yay, me!

Of course I have no idea how well this will hold up, but it IS indoor/outdoor fabric.  It’s designed to deal with the elements, so I hope it will do okay on the back of a travel trailer!

And while this floral fabric may not suit everyone (“glamping,” anyone?), now that I’ve figured out how to sew a tire cover for the back end of our trailer, it opens up a whole lot of possibilities!  Yes, I’ll be making others. 🙂

Again, my thanks to the woman in the Scamp forum who inspired this!

More Curtains….

What started as a simple task of washing the curtains in the trailer ultimately led to the re-making of ALL of the curtains.  (Again I ask, how do I get myself into these things?)

The first one I made was the floral curtain for the “bathroom.”

There are two small side windows at the head and foot of the bed, and I used the same fabric to make new curtains for these windows. (The “blackout” fabric I thought I’d purchased was actually “light filtering” fabric, but whatever….  They’re pretty.)

I used a solid royal blue fabric for the curtains on the larger front and back windows.  While the formula for calculating the size of curtains is the window width times 1.5, divided by 2 (for 2 panels), I tried that for the front window and they just seemed too heavy and bulky (and short).

Fortunately, when I moved them to the back window, they worked fine.  (And I DID use blackout fabric behind these.)

I then made the curtains for the front window, purposely making them narrower and longer than the curtains for the back.  No, they don’t “drape” as well as the ones made using the “formula,” but I’m okay with that (less bulk, less to bunch up when opening them).  I’m still trying to decide if I want to use a lower curtain rod to help hold these closer to the front curved wall, but I could also add a couple of pieces of Velcro on the bottoms of all of the curtains since tiny Velcro tabs will stick to the fabric on the walls.

But all in all, I like the pop of color provided by the new curtains–especially as they play off the green of the dinette cushions.  While re-making these certainly wasn’t the original plan, ultimately I think it was a worthwhile effort! 🙂

“It’s Like Déjà Vu All Over Again” – Curtains for the Scamp….

In a previous post, I said I needed to wash the curtains as part of our preparation before camping….  Well.  To re-cap, three years ago I was motivated to learn to sew when I wanted to make curtains for the trailer.  I bought an older Singer sewing machine from a seller on Craigslist, bought and pre-washed some fabric I liked, and spent a crazy week or so trying to figure out how just how to do such a thing.  In the end, however, I had functional–if not perfect–curtains for our Scamp.  Yay, me!

I knew the backing fabric on the curtains had faded over the last 3 years, but I didn’t realize just how badly it had faded until I took them down to wash them.  Um, yeah.  This was navy blue at one point?

To make these look better–and to increase their light-reducing capabilities–I decided to add “blackout” fabric to the back of each curtain panel.  Seemed simple enough (she said, naively).

It actually worked pretty well for the smaller curtains on the sides of the trailer.  I sewed the blackout fabric directly to the back of the curtains between the hems.  Perfect?  No, but functional.

When I took a good look at the larger curtain panels for the front and back windows, however, I just wasn’t sure that this was going to work at all.  🙁  Since these curtains were SO uneven and SO frayed when they came out of the washing machine (I didn’t know, at the time, to turn under raw edges!), I decided to rip out the seams and start over.  That’s when I realized that I’d used the absolutely tiniest stitch length ever when I’d made these, and there wasn’t going to be a good way to pick apart the seams in this lifetime….

Okay, fine.  I’d recently seen the same fabric in a store, so I figured the best solution would be to buy more of it and totally re-make the front and rear curtains–with the blackout lining put in correctly.  I made a late afternoon trek over the mountain to the store, and–SURPRISE!–the fabric was no longer available.  Not good.

Since I was facing the prospect of making new curtains, I figured I might as well change it up a little bit.  I bought a bold, colorful, and wildly floral indoor/outdoor fabric that I thought would be cool to use for our “bathroom” door, and a solid medium blue fabric for the new curtains.

As large as the floral fabric was, I knew I’d need room to spread it out and cut it, so I took it to my classroom at school.

Two and a half yards of 54″ wide fabric = a LOT of fabric.   In and around my classes, I was able to get it measured and cut to size.  I stayed after school to sew the side seams and the top rod pocket, thinking I could “simply” hem it when I got home.

You’ve probably noticed a theme by now: nothing is as simple as I anticipate.  I’ll spare you the details, but ultimately the curtain was the length I wanted it to be.

This is certainly an in-your-face difference when you open the door to the trailer!  But I DO like how it coordinates with the pillows and seat cushions, and it’s a bright, pretty change.

After I make the new curtains (sigh…), I’ll probably use this floral fabric for the tie-backs.  And while I’m at it, I’ll make a couple of new floral accent pillows, too. 😉

New (again) Fabric on the Ceiling

On Saturday afternoon, April 28th, we put up new marine-grade hull liner fabric on the ceiling.  For a variety of reasons, we decided to use three relatively short pieces instead of one long piece as we’d done the first time.  (I’m SO glad we initially ordered a little extra fabric!)

The first piece (forward from the vent) went up quickly.  While we DID have a bit of a gap at the sides, this picture makes it look wider than it actually was:

The next piece butted up to the previous one:

The third piece was a bit more challenging because we had to cut an angle to accommodate the shape of our “bathroom.”  Also, since this piece would go to the top of the front window (which we’d covered with newspaper to protect it from the spray adhesive), we opted cut it a little longer than necessary and not glue the last couple of inches of fabric.  This way we could glue it after we had precisely trimmed it.

Crazy, but what took the longest was getting the seam cover pieces cut and in place.  By using shorter sections of fabric on the ceiling, we certainly had more seams, but I don’t really mind the look at all!

In my last post, I was considering ripping out fabric towards the rear of the trailer where there’s some sag.  Nope, not happening now.  If we find we DO need to fix this in a year or so, I’m almost certain that we can do it without removing everything.

We still have several projects and upgrades in mind, but for now I want to get the trailer thoroughly dusted and vacuumed, get the curtains washed, and put the clean sheets and blankets back on the bed.  We need to get the trailer inspected, but soon (I HOPE!) we’ll be good to go. 🙂

New Reflectix Insulation

The torrential rain we had last weekend confirmed that we HAD found all of the leaks in the trailer forward from the ceiling vent.  And, indeed, it was the loose curtain rod bracket that had caused the largest leak in the front dinette area!

Armed with a can of 3M Hi-Strength 90 spray adhesive, I put up new Reflectix insulation on April 22nd.

I purposely used small pieces of Reflectix instead of trying to run long pieces from front to back.  For one reason, I was working by myself and didn’t want to have something so long that I couldn’t easily handle it easily by myself.  More importantly, I felt that multiple “small” pieces would stick better and be less likely to pull down once the weight of the hull liner was added.

While I’d hoped not to deal with tiny pieces, some of those had to be added, too:

So in the center of the roof–from the vent to the front window–new and extremely-well adhered Reflectix is in place.

While we could probably add new fabric (marine-grade hull liner) by next weekend (a much more challenging project since I will want to use large pieces to avoid lots of seams), I’ll need to make a decision….

There’s some sagging behind the vent to the rear window–and along the rear quarter on the driver’s side.  I’m wondering if I should just rip out the old Reflectix and the not-that-old fabric and start from scratch.   🙁

While the thought has zero appeal (I keep saying I’d rather go camping with the trailer on a free weekend instead of renovating or repairing something!) it might make sense to go on and do it.  Ack.  Always something….

Waiting for the Rain….

On Saturday, April 14th, we tentatively planned to buy a taller ladder to allow easier access to the Scamp’s roof.  We figured we needed this in order to patch the spots I’d identified last month as the source of some small leaks.  But I guess frustration was starting to take its toll regarding the ongoing work on our trailer, because we impulsively made a trip to Ashland, VA to visit a couple of RV dealerships.

If money were no object–or if I didn’t have a problem with the thought of financing a brand new travel trailer for 10 years–I would love to have an R Pod.  These are the best-selling travel trailers under 23 ft. in the country now, and after getting a firsthand look at several different models, I can see why!  With their funky, aerodynamic exterior design, rubber torsion axles, and an assortment of convenient features in a small package, these are incredibly cool little campers!

At the next dealership, we were most interested in a 2015 Jayco Jay Flight SLX 185RB.

The price and features were good–and the salesman really worked with us regarding the price and financing options.  For a relatively small trailer, the interior was spacious and open, and its weight was well within the towing capacity of my small SUV.

We both really liked the trailer.  It would be all we’d need for an extended cross-country type of camping adventure with its A/C, furnace, 3-way refrigerator, propane stove, microwave, bathroom, permanent bed, side dinette, and abundant storage space.  But–bottom line–we just didn’t love it.  🙁

Compared to our Scamp–and even the R Pods that we’d just toured–the Jayco seemed so big and boxy and … rectangular….  We looked at it a second time and continued to talk numbers with our salesman, but in the end we decided that it would make an absolutely wonderful camper for someone–but not for us.

On Sunday afternoon, we took the tarp off our Scamp and leaned a foam-padded extension ladder against the exterior (since we still don’t have a step ladder tall enough to reach the roof!)  The pinholes on the top aren’t visible at all (which is why this has been so frustrating), but by measuring and comparing the circled spots on the ceiling with the corresponding locations on the roof, Wayne was able to add another generous coat of Tropi-Cool roof sealant on the suspicious areas.  For good measure, he used some “Seal-All” inside on the ceiling.


As I’ve said previously, these little pinholes still can’t explain the water that’s appeared on the front dinette bench.  Even though we used butyl tape under the screws when we mounted the brackets for the curtain rods, when I checked one of the brackets, I was shocked to find that it was loose–like wiggly loose!  Could something this simple be the source of the leak in the front dinette?

Wayne tightened both screws in the bracket (yes, we could have used a shorter screw…), and we also found a couple more that weren’t as snug as they should be.

So now we wait.  With heavy rain and storms moving in, I am hopeful that our little trailer will stay completely dry inside!

“Aha,” but also “Hmmmm…..”

It rained during the night and it was raining this morning, so I went out to the trailer to check the exposed ceiling for leaks.  There was a small puddle of water on the front door-side dinette seat, but still no obvious source!  I also saw one drop of water fall from the spot in front of the vent.

I wiped up the puddle then headed to work, and Wayne went out and put a plastic bag on the bench with a towel on top of it.  He also set a couple of buckets under the suspicious spots.

When I got home I went out to the trailer with a magic marker–and a plan…. I took a single layer of toilet paper and pressed it against the pinhole near the vent.  Yep–even though it wasn’t raining right at the moment, the paper was wet (despite the two coats of roof sealant…)  I circled the spot with the marker.

I slowly worked my way to the front, pressing the paper against the ceiling, and I found two more spots that were slightly wet.


While it was “good” to find these leaking pinholes, they still didn’t explain the puddle on the front seat.  I checked rivets and other places on the ceiling, but I guess we’ll have to consider the front window again.  Early in the restoration we sealed all the way around it, but maybe there’s still a way that water is coming in.  Just don’t know….

But with significant snow in the forecast, this evening we put a tarp over the trailer.

At least this should keep everything dry until we can start doing repairs. (Sigh…)

Another attempt to fix an unknown leak, and preparing to re-do the ceiling. :-(

Last July, probably to the horror of many fiberglass RV enthusiasts, we painted the entire roof of the Scamp with Henry Tropi-Cool silicone roof sealant.

We’d dealt with a persistent leak of unknown origin, and really felt that using 2 coats of this special paint would take care of it.  Unfortunately, it didn’t.  In heavy rains, a tiny trickle of water would still come from under the insulation and headliner fabric and run down the front window.

Additionally, the ceiling was starting to sag quite noticeably.  This probably had nothing to do with the leak and was more likely due to the fact that a previous owner had ripped out all of the headliner fabric, but left the original insulation.  When we put up new fabric, we (mistakenly) assumed that the insulation was still holding tightly to the ceiling, but the pulling and tugging that he had done to remove the fabric must have weakened the bond of the insulation to the ceiling. Oh, well!

I didn’t think to take any “before” pictures today of the sagging fabric on the ceiling because as soon as I had a warm-enough day to start a project in the trailer, I started pulling and cutting out our (new) headliner fabric along with the old insulation.  I really thought that the leak was probably coming from around the vent (which had been replaced) but there was nothing at all obvious there.  Rats…. And so I continued to cut my way towards the front of the trailer until the center of the ceiling was completely bare from the vent to the front window.

The dark spots on the ceiling look a little suspicious because in 2015–before we put up the new headliner fabric–we dealt with a leak over the door with dark spots around tiny holes that looked like these.  We still have no idea what had caused these tiny pinholes on the roof, and last spring or summer we’d patched everything we could find on the top BEFORE our “last resort” of using the 2 coats of sealant on the roof.

In the pictures below, you can see the patching (done from the top) around some of the dark spots:


The ONLY truly suspicious spot I could see today was a tiny hole about 2 feet towards the front from the vent.  It’s one we hadn’t patched, and you can see the white of the silicone roof sealant through it.  Was this enough to cause the current leak??

I wondered if we should go on and patch all of this, now, from the inside, but then we decided that it might be best to wait until we have a steady rain to see if we can figure out exactly which spot is leaking.  After that we’ll patch everything from the inside, put up new Reflectix insulation using 3M-90 spray adhesive, and–one more time–the headliner fabric.


Fortunately, we have enough fabric left over from when we installed it, initially. And to clarify, it’s not really headliner fabric, but Silver Gray Stratos (plain pattern) marine hull liner that we ordered from PerfectFit.  I can’t remember how many yards we ordered, but I’m glad we won’t have to re-order it.

Being out in the trailer again makes me want to go camping as soon as we have a relatively warm, dry, and open weekend.  As I told Wayne, if an opportunity comes up before we have the new Reflectix and headliner fabric up, we should go anyhow!  I still haven’t ruled out the possibility of adding a sink and propane stove at some point, but as we’ve found already, our little mobile bedroom and dining area are really all we need for a fun camping adventure!