Memorial Day Weekend – 2016

The foam I ordered for the cushions arrived this week!  On Saturday afternoon we used each bench seat top as a pattern to trace around on the foam, and then we used an electric carving knife to cut out the unique shapes for each dinette cushion.  (We purchased the carving knife from Goodwill last summer, and used it to cut the Memory Foam mattress for the bed. It’s come in handy!)

Cushions-052816-2  Cushions-052816-1

We *think* we have enough foam left to make small back rests, which will also cover the table when the dinette is converted to a bed. I’ll probably make some pillows to fill in, too.

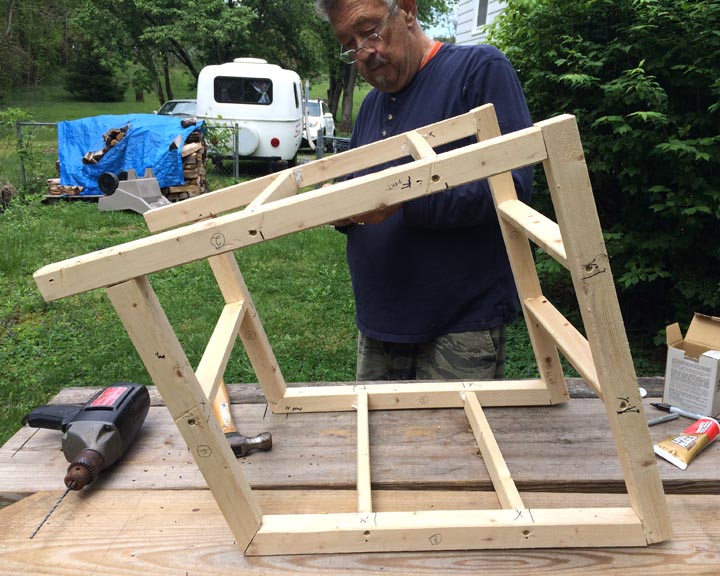
After we got the foam pieces cut out, Wayne reinforced the bench frame with another support piece, and took measurements for the paneling that will cover the sides of the benches.

It was really hot in the trailer (close to 90 degrees by afternoon!), so I quickly sealed up the area around the A/C with aluminum tape, and turned it on.  MUCH more pleasant working conditions! I sure wish we’d put it in LAST summer when we were doing so much work inside….

AC-052816-1

On Sunday (before it started raining–again!), we sanded the bench seats.

Bench-2016-052916-0-Sand

When he was looking for a large drill bit to make a hole in the “access cover” section of the seat, Wayne found one of my Dad’s old hand drills, and it still worked well!

Drill-052916-1-Wayne

Drill-052916-2-Sharon

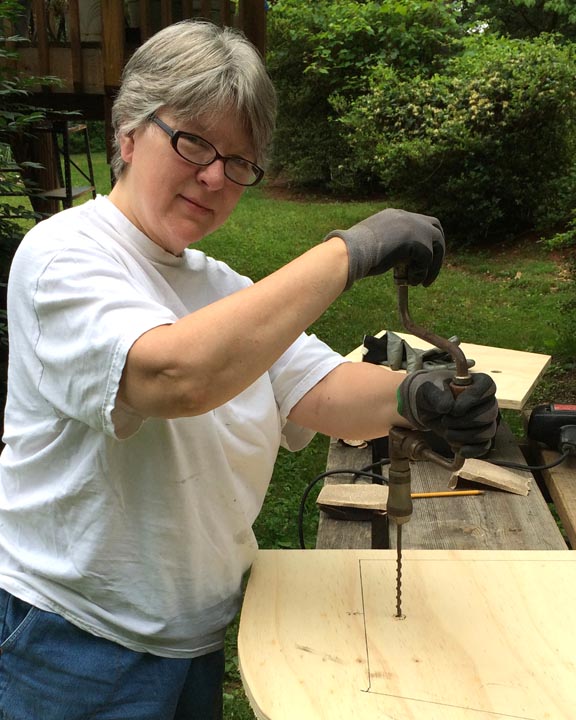
As I was drilling a hole through the top of the second bench top, I couldn’t help but think of how my Dad would love to be helping with all of these projects….  While my Mom was a somewhat reluctant camper, my Dad greatly enjoyed having a tiny home on wheels.

Bob-Ruth-Camping-July1970  ShastaTrailer-Summer1970

Each summer when I was a kid, vacation meant a road trip along the East Coast, (or to the Midwest or to Canada), with a small travel trailer following along behind us.  And yes, a lot of my desire to have a trailer now stems from the wonderful memories that were made when I was young, traveling around the country with my parents. 🙂

Car-Camper-Sharon-July1967 Car-Trailer-CanadianBorder-1966

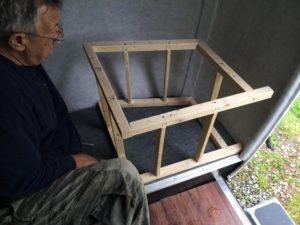
Anyhow, by the time we called it quits on Sunday due to the rain, both bench seats (with access panels cut out and functional) were secured to the frames:

Bench-2016-052916-1

Paneling to cover the front and side of each bench was cut to height, but not to length; we’ll need to make a template out of cardboard to figure out how to cut the curves….

Paneling-Bench-052916

We also rough cut a scrap piece of Formica and put it on one of the counters, just to see what we thought.  We were both surprised by how much brighter the area instantly became with an off-white counter instead of just with the stained wood.  This isn’t a high priority project, but it’s certainly something to think about.  We’re also still looking at potential back splash options.

Counter-2016-052916-1 Counter-2016-052916-2

And in the meantime, I’m watching dozens of video tutorials about making cushions, and trying to decide if I want to complicate matters further by making piping to go around the edges of the cushions!

Yes, cushion-making will be a challenge, but almost exactly a year ago I bought my very first sewing machine, and I was really struggling to learn how to sew well enough to make simple curtains for the trailer.

Sharon-071215-1

Well, look where that new interest led! 😉

BabyBlanket2-122415-2 BabyBlanket-112115-03

WatermelonPurse-112115-Finished ApplePurse-111315-7-Front-Revised RaspberryPurse-111515-lowresolution

CatPouches-120315-1 Minion-Bags-123015-2

ZipperedBags-052616-4 ZipperedBags-052616-5

So you never know!  I was never interested in sewing when I was younger, and I had no idea that Wayne and I would find ourselves in the process of converting an empty fiberglass trailer shell into our own comfortable and functional tiny home on wheels. Life is full of surprises!

UPDATE: Monday, May 30, 2016

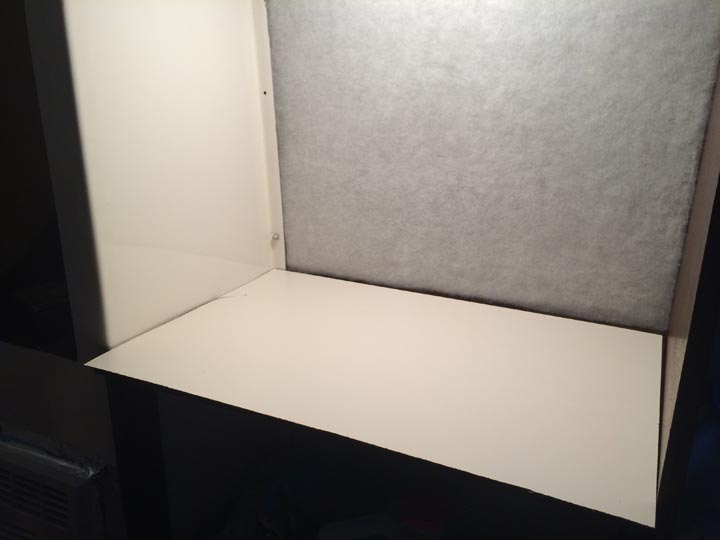
Wayne got some more work done on the benches.  He put in more reinforcing upright pieces, and then he used cardboard templates to cut the first two pieces of paneling to start closing in the bench seat frames.  Looks great!

Paneling-Bench-053016-1 Paneling-Bench-053016-2

I’m not sure how well this unfinished paneling will take stain, but that’s the plan right now–staining to match the other wood in the trailer. 🙂

Working Between the Raindrops…

It’s been one of the wettest Springs I can remember, and that’s made it hard to get a lot done on the trailer.  Without a workshop or garage, all sawing or sanding has to happen out in the yard.

Today was one of those rain, sun, rain, drizzle, sun–nope–rain kind of days, but Wayne had just enough time to get most of one bench and bench seat modified for storage access.

Bench-2016-0522-1

With the seat in place, he reached underneath to trace a line for the area that needed to be cut out.  (Prior to this, he attached two of four support pieces to the upper bench frame. You can see the side pieces in place, after the center was cut out.)

Bench-2016-0522-2

He’ll make a small hole in the top of the seat so that it can be opened–and do the same thing for the other bench.

Bench-2016-0522-3

In the meantime, I’ve ordered 4″ medium-density foam which will be cut to match the shape of the bench seats:

We’ve also bought outdoor fabric at Jo-Ann’s for the cushions. After thinking we’d opt for a dark blue, we decided to get a green that will coordinate with the green in the curtains, and yet would go with other colors if we’d decide to switch out the curtains for a different pattern at some point.

For either camping or for more project work, we’re ready for some dryer weather!


Sittable Seats!

I’m pleased to announce that our bench frames have been screwed to the floor, AND that they can be sat upon!  We made a template to get the curves for the seats accurate (which wasn’t particularly easy….), and then Wayne cut sheets of plywood to fit each side.  Beautiful job!

Bench-2016-0507-1 Bench-2016-0507-2

Right now the tops are just resting on the frames, but our plan is to permanently attach them after cutting openings in the top to allow access to the storage space underneath.  An online friend who did an incredible job with the restoration of his “Haunted Mansion” did something similar.

Now that I have a template for the bench tops, I need to figure out how to make the cushions for the seats.  I want to use 4″ medium density foam (since the dinette will sometimes be converted to a bed), and I’m probably going to opt for a solid royal to navy blue color, which should look okay with the (busy) curtain fabric.

Curtains-071215-4

The last time I was at Joann’s, I briefly looked at the outdoor fabrics, so that might be a good option.  I don’t think I’d go with a regular, heavy-weight upholstery material, although duck cloth might work.

I’d like to put zippers in the cushions on the hidden side, and this could be interesting since the hidden side is also the curved side.  (But as a side note, I am so NOT intimidated at the thought of sewing in zippers; I just kind of jumped into that when I started making purses.)

In addition to the cushions for the seats, I’ll need to make two cushion pieces out of the same foam to serve as back rests AND to cover the table when the space is used as a bed.  Since the benches are fairly deep, I might need to fill in with some throw pillows.

There’s still a lot to figure out (with ALL of this), but I’m ready for the challenge! 🙂

A Table for Two

Well, I guess we’ll eventually get around to the table part of this project, but first we need to make the benches for our future front dinette. Scamp gave us one challenge: a narrow space and curved walls. We’ve given ourselves another challenge by wanting a dinette that can convert to a bed.  After lots of measuring and drawing and cutting, the pieces were ready to be assembled.

Bench-2016-0424-1  Bench-2016-0424-2

Each section was glued and then screwed together.  The shape seems somewhat odd, but it maximizes the available floor space without interfering with the curve of the walls.

Bench-2016-0501-1

We paused part way through the assembly process to make sure that the first bench would fit through the door AND that it would fit in the space the way we wanted it to.

Bench-2016-0501-2

After assuring ourselves that everything seemed okay (including the height), we finished adding all of the vertical support pieces (a total of 11 on each bench) and then took them in the house where we added more glue to the joints.

Next steps will involve screwing each bench to the floor, and adding paneling pieces to the outer (visible) sides.  Pieces of plywood will be cut to fit the shape of the curved walls to form the bench seats, and we’ll design them so that we have access to the storage area under each bench.

So funny–last year this time, I was learning how to sew in order to make curtains for the trailer.  As soon as we have the seats cut out, it will be time for me to figure out how to make (i.e. sew) the cushions for the dinette.  And in and around our various projects, we hope to go camping with it–as is–as soon as we can! 🙂