Memorial Day Weekend Work

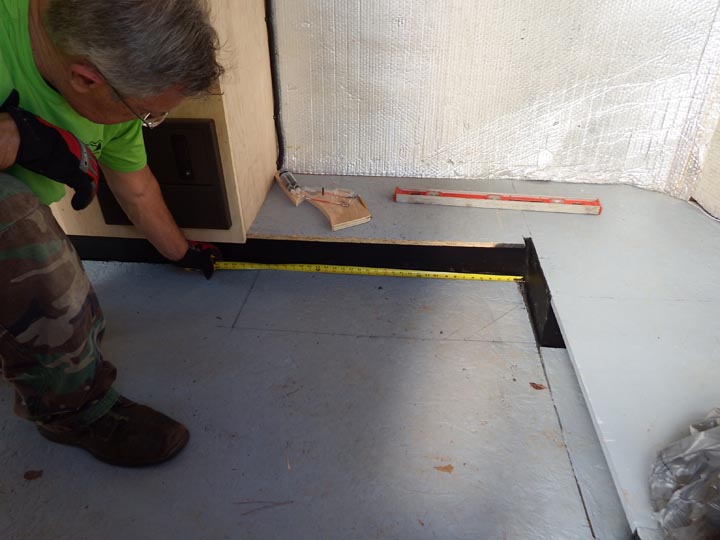
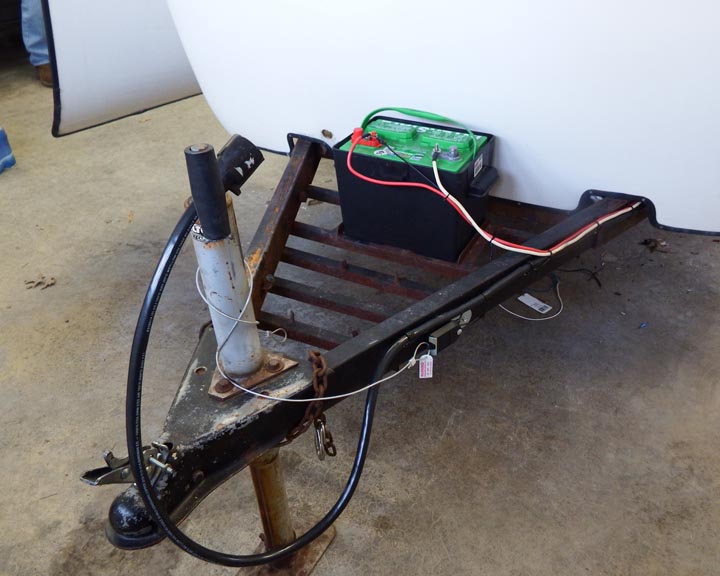
On Sunday, May 24th, Wayne worked on removing the old chains, which need to be replaced.  The bolt that held the chains on was totally rusted, and despite using WD-40 and a product called “Rust Buster,” he still had to lie down in the driveway and alternately saw it and hit it with a chisel…  As he was doing that, I got ready to start staining the wood in the back near the bed, rationalizing that it would be good to get that done before putting up more fabric.   As it turned out, neither of us had a particularly fun day of trailer renovation, although he DID finally manage to break and remove the bolt so that he could get the chains off.  He also continued to work on getting the door to close…

I’d woken up with a headache on Sunday, and even though I was wearing a mask and had a fan going, it was hot in the trailer and the fumes were incredibly strong.  By the time I finally decided I’d had enough, my head was pounding and I was also very queasy.  AND I wasn’t but so pleased with the results. 🙁

Stain-052415-1

I liked the color, but it was so hard to keep it from streaking!  Plus, the “disposable” brushes I’d bought were shedding even more than my cats…  I seriously wondered if we should just change gears and paint instead of stain!

When I looked at it again on Monday, May 25th, I decided I liked it enough to keep going, but I knew I needed to be better prepared….

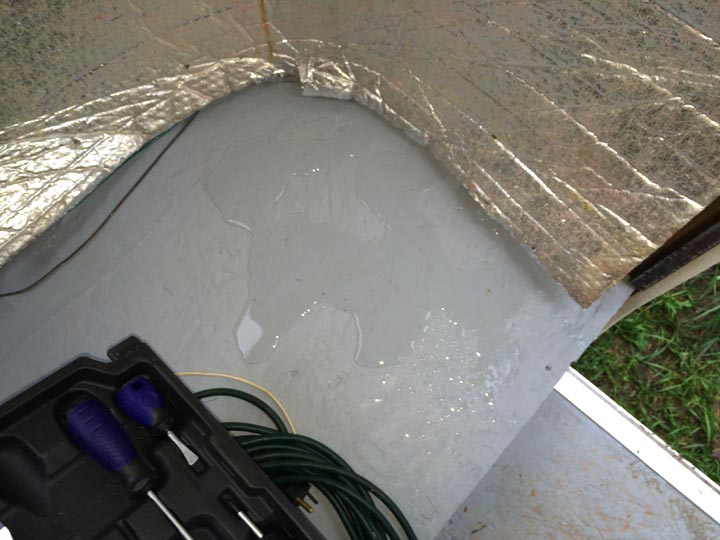
In the meantime, Wayne started patching the tiny holes on the roof above and to the front of the door–the source of the leak in our future “dinette.”  Now that he knew what to look for on the roof, though, he was shocked to find LOTS of tiny holes!  WTH?  There’s no evidence that any holes other than the ones over the door are leaking, but while he was at it, he tried to sand and repair all of them.   So with rain in the forecast tomorrow, we’re (one more time) pretty confident that we’ve sealed anything and everything that could possibly leak.  Fingers crossed on that!

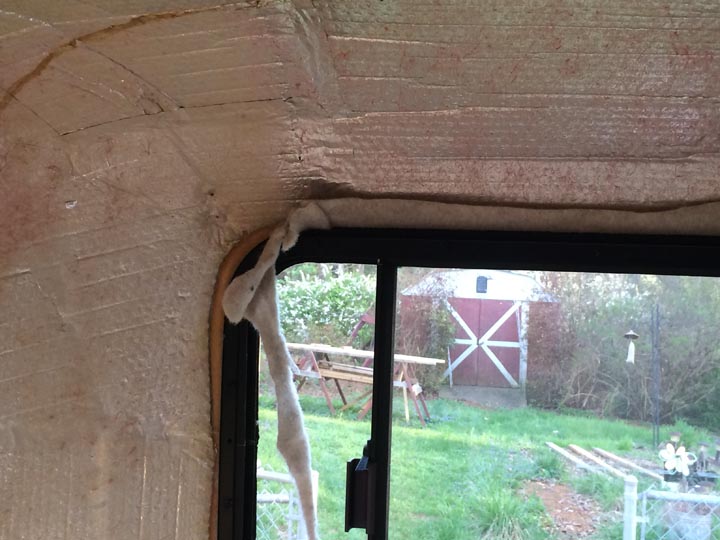
Wearing a respirator and with a better fan set up, I started in the back again and put a second coat of stain on the walls next to the bed.  Since we want to get all the fabric up in that area first, it makes sense to get it finished–though I’m not exactly sure when we’ll decide that it’s done….  Supposedly this type of stain also has a poly “gloss” to it–which I’d like–but I’m not seeing it yet.  Maybe after more sanding and putting on another coat??

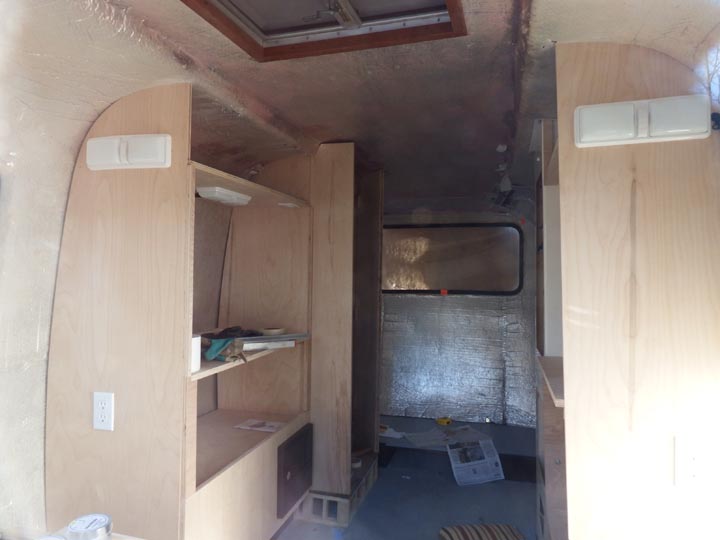
I found that the respirator helped a LOT–as did the fan–so I was able to get a second coat on all of the surfaces I’d stained yesterday.  Wayne came in later and started staining the walls of the “bathroom,” and between the two of us we almost got everything stained (first coat).  I wish we could have finished, but we just didn’t want to push it.  So here’s how I spent my Memorial Day afternoon:

Sharon-Staining-052515

Ultimately there will be doors on the upper and lower cabinets, and at some point I want to put a thin laminate on the “kitchen” counter tops.  I have to admit that I like the look of the “American Chestnut” stain, and now that we’re at least getting to this part of the renovation, we’re excited about the possibilities! We looked at fabric last night for curtains, but just didn’t see anything that we liked enough to get.  I hope we’ll know it when we see it. 🙂

Stain-052515-02

Stain-052515-03

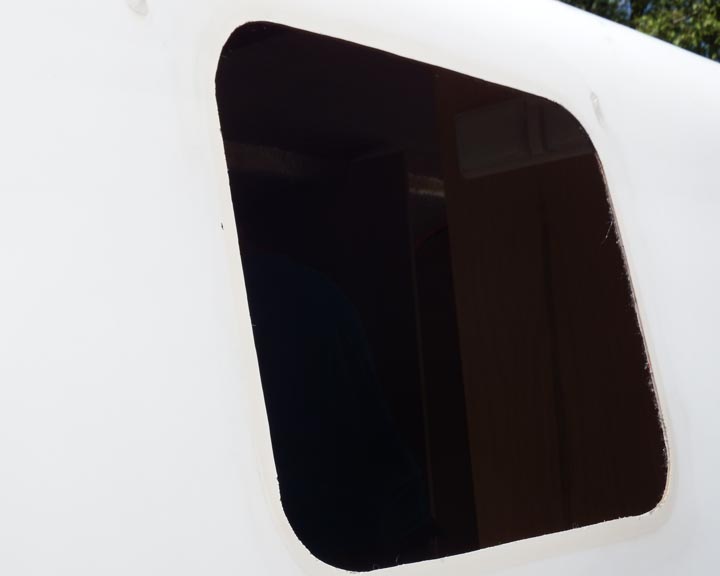
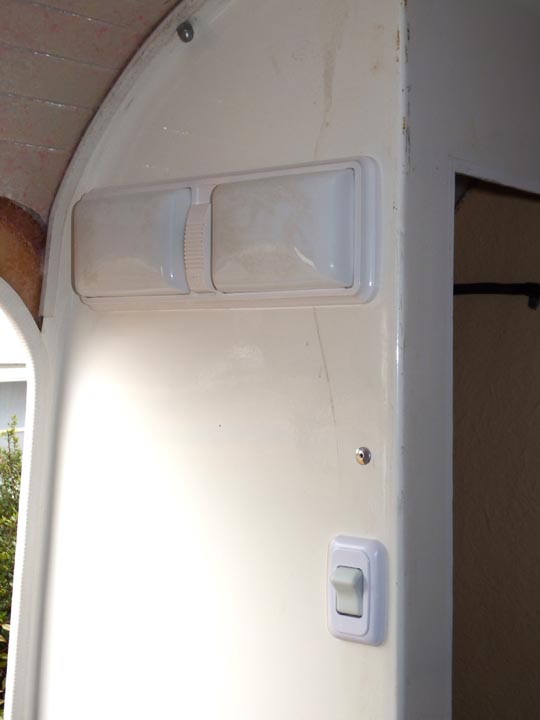
This was taken through the screen from the outside, looking towards the front of the trailer:

Stain-052515-05

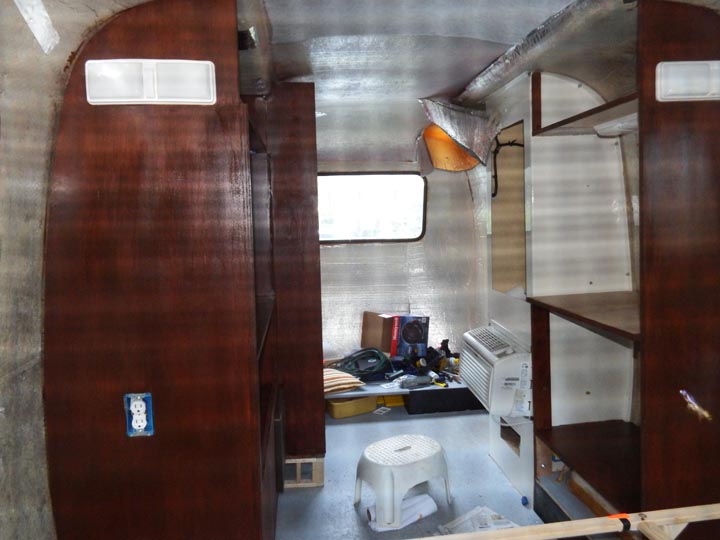
BTW, we’ll probably use this AC this year, though we’d like to get one with controls on the front (instead of on the top) so it won’t have to stick out so far from the cabinet. Getting the housing set up for that will be another big project….

Progress & Complications

Saturday morning, May 23rd, started with the installation of a new rib door seal.  Yay!  Looks nice!  It will be great to have the door shut more securely!

Door-Seal-052315

However, it would be even better if we could get the door to actually CLOSE!  Ugh.  We’ve tried to adjust the hinges, but we still can’t get it to latch. Not good.  As I’ve said, one step forward, TWO steps back sometimes. Guess what tomorrow’s project will be? 🙁

But we did get more of the fabric put up:

Fabric-052315-1

And no, there’s not a huge bowed out area in the fabric under the window–the light was just coming in at an odd angle from the hatch.  But while I was crawling over and around the “bones” of the future bed, I trimmed the fabric along the floor.

Fabric-052315-2

We got the first long strip put up on the ceiling, starting from the top of the rear window to about halfway towards the front.  For the second coat of adhesive on the fabric (after getting two coats of it on the ceiling), I had to start using the 2nd can of 3M-90 adhesive.

Fabric-Vent-052315

I put wide painter’s tape over the opening to the hatch (especially on the handle) and ran the 3 x 6 ft. piece of fabric over it.  It was easy to see and feel where to cut out for the hatch, and after making sure everything was well-attached there, we put the wooden trim piece back on.

Of course the goal is to have only as many seams as necessary, but it’s really hard to get it perfectly placed–and it’s not like we’re experts at this!  Ultimately I think it will look fine, but it’s definitely a challenge to get it put up neatly and evenly, given the odd shapes and curves.  We start by measuring and cutting a piece that’s close to the right size. Then we take it into the trailer and try to trim it even closer.  Once we’re pleased with the basic size and shape, we take it outside and spray on the adhesive.  We put it up, smoothing as we go, and then trim it again if we have to, once it’s on the wall or ceiling.  And yes, we’re wearing masks while we’re doing this.  In addition to trying to protect ourselves from the adhesive, we’ve found that the marine headliner fabric has lots of fibers that come off and float around.  I really, really hope this shedding won’t be an ongoing issue.

We took a break in the afternoon to get together with some family members, and then we spent a couple of HOURS and almost $100 at Lowes.  I made an executive decision this afternoon that we should go on and stain or paint the wood before putting any more fabric on the walls or ceiling.  We were leaning towards stain rather than paint–and I was leaning towards a darker stain rather than a lighter one (since the walls are white)–so we opted for a color called “American Chestnut.”

American-Chestnut-Stain-052315

It’s dark, but not TOO dark, and I like the reddish tones.  If we decide we don’t like it, we’ll paint over it at some point. 🙂

Lady Macbeth had her “damned spot”….

…. and I have my damned puddle. 🙁

While we were out today (Sunday, May 17th), there was a hard rain here.  When I checked the trailer after we got home, this is what I found.  AGAIN.

Leak-051715-1

What made this even more frustrating is that on Saturday Wayne caulked over EVERY rivet that he could reach on the roof, caulked along the belly band by the door and over the screws on the door hinges.  We REALLY thought we’d taken care of the leak in the front…

On the positive side, after yesterday’s rain, there was a tiny bit of water in the window track on the inside, so I cleaned out the track again, cleaned out the weep holes again, and I was delighted to see that it was completely dry after today’s hard rain.  Yay!  As a result, I feel pretty confident about putting the fabric on all of the rear walls and ceiling.

Window-Dry-051715

But as to the water in the front, Wayne has gotten up on a ladder a couple of times to look for holes or cracks on the roof and he hasn’t seen anything.   This evening as it started to rain yet again, I decided to try a different approach.  I already knew that there were no leaks through the insulation, because it always come from behind the insulation–though I didn’t know which route the water was taking to ultimately wind up on our future “dinette.”

Insulation-Door-051715

I figured the only thing to to do was to start ripping off the insulation–while it was raining–and this led to a “Voila!” moment and a simultaneous “What the hell?” moment….

Roof-051715-1

To my complete surprise, I discovered a series of tiny holes in the ceiling above the door and towards the front of the trailer.  I don’t know why we haven’t been able to see them from the outside, and I have no idea what might have caused them.  I took some toilet paper and pressed it against each dark (moldy?) spot and all were wet–some more than others.

I dried them as best as I could with a paper towel, and Wayne caulked them from the inside before the rain got even heavier.  Not sure if the caulk will stop the leaking, but it’s the only thing we could think to do as a short-term fix.  At this point, I’m not sure what the best long-term fix might be.

While I’m very glad we finally found the source of my “damned puddle,” I have to wonder if there are OTHER tiny holes (of unknown origin) behind the insulation in other parts of the trailer.  We haven’t had any other leaks (yet) and I really, really don’t want to rip out and replace ALL of the insulation, just to check!

But in other quick news, on Saturday we re-attached the door latch that was held on with one rivet.  We put a couple of small bolts through it (with washers and a lock nut) and it’s very solid now.  We also discovered that wasps were building a nest under the hitch!  While I don’t like to use sprays, these guys needed to go to wasp heaven, and we sent them on their way.  Since we still need to replace the chains on the tongue–if we can ever get the bolt off–we had to make sure that we wouldn’t be reaching into a wasp nest.

Good News, Bad News, Worse News…

Yesterday we bought a piece of indoor/outdoor carpet that we’ll cut to fit under the bed.  We bought a smaller piece to put in the “bathroom.”  We’ll probably use a plank-type of flooring (like Allure) on the visible sections of the floor, but we won’t do that until we finish building the bed, bathroom and dinette. And yes, we bought some some new, heavy-duty scissors!

Today Wayne brought over a relatively new  5000 BTU air conditioner unit that he’s had in storage to see how it would fit in the closet space.  It’s not bad, but we might see if we can find one with all controls on the front–instead of the top–to avoid having it stick out into the trailer quite so far.  There was an A/C in there at some point, so there’s already a drain hose through the closet floor.  We’ve watched a couple of tutorials on how to install one into the space; now we just need to decide if we can use what we’ve got or if it would be better to get one that might fit better.  Prices are pretty reasonable for ones with the controls on the front; it’s just an expense we hadn’t counted on…

Good news is that we finally had some rain–not a hard rain, though–and the window that we took out and re-sealed seems to be nice and dry.  I won’t put fabric on that section until we get a heavy rain and I’m CONVINCED that it won’t leak again!

Bad news, like maybe *really* bad news, is that there was some water AGAIN in the very same place in the future dinette area near the door.  First thought was that it was leaking around the belly band near the door.  The rivets seem to be well seated and the caulking is okay there, but there’s a little gap in the corner of the belly band where water *could* possibly come in.  We’ll caulk that as soon as we get a chance.

Worse news, though, is that I started pulling up insulation over the door and it felt damp.  Was it from a loose rivet in the drip guard over the door?   I pulled the insulation up a little further and the area around the rivets was dry, but it was wet ABOVE that–like it’s coming from higher up.  There must be a hole or crack somewhere in the fiberglass on the roof.  Not good; not good at all.

One step forward, TWO steps back, it seems….. 🙁

Marine Headliner Fabric – Part 1

We’re still waiting for rain to test our re-installed window and caulking work from last weekend, but I rationalized that I could safely start putting the material on some of the walls–plus I just needed to do something to move this big project forward!

We really weren’t wild about using a spray adhesive, and I posted in a fiberglass RV forum this morning to see if there was some sort of paint-on adhesive that might work better.  There didn’t appear to be anything really designed for this type of material, so we decided to use the spray–and it was okay.

Ideally, I would have cut one huge piece of fabric to go beneath the rear window and up each side, but I just wasn’t sure how well we could manipulate such a large piece.  As a result, we put one big piece below the window:

Fabric-050915-1

We were able to pull the bed platform towards the front of the trailer a little, but it fits in there too tightly to take it out!  We had to crawl over it, which made all of this a little awkward.  I purposely left the fabric a little long at the floor; I’ll trim that–or not–later.  Once the bed is finished, you won’t see it.

Next, I cut a piece to go on the left side of the window.  While the seam between the upper and lower pieces isn’t awful, I may put a “seam cover” strip over it when I get to that stage.

Fabric-050915-3

First impression, though?  I LIKE the color (a silvery white) and the feel of the fabric, and I think it’s going to look really, really good!

Before doing more, however, we have GOT to get some really sharp scissors; this stuff isn’t all that easy to cut!

Walls, Windows, Water & Whatever….

The interior walls and ceiling of Scamp trailers are typically covered with a type of mold- and mildew-resistant fabric that owners refer to as “rat fur.”  The rat fur is adhered to a bubble wrap, foil-covered insulation that’s glued to the fiberglass shell.  The previous owner ripped out all of the rat fur, saying he thought it was too dirty to clean, but he left the insulation.

After researching and talking with folks on various modification forums, I decided to purchase a marine headliner (typically installed in boats) for the walls of our trailer.  I ordered the Silver Grey Stratos (plain pattern) from  “Perfect Fit” and it arrived in a ridiculously long roll that we have stored in the hall in the basement.

First, I had to remove pieces of rat fur that were still around the rear window and the rear driver’s side window.

RatFur-041815-2


I really, really didn’t want to take these windows out, so I carefully cut and ripped out the old fabric.

RatFur-041815-1

Another Scamp owner said that when she replaced the fur with marine headliner, she simply made a fold and butted it up against the frame of the window instead of loosening the window frame to tuck the fabric behind it.  That’s what I plan to do, too.

Concerned about the amount of glue residue left on the walls from the removal of the old rat fur, I started using a “Goof Off” type of spray applied to a sponge, then I lightly washed the walls to remove the solvent.  (I still need to do more of this on the ceiling.)

A couple of weeks before this, I sanded and painted the bumper and tongue of the trailer with black Rust-oleum.  Looks much better.

Bumper-041115-02

Before

Bumper-041115-04

After.

The first time we saw some water in the “dinette” area near the door, we thought we’d tracked it in.  To our dismay, we finally realized that water was coming in from somewhere in the front, and we also discovered that the rear passenger side window was leaking.  As a side note, there was no rat fur around the leaking window, and I’m guessing that when the previous owner took it out to remove the fabric, he just didn’t re-seal properly when he put it back in.

We caulked over all the rivets in the roof, loosened and caulked around and under the hinges on the door, and we caulked over the leaking window.  We were pretty confident that we’d taken care of everything, but the next hard rain proved us wrong….

We knew that we had to get everything dry before we could consider putting up the wall covering or building the dinette or bed extension, so I ordered some butyl tape (that we couldn’t find locally) and we pulled out the rear passenger side window.  A large tarp covered the roof and hole for a week or so…

Window-Opening-RearPassengerSide-050215

It took a while to remove all of the old caulk and adhesive around the window, but the solvent we used (and elbow grease) worked well.  Followed that by rinsing off the solvent and letting it dry.

Window-ScrewHole-050215-3

I removed the old adhesive and caulk that were left on the window and cleaned out the weep holes.  Then we started the process of putting it back in.

Window-Butyl-Tape-050215-1

Wayne put strips of butyl tape around the window opening.  I can see why this is the recommended way to re-install RV windows. It’s much thicker than the thin strip of adhesive that was there before.

Window-Reinstalled-050215-1

Next step was to trim off the excess butyl tape that oozed out around the window, and we also caulked around the window.  I can’t think of anything else that we can do to make this leak-proof!

We also caulked around the big front window–both around the outside of it and between the gasket and the Plexiglas window.  In a perfect world and if we had crazy skills and an unlimited supply of money, we’d probably opt to replace the gasket around the window.  After watching some how-to videos, though, we decided not to mess with this right now.  Our goal is to be able to use our trailer as soon as possible, and while we’re not trying to cut corners, some things will just need to wait.

During the week of May 2-May 9, there were strong thunderstorms all around us, but not a single drop of rain fell here.  Now we have a nice Saturday to get some more work done on the trailer, but until we know–for SURE–that we’ve sealed up everything to prevent further leaking, we just can’t move forward with the dinette or wall covering….


Building a “Bathroom” – April-May, 2015

So our goals at this phase include building a “bathroom” (for a porta-potty), building a dinette in the front, and building an extension on and reinforcing the permanent bed in the back.  The first project tackled was the bathroom:

Bathroom-041115-1

Measuring the available space.

Bathroom-041115-2

Extending the floor.  Notice the angle; we need to allow room to get into the dinette.

Bathroom-041115-3

Reinforced floor.

Bathroom-041115-4

Floor extension.

Bathroom-041215-03

The front wall of the bathroom attaches to the floor with L brackets, and to a block that was epoxied to the fiberglass shell of the camper.  This wall will also be connected to the driver’s side bench of the dinette.  By connecting all of these pieces–from the “kitchen” to the dinette–I think we’ll have very strong and stable structures. (And it’s possible that the bed extension will connect to the rear wall of the “kitchen” for additional support.)

Bathroom-050315-1

Front view of the “bathroom” (with the gravel guard stored in the space).  At this point we’re thinking of just having a curtain to close off the room instead of a door.  Maybe we’ll add a door later, but it’s not a huge priority at this point. 😉


Assessing the Changes

After bringing the trailer home from the shop, it seemed like weeks before we had a chance to really get inside, look around or even think of what we would need to do, ourselves, to make it ready for camping.  Actually it WAS weeks….  Between cold weather, rainy weekends and crazy schedules, there just wasn’t time or opportunity to work on it.  Finally in March we assessed what had been done at the shop:

Closet-Lights-Switch-031415

Lights had been mounted on the side of the closet, and the switch on the closet controls a newly-installed “porch” light.

Bathroom-Light-031415

A light was also installed in what would be the rear wall of the bathroom.

Back2Front-041215

Lights and outlets were put on the back walls near the permanent bed platform.

AC-Outlet-031415

An outlet was put in the lower part of the closet–which will eventually hold an A/C unit.  As I’ve mentioned before, at some time there WAS an air conditioner in this spot; there’s a drain in the floor of the closet, and a vent on the outside of the trailer.

DriversSide-Converter-Lights-031415

Driver’s side cabinet structure with lights and outlets.

PassengerSide-031415-01

Passenger side structure with lights and outlets.

It’s a good start!


Our Christmas present to ourselves

Before taking the trailer to the shop on December 26, 2014, we really, REALLY duct-taped the temporary towing lights and wiring connections for the trip over the mountain!  To our surprise, everything was still connected when we stopped to check in Waynesboro, Virginia.

Scamp-Waynesboro-122614

Once we got to the shop, we had to make some decisions about what we wanted done–and how.  Of course all the exterior lights needed to be wired up, and a 7-pin wiring harness would need to be put on in order to make the brakes on the trailer functional.  (We knew it had brakes, however we had no way of knowing if they worked.)  It needed new tires–and a new vent–and the marker light that had fallen off on the way home had to be replaced.  Those were all givens.  We also knew we wanted to have interior lights that would work on battery or electric, so that meant we’d need to purchase a deep cycle marine battery and a battery converter.

Scamp-011115-02

Scamp-011115-01

While this was going on, we had a brake controller installed on the 4Runner, and then the next phase of trailer work involved finding a way to mount lights and outlets in a fiberglass trailer; it’s not like you can just screw a light to the wall!  This was when we had to make some serious, “permanent” decisions about how we wanted to design the interior.  We looked at pictures on the internet, talked with friends and joined RV forums to try to make the best decisions.

DID we make the best decisions?  I hope so, but I guess time will tell!

We decided where we wanted the lights and outlets and then had rudimentary cabinets built to accommodate them.  The curved wooden shapes that the previous owner had used to support the roof became the front and back walls of a future “kitchen” on the driver’s side of the trailer.  The battery converter was put the bottom of the cabinet, with the electrical cord stored in the same space.

DriversSide-Converter-Lights-031415

A smaller cabinet was attached to the closet on the passenger side, using another curved piece of wood. It’s possible that we’ll put a sink on this side instead of in the “kitchen” area–we haven’t fully decided where anything will go yet!

PassengerSide-Counter-Cabinet

While we may opt to put in propane for a stove and furnace–as well as a sink, holding tanks, etc.–these items will all have to wait.  The shop-done renovations added up to more than we originally counted on (though we were very pleased with the work), and we really, really hope to use the trailer as soon as possible.

And so on February 22, 2015–with snow on the ground and ice in the driveway–we brought it home. 🙂

Scamp-22Feb2015