I’ve been at my school since 1999, and over the years we’ve used the polymer, oven-bake clay, Sculpey (frequently), and a self-hardening clay (once), but never “real” clay for sculpture projects. Finally, finally, that’s changing!
In September 2016, a potter and school art teacher emailed me and introduced herself. Ruth said she’d gotten to “know” me through my website (art-rageous.net), and wondered if it would be okay to come spend a day at school with me when she and her husband were in Virginia visiting relatives. They planned to come in October, and she offered to do a clay workshop with my students.
Wow! I get a lot of emails through my website (which averages about 5000 visitors per day), and most are from art teachers around the country/world who want more information about the various lesson plans I’ve shared. This was the first time anyone (especially someone over a thousand miles away!) had asked about meeting in person (yikes!), coming to my school, and interacting with my students…. Despite my online, “out there” presence, in real life I’m very low-profile, private, and reserved, so I was more than a little antsy and suspicious!
After some well-justified snooping (I verified that she was who she said she was, and taught where she said she did), I also checked with some people at my school to make sure this would be okay. As Ruth and I exchanged more emails over the next few weeks, however, I started getting excited about meeting her, and I began to feel that I “knew” her, too!
Prior to her visit, I purchased some low-fire white clay, a couple of rolling pins and some canvas to cover the tables while wedging the clay. I still wasn’t quite sure what Ruth had in mind, but these were the supplies she’d requested, so I was at least somewhat prepared.
She arrived just before my first class on Monday, October 17th, and we greeted each other like long-lost friends. Too cool! There wasn’t really time to chat much since kids started coming in the room, but as she unpacked her supplies, I saw that she’d brought various clay tools–and leaves.
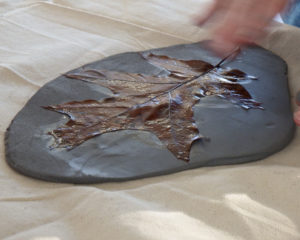
Leaves? Like the plural of “leaf.” Real leaves. She also brought an example of a ceramic leaf, and she explained to me (and to the students) that it was made by rolling out a 1/2″ slab of clay, placing a leaf on it, tracing and cutting out the shape, and then firing it, and glazing it, and firing it again.
With that introduction, she got the kids wedging chunks of clay (which involves kneading and pounding the wet clay to remove any air bubbles in it), and next came the rolling, tracing, and cutting part:
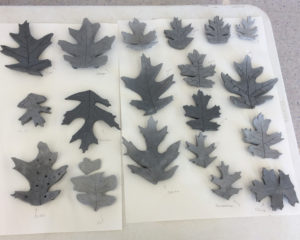
As each student finished cutting out his or her leaf (and adding little “feet” to the bottom of it), I placed it on a cart to dry.
Our little tabletop potter’s wheel doesn’t work particularly well, but after making the leaves, Ruth demonstrated how to use the wheel, and the kids got a chance to try, too. Each class had SUCH a good time! 🙂
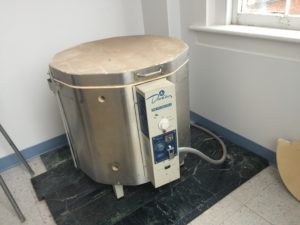
When Ruth first contacted me about doing a clay workshop, I told her I had a kiln, but that it probably hadn’t been used in at least 20-25 years–and certainly never by me. No one seems to know if it was ever used in the school’s art program (the tabletop wheel was there, too, when I got there…), so I’d always assumed that it had belonged to a former employee.
I’d had it checked out a couple of times over the years by “clay people” who said it appeared to be in good condition, but since I don’t have a strong clay background–and had no experience with kilns–I’d just never tried to use it. (When I moved into my “new” art building in 2008, a separate “kiln room” was added, at my request–though that still didn’t push me into actually using it.)
At the end of the school day when Ruth’s husband came to pick her up, they both checked out the kiln and said it appeared to be in excellent condition and safe to use. Ruth gave me a box of 04 cones, and I told her I would have a million questions for her, but I was ready to try it!
We all got together for dinner that evening (Ruth, her husband, Wayne and myself), and how I wish they lived closer! We could have talked for hours and hours, but such things happen when you bring together artists and musicians, and people who are sincerely caring and engaged. Bottom line, I think we’re part of the same “tribe.” 🙂
I started reading about kilns, in general, and also about “my” kiln, in particular. By watching a variety of YouTube videos and with Ruth’s help via email, I slowly gained confidence in my ability to safely and successfully do a test firing.
When I decided to plug it in for the very first time, I realized that I couldn’t plug it in! While it was the right voltage (240), the shape of the receptacle didn’t match the shape of the plug. Well, darn! There was a bit of a delay as I waited for the maintenance staff to purchase and install the proper receptacle, but finally on December 7th, I was ready to do my first ever firing of a kiln. How exciting!
I’d used kiln wash on the shelves, made sure the cone supports were adjusted properly, put an 04 cone on the supports, turned on the breaker, opened the windows in the kiln room, set the controls for an automatic, low-fire ceramic firing, set the Kiln Sitter–and pushed the button.
YAY! The red light on the Kiln Sitter came on and there was a slight buzzing sound as this old machine came to life, doing what it was designed to do. Happy dancing, for sure!
When I checked it after 5 minutes, there was a little tendril of smoke coming out of the vent hole in the lid. No worries–just burning off some dust or something. Well, five minutes later the whole kiln room was full of smoke, and the fan in the window couldn’t pull it out as fast as it was pouring out of the kiln! Not good!
I turned off the breaker to cut power to the kiln, but by that time smoke was coming out under the door of the kiln room and filling my classroom. REALLY not good!
Long story short, multiple windows were opened, multiple fans were set up, and my classes had to meet in a different building that day.
When we finally opened the kiln late that afternoon, the shelves with kiln wash on them were a dark, grayish-purple in color, and there were significant “scorch” marks along the inner lid and the upper kiln wall. What the hell had happened?!
I contacted Ruth and other potter friends, as well as a kiln repair service in Richmond. No one had EVER heard of such a thing happening before, but the best guess was that at some time (perhaps during the many years that it been stored in the basement of another building) something flammable had been spilled in or on the kiln. At no point were there visible flames, but who knows what was happening inside. The elements appeared intact, however, and there was no obvious damage.
I was determined to try this again, but I decided to wait until March 17th, during our Spring Break. With no students at school, at least I wouldn’t have to worry about abandoning my classroom for the day. Knowing that there could be heavy smoke again, I set up two exhaust fans in the windows, and I also opened other windows and turned on other fans. And as an extra precaution, I took the fire extinguisher off the wall and put it within easy reach….
One more time I turned the breaker on, put an 04 cone on the cone support, set the timer and the other settings, and pushed the button. One more time, the red light came on the Kiln Sitter, and it made a slight buzzing sound. AND one more time, a little tendril of smoke started coming out through the vent hole in the lid.
Next, some smoke started coming up between the bricks on the lid…. Curious….
But that was as bad as it got (not bad at all!), and the two fans were able to pull the smoke out of the room. I’d brought some work with me–just in case things went well–so I settled in for the day. I had no idea how long it would take for the cone to bend, or if the Kiln Sitter would actually turn the kiln off (as it was supposed to do when the cone bent), but after 4-1/2 hours, I heard a click! It worked!!
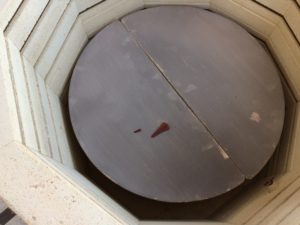
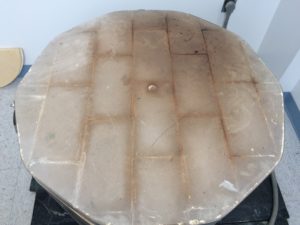
The next day when I went into the kiln room, I took this picture of the top of the kiln. No idea why smoke had come through the lid, but each brick had been well defined by the smoke:
When I opened the kiln, I was surprised by how clean it was; the scorch marks had completely burned off!
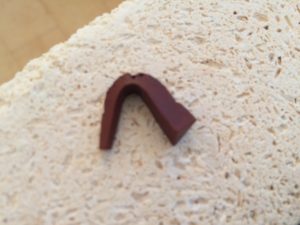
And the cone had bent at the correct angle, meaning that the kiln had reached the correct temperature and then turned itself off. Excellent!
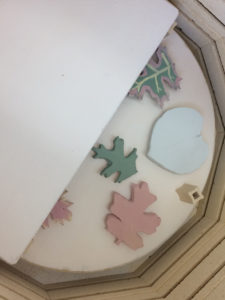
On Friday, March 24th, I put fresh kiln wash on the shelves, and loaded the kiln with the greenware leaves that Ruth had helped us make in October! I set the fans in the windows, pushed the button, and 7-1/2 hours later, the Kiln Sitter turned off the kiln and we had our first ever successful bisque firing!
I ordered an inexpensive 6-pack of solid color, low-fire glazes, and the kids were finally able to paint their leaves. (A student asked if this was a graded project. Hahaha–no!)
On April 13th, using an 05 cone, we did our first glaze firing:
When I opened the kiln on April 14th and saw all of the brightly colored, shiny leaves, I knew that a new art offering had been created at my school for the upcoming year, even if it HAD taken us 5 months and some semi-disasters to get there!
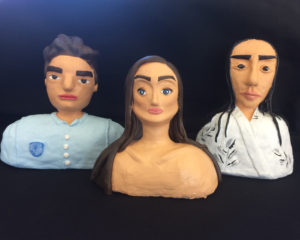
Will we still use Sculpey for some sculpture projects? OH yes, because it is a WAY cool sculpture medium that the kids really enjoy:
But will we also use “real” clay? Absolutely!
One of Ruth’s gifts to me in October was a notebook filled with her clay lesson plans, pictures, and project ideas. In October, I looked at this collection with trepidation; now I look at it with anticipation!
I can’t thank her enough for reaching out to me across the internet (and miles!), and for sharing her time, talents, and passions with me and my students. With her help and motivation, I’ve not only added a new art experience for our program, I’ve also gained an all-things-clay resource, a new friend, and an on-going connection with a warm, genuine kindred spirit. <3

