In the fall of 2008 I attended a workshop on screen printing at our local community college. I had a blast learning how to do this, and knew my students would enjoy it, too!
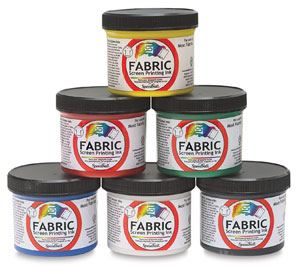
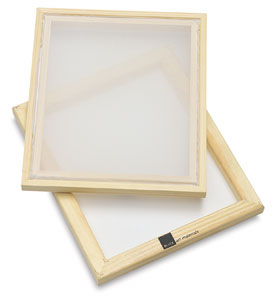
On the recommendation of the workshop instructor, I ordered the basic supplies we needed from Dick Blick Art Materials. Starting out small (for the sake of my budget) I ordered a few rolls of "Mask-Ease", quart size containers of water-based Speedball fabric inks in 4 different colors, two 8xx screen frames and a couple of 10" 60/65 Durometer squeegees.
Students enrolled in the 2nd semester "8th Grade Art" class were the first to do screen printing. This page documents the process and their projects.
They developed designs of their choice, scaled to fit on an 8.5 x 11 piece of white copier paper. Their goal was to print the design on white fabric (which would become the top of a hand-sewn pillow) and on one or more t-shirts.
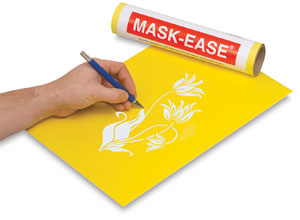
Once they had drawn their designs on the paper--and were made aware that it would "reverse" when printed--they held their drawings against a window in order to trace them "backward." Mask-Ease material (yellow top with white backing) was taped to a table, a sheet of carbon paper was placed on top of the Mask-Ease and their "backward" design was taped on top of it. They traced over the design with a dull pencil, and the carbon paper (the first that most of these kids had ever seen!) transferred the design to the Mask-Ease material. (It's possible that graphite, alone, might transfer the design onto the Mask-Ease, but since we had carbon paper, we used it.)

Using carbon paper to transfer a "backward" design
They removed the copier paper and the carbon paper and placed a piece of cardboard underneath their sheet of Mask-Ease. Using X-acto knives, they carefully cut away all areas of the design that they wanted to print, removing just the yellow top layer and trying not to cut through the bottom white layer.

Cutting through the top layer of the Mask-Ease
The Mask-Ease product comes with a clear adhesive plastic/vinyl (very much like "Contact paper"), and after students finished cutting out their designs, the clear vinyl was adhered to the top of the yellow sheet. This helped to hold in place any random "floaters" (such as the center of the letters "D", "A" or interior parts of their design that they wanted to leave unprinted).
After this step, the white paper backing was removed from the yellow sheet and the yellow Mask-Ease with their design on it was carefully stuck onto the flat side of the fabric screen and smoothed into place.
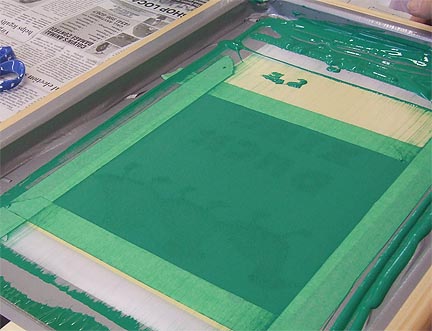
Once the yellow vinyl was on the screen, the clear plastic adhesive was carefully removed and the screen was turned over. Masking tape (and the salvaged clear adhesive) was used around all the edges to make sure that ink didn't bleed beyond the edge of the Mask-Ease. In the pictures, you can see that a (hopefully) permanent border of gray duct tape had previously been placed around the edges of the fabric screen in order to create a printing "window."

Clear adhesive plastic around the yellow design; masking tape was added next.
They placed cardboard under a piece of 9x12 white cotton fabric and prepared to print on that, first. This would serve as a "test print" and would be later used for the pillow. They also put a piece of cardboard inside of their t-shirts and taped the excess fabric and sleeves on the back to keep them out of the way and to create a smooth front for their shirt.
They centered the screen on the piece of fabric and ink in the color of their choice was put in the screen frame, just above their design. As "helper" students held down the corners of the frame, the student who was printing used a squeegee to pull the ink down across the design. The squeegee was turned around, the ink was pushed back to the top of the screen, then pulled toward the bottom again. Students finished with a "dry pass" of the squeegee over their design to remove excess ink.


The screen frame was carefully lifted up from the bottom to reveal the printed fabric underneath. The fabric was left on the cardboard to dry, the first t-shirt was placed on the table and the process was repeated. The results were good!
After a student finished printing, excess ink was scraped off the squeegee and the screen with a spatula and returned to the container. The screens were taken to a sink where the tape was removed and all the "Mask-Ease" vinyl was peeled off and discarded. Both sides of the fabric screen were scrubbed with dishwashing liquid and the squeegee was also washed and left to dry.
I only purchased two screens and given that they had to dry before being used to print again, only two students could print per day. As a result, students in the class were simultaneously engaged in designing; cutting designs; preparing their shirts for printing; printing; heat-setting their fabric and shirts by ironing them; getting ready to sew or actively sewing. (Others were doing observational drawing or other assignments just to keep them on task.)
I engaged as many "helpers" as possible (including a couple who took turns as "photojournalists") and also got students to help teach each other. I'll admit, though, that teachers with large classes of young students will have to be very organized (especially when X-acto knives and irons are being used!) if they have a limited number of screens. Next year I plan to order a couple more screens and squeegees so that there's not quite as much going on in the room at the same time!
But was this fun and did the kids enjoy it? OH, yeah! And screen printing (on fabric and on paper) is definitely something I want to do with my Advanced Art and Honors Art kids next year!


RESOURCES
Student Gallery of Prints
Screen Printing Workshop for Adults
Screen Printing with Middle School Students
Hand-Sewn Screen-Printed Pillows
Screen Printing with High School Students
BACK